Showing posts with label MB Nativity. Show all posts

Tuesday, June 20, 2023

Tag Journal Recap by Nina

             Hi Ai fans, Nina here and I am so excited to recap with you all the tag pages I enjoyed creating using the adorable images and the die sets from Art Impressions.

This Tag Journal documented my moods since beginning of March all the way until today, each one of them gave me tremendous joy as I dig into my Art Impression collection of stamps and dies, mixing and matching elements from different sets to create one single adorable project.

I will include links to all of the tags in this article along with some photos so it will be easier for you to find them all in one place.

I used the Tag stitched Die Set for all the tags to create the base, I would usually die cut it twice and glue them both to each other so all my tags are sturdy and flat (not warped). For the elements I place on the tags you will find thier name below with each project.

1. You Rule! Tag


This was created for the Teacher Appreciation week using Teacher Rule Set. 


I also have a Video Tutorial here:


I created this one for our Windows Challenege, I used the Little Girl Front & Back set.


3. Spring Harvest Pastel Tag

To kick off the Spring season, I created this tag using the Harvest Together Set.


4. Easter Bunny Tag

Here I used the Sweet Easter Set.


5. Explore Nature Tag

I used the bag stamp from from Ole Buck Set.


6. Woodland Treehouse Tag

This project was created for the April Showers Ai Challenege where we included rain or clouds, I used Woodland Tree Cubbies Set.


7. Teacher Appreciation Tag

I created this one to thank all teacher as we hit the second day of Teacher Appreciation Week. I used Teacher Rule Set.

8. Barnyard Party Tag

This tag was for our Ai challenege "Don't Fence Me Up". I mixed and matched many decorations and critters from different Ai sets to achieve this adorable partying scene on the inside, it had an interactive door than opens up to this fun scene. I used:

4967 – WC Fence Dies
5180 – Barnyard Animal Cubbies
5455 – Birthday Buggy Set
5491 – Front Porch Party Set
5722 – Birthday Journal Set
5443 – MB Nativity


9. Life is Sweet Tag

Yet another tag, I used the adorable Birthday cake GCH Die set.


10. Spring Time Tag

 For this Spring tag I used the cute HM Garden Set which is an add-on for the Holiday Mansion Set.


11. Fabulous Flowers Tag


I was the featured Design Team member for the Fabulous Flowers Challenege and I created this tag as one my projects for this challenege. I used Birdhouses stamp Set.

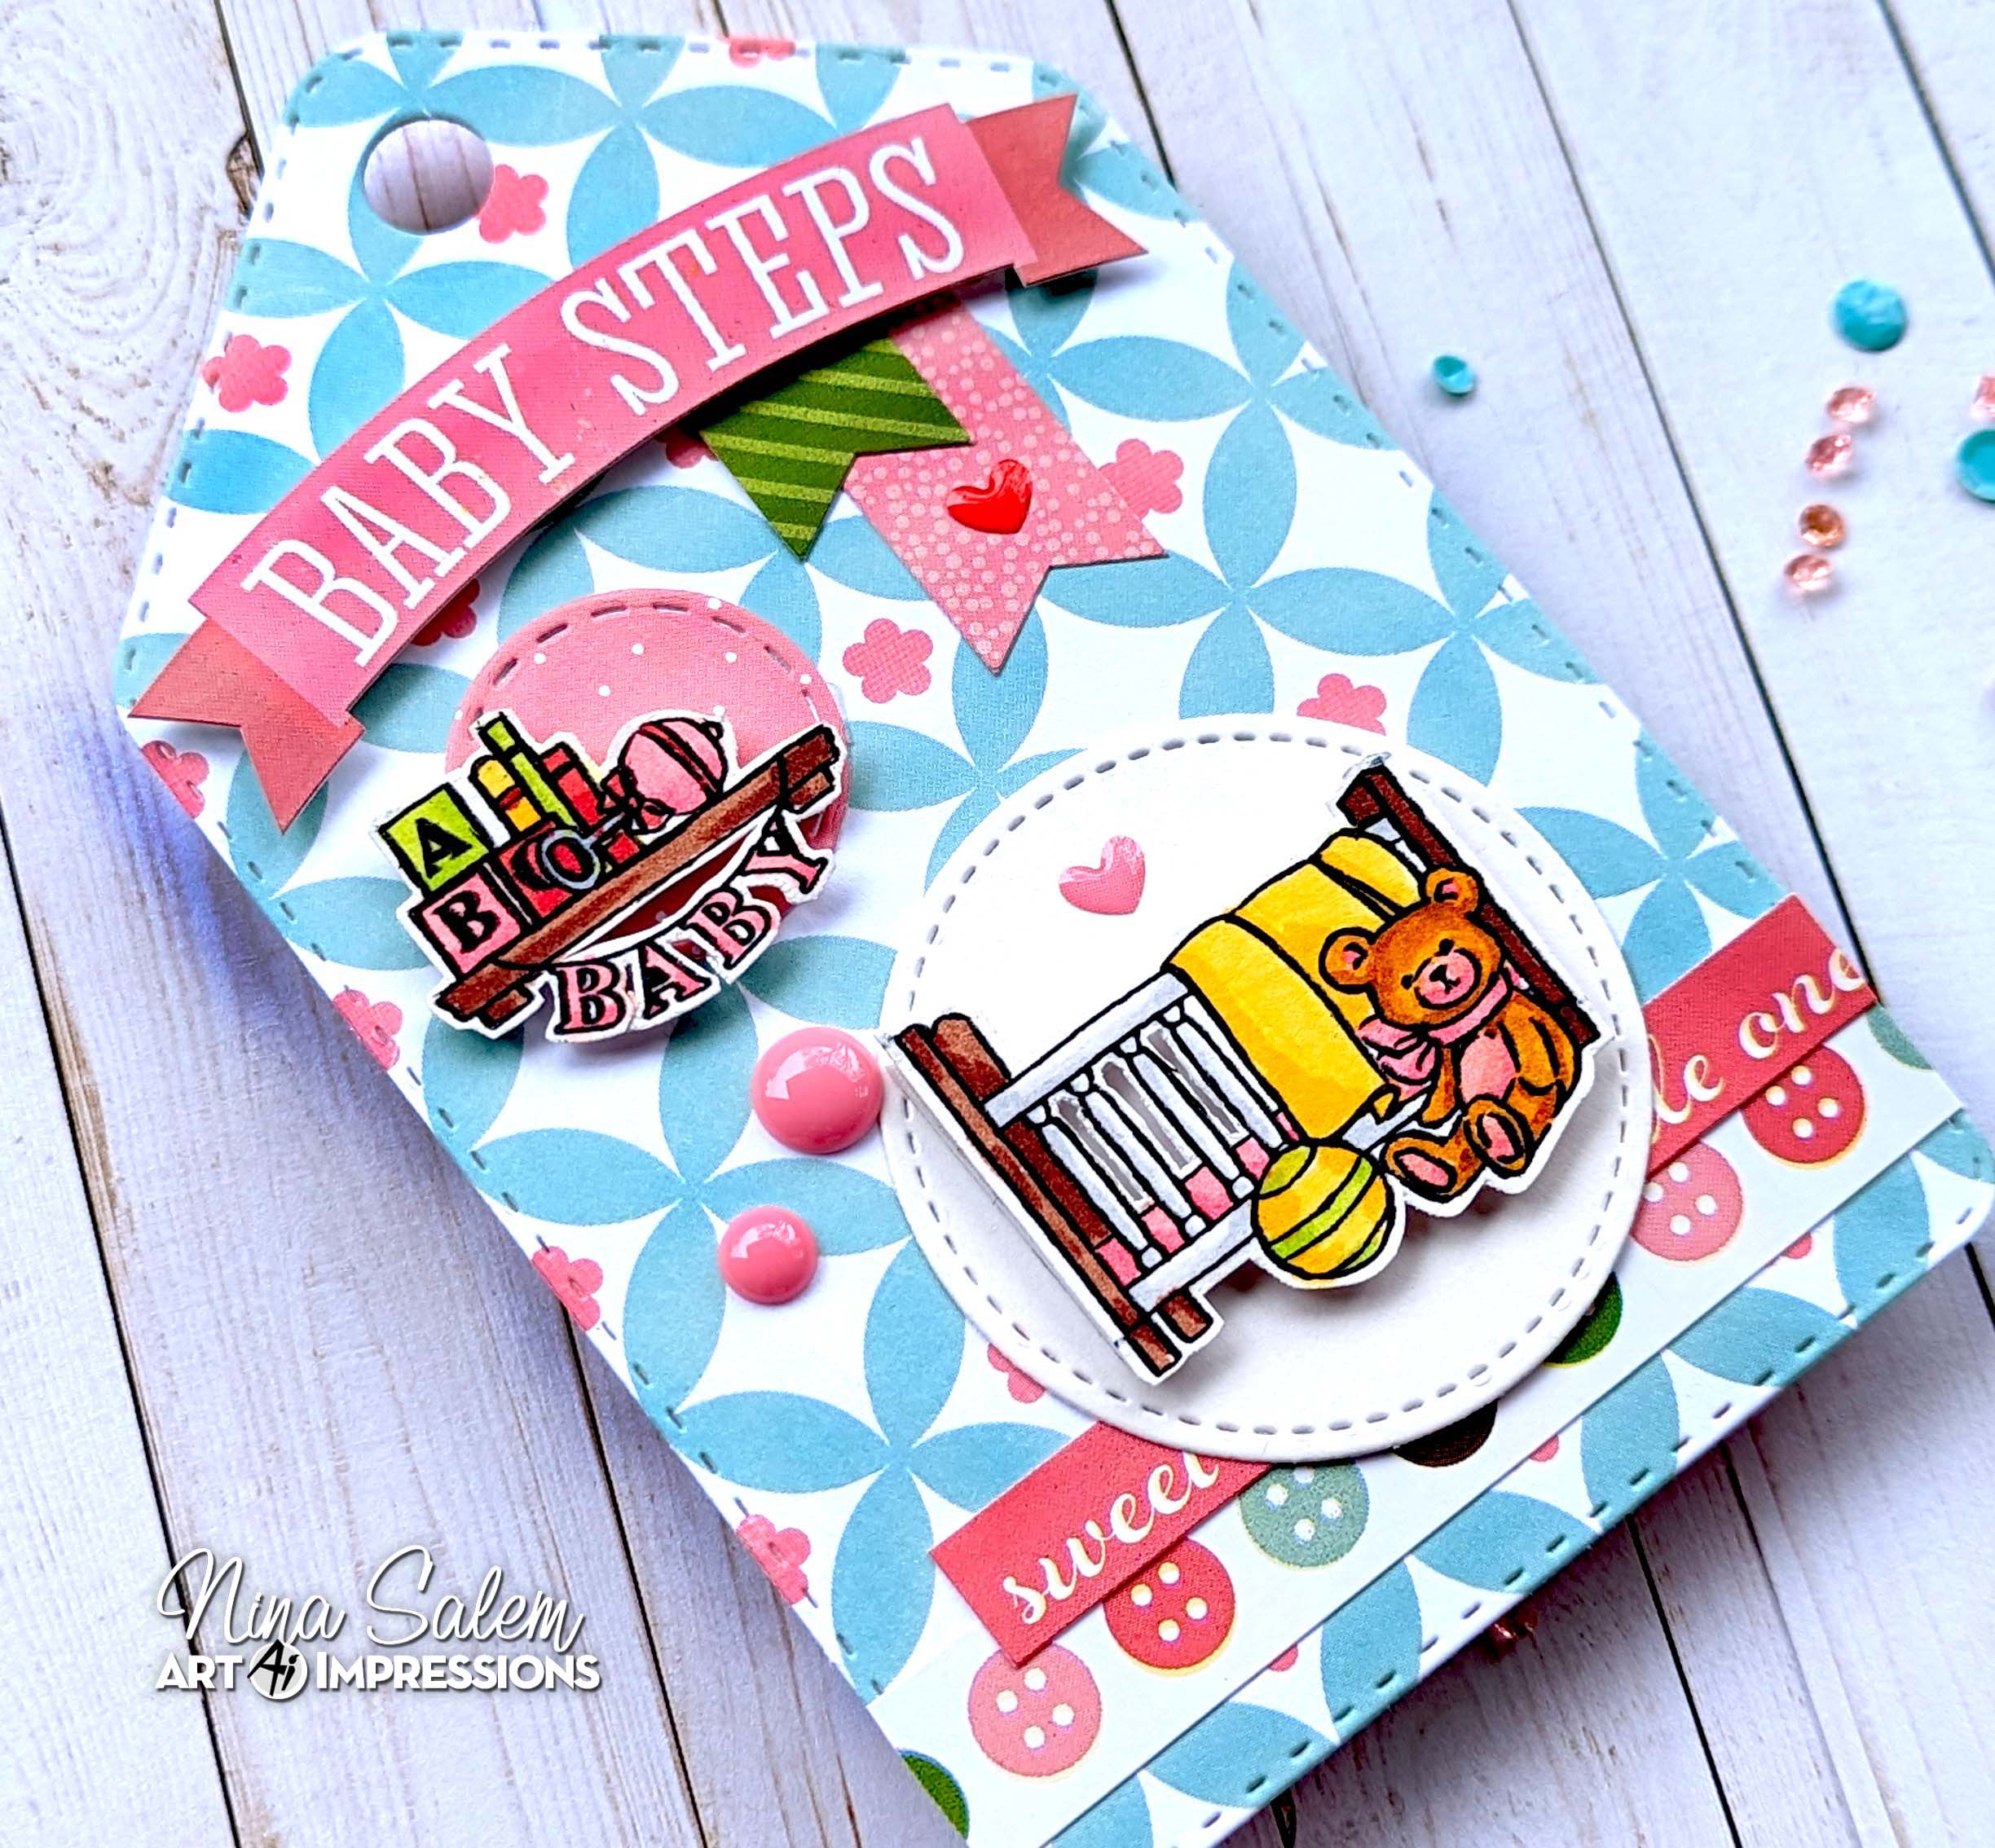
12. Baby Steps Tag

I used images from MB Nursery Set which is one of the Matchbook sets. Matchbook sets were the perfect size to create scenes on these tags.


13. Chicken Coop Tag

Again for this Spring Tag using one of the Matchbook sets, just the perfect size. Here I used the Chicken Coop Set.


I also created another tag for our current Midnight Snack Challenege that will be up on Art Impressions Blog Next Tuesday. Stay tuned.

Here are images for the complete Journal..


I had a blast creating this Tag Journal I hope you enjoyed each one of them. Thanks for being part of this journey!


Tuesday, May 9, 2023

Barnyard Party Tag by Nina

  Hello Ai fans, Nina here with a fold tag as a new addition to my tag journal that has been going on for a while now :) Today I am using many of Ai cute sets to create a barn/farm tag. 

I used:

4967 – WC Fence Dies
5180 – Barnyard Animal Cubbies
5455 – Birthday Buggy Set
5491 – Front Porch Party Set
5132 – Tag Stitched Dies
5722 – Birthday Journal Set
5443 – MB Nativity

This project was part of Ai challenge Don't Fence me In where we create any project with fences., so I decided to create a folded double tag with Ai cute farm animals from different die sets in a barn with a peek-through window. 

I started with stamping the animals from MB Nativity and Barnyard Animals sets on white paper using Memento Tuxedo Black Ink and my Mini Misti.  I then colored them with Copic Markers.


Copic Shades:

Wood:  E29 E37 E35

Duck: Y08 Y06

Cat: YR68 YR07 YR04

Pig: RV34 RV32 RV13 RV21

Rooster E99 B05 YR68 E99

Sheep Face: E13 E11

Greys: C3 C2 C1 C4 C6

Reds: R27 R29


I then cut all the images and backed them with foam tape to give them dimension.

To create the first tag, that is the background behind the animals, I die cut the tag using the biggest tag in Stitched tag die set from a sort of a checkers pattern paper of a teal color and ink blended the edges with Mermaid Lagoon Distress Ink to give it dimension. 

For the second tag, that is the barn front tag, I cut it from a yellow wood pattern paper and cut a dome shaped window in the middle. I also used a barn roof die from my stash to create its roof and attached to the top of the barn with foam tape just above the dome window. I did trim the top part of the tag that is above the roof so the back tag can show through.

I attached both the tags to each other with a simple strip of paper from one side to create a hinge to be able to open and close.


As I always like to ground my images, I created a hay sort of ground in the inside using a grass border die from an orange paper and a grass sort of ground on the outside from a green paper. 

To build my farm scene inside, I attached the hay ground then started organizing the animals and thier shed tucking them behind the hay from the bottom and thought it will be cute to stack some of the animals above the cow shed.

As I started stacking them it felt like there is a party of some sort inside the barn :) and I thought why not add elements to make them have a cute barn party. I searched my sets for fun party elements and found the balloons from Front Porch Birthday set and the top banner from Birthday Journal set, I die cut them and added them to the scene after coloring the balloons with matching Copic colors.


For the start of the show "THE FENCE" I die cut the crooked fence from WC Fence dies set and attach it to the front at the bottom of my dome window so the animals can show through.

I then decorated with some enamel dots and drew strings coming down from my balloons

I then attached my tag to the metal ring of my Tag Journal.


Tuesday, November 9, 2021

Matchbook Nativity by Jil Lebel


Hello Ai fans!

I used the Matchbook (MB) Nativity stamp and die set to make this compact nativity. I also used the add on dies for the matchbook and holder to complete this project.
I started by stamping the images onto Spectrum Noir Ultra Smooth card stock with Gina K Black Amalgam ink and colored them with Copic markers.  The colors I used will be listed at the end of this post.  I then cut the images out with the matching dies that come in the set.
I used the MB Template and MB Envelope dies to cut from 6"x6" Whimsy Paper.  I attached the cut Nativity images to the MB Template according to the directions on the package.  I added it to the MB envelope to send it out. 
Copic Colors Used:
Gray - C3, C1, C0
Skin - E11, E00
Green - YG63, YG61
Wood - E35, E33, E31
Cow - E74, E71, E70


Thanks for stopping by and Have a Great Day!