Showing posts with label WC Bench Set. Show all posts

Friday, July 12, 2024

Have a Magical Day Card by Tasha!

Happy Friday Friends!

Tasha here sharing a card inspired by the current Ai Challenge. The theme is Magical Creatures and I thought it was the perfect time to create with the new 5915 - Woodland Fairies Set!

I love fairies and when looking at the images included in this set, I just couldn't decide on which fairy to use, so I selected three for this card. To make a little scene, I stamped a bench and covered it with masking paper before stamping the fairy in the back. I just love masking!

Since I wanted it to look like the other two fairies were sitting on the bench, I used the included coordinating die set to cut them out and attached them to the card with foam tape. Don't they look so adorable, I love the little wings!


For the background, I used a cloud and grass stencil to make the ground and sky. I also used two Ai grass stamps to add more detail to the ground and attached several enamel flowers for extra color. 
Lastly, I attached silver paper, purple card stock, and a fun star pattern paper to complete the card. I hope you enjoyed today's project and will join in the Magical Creatures Challenge!


Wednesday, November 28, 2018

NEW VIDEO! Fox on a Snowy Bench Watercolor

Hello Ai Fans!

It's Watercolor Wednesday time! We are continuing with our winter series and loving all the snowy scenes! This week, Bonnie creates a sleepy little fox resting on a snow-covered bench, surrounded by a pine tree and holly branches. We love this sweet scene, great for any recipient!

We know you have holiday cards on your mind, so we've made creating unique watercolor cards even easier with our Winter Watercolor Playlist! With almost 20 videos, you can create special designs to send warm greetings to your friends and family! Make sure to leave a comment on your favorite video of the bunch!


View on YouTube: https://youtu.be/fIQm_4lg51w


Wednesday, June 20, 2018

NEW VIDEO - Bench Swing & Cat Watercolor

Hello Ai Fans!

Welcome to a NEW Watercolor Wednesday! This week, Bonnie transforms our WC Bench Set into a swing with a sleepy Siamese cat and pillow. She shows in the video many different ways you can create the swing and add different critters that you prefer! Watch the video below for the full tutorial!

Did you know, you can search our YouTube? Simply click on the magnifying glass in the top right of the screen on our channel page and you can easily find videos using your favorite sets, such as our Garden Wagon, Rustic Containers or Old Barn!

Happy Watercolor Wednesday!


View on YouTube: https://youtu.be/Bls8oyOqx80


Saturday, April 21, 2018

Watercolor Weekend Roundup - Clever Cards!

Welcome back to an inspiration-filled Saturday post! This week our designer's really knocked it out of the park with creative card designs! From Dot's scene featuring a foreground and background, to Tricia K's creative use of the "Bench Set" and Tricia O's "Postage Stamp" design, there is something to spark creativity for everyone here! 

Dot Freel - Instagram - Blog - Pinterest
Hello Watercolor Friends,

This is my project for the Art Impressions Watercolor Weekend roundup. I thought these little .99 cent cardboard boxes from Hobby Lobby would make cute keepsake boxes for my granddaughters. I painted this one white and then attached the watercolored scene to the top using extra strong double sided tape. I used five stamp sets and four markers to create it. See my list of supplies below:
Art Impressions Products: 5011 - WC Truck Mini Set, 5012 - WC Wishing Well Set, 5009 - WC Mini Flower Set, 4051 - WC Foliage Set 1, 5016 - WC Mini Critter Set, 4774 - Stamp positioner, 4773 - Acrylic Blocks, #4 Brush
Marvy LePlume II Markers: 45 sepia, 72 pine green, 86 African violet, 20 magenta
Other Supplies: Tim Holtz Distress Watercolor Cardstock

Tricia Kennedy - Instagram
“Spring is in the Air” for my Watercolor Weekend project!

Start by masking off a 3”x 3” square on your watercolor paper using 3M Painters Tape, masking paper, washi tape or Post It Notes (I used 3M Painters Tape). Stamp the tree branches at the top with stamps from the Branches Set in 45 Sepia. Next build the trees by stamping leaves from the Foliage Set 2 in 15 Olive Green. Pull the color from the lines with your watercolor brush and water. Next stamp the top half of the bench from Bench Set in 45 Sepia. Scribble 45 Sepia onto your palette and brush onto the bench. Use the fine tip of 45 Sepia to create wood knots, woodgrain and added dimension in the cracks and crevices. Stamp the flowers from Flower Set 3 around the bench in 20 Magenta and 15 Olive Green. Add additional foliage into the flowers with leaves from Foliage Set 2 in 15 Olive Green. Place the little bird from Bird Bath Set on the top of the bench by using your Stamp Positioner. Pull the color from the lines on the tiny bird with your watercolor brush. I found it easier to use watercolor brush no. 1. Use your fine tip 45 Sepia to darken the eyes and beak. Scribble a little 88 Terra Cotta on your palette and brush onto the bird’s chest. Place 60 Salvia Blue (or any other pale blue) onto your palette, water it down and paint it into the sky. Add dot detail with your fine tip 20 Magenta around the flowers. And finally, remove the tape and sign your masterpiece!

Marvy Le Plume II Markers: 15 Olive Green, 20 Magenta, 45 Sepia, 60 Salvia Blue, 88 Terra Cotta
Other Supplies: 3M Blue Painters Tape

Tricia O'Bin - Blog - Instagram - YouTube - Pinterest - Facebook
Sometimes it is hard to come up with unique ideas for paintings. For this weekend’s Watercolor Weekend I created this card using small rectangle dies as guides for this card design. I wanted to try to create the look of postage stamps with flowers on them. I added words to the left hand side of each rectangle. I used various foliage and flower stamps to create a different look in each of the rectangles. Check out my Blog and YouTube channel for all the details. 

Other Supplies: Wink of Stella Glitter Clear Brush Pen – ClearGina K Designs Heavy Base Weight Card Stock- DandelionClassic Crest Cover Solar White 8-1/2x11 110lbScor-Pal Scor-Buddy Mini Scoring Board, 9 by 7.5-Inch

Such lovely projects, thank you, designers! We LOVE how easy it is to mix and match stamps from different sets, to create larger scenes or to use in an unexpected way! We hope you'll share some of YOUR watercolor creations with us on Instagram using the #AiStamps! Be sure you are following our designer's across your different social media accounts to see inspiration every week!

Happy Stamping!

Saturday, January 20, 2018

Watercolor Weekend Roundup - Love In the Air

Hello, Ai Fans! Our winter break from Watercolor Wednesdays is almost over, and our Watercolor Guest Design Team is excited to show you some wonderful winter-y and love-y watercolor projects! From friendship cards to love notes, and even masculine tags, we got you covered this week!

Dot Freel - Instagram - Blog - Pinterest
Hello Watercolor Friends,

I'm happy to share this card I made for the Art Impressions Watercolor Weekend roundup. I have puppies on the brain since my granddaughters both got puppies for Christmas. I plan to make similar cards for them for Valentine's day. I used the 4959 - WC Dogs Set, the 4873 - WC Cats set and 4965 - WC Bench set. I used the basket from the Exclusive for 2017 Garden Set. You can only get the exclusive sets by attending the classes at the shows. I wonder what the exclusive set for 2018 will be? Two of the flowers were from 4052 - WC Flower Set 1 and two more flowers were from 4868 - WC Flower Set 2. The grass and leaves are from the 4051 - WC Foliage Set 1 and the set 4763 - Southwest. I used a Wink of Stella pen to add glitter to the flowers. The sentiment is from the In The Air Set - 4753.


Tricia Kennedy - Instagram
My project for today’s Art Impressions Watercolor Weekend, “Love Bird”, will help you get a jump on your Valentine’s cards.

Begin by stamping the bird onto a mirror stamp or even acetate. Position the stamped image, press down and transfer the stamped image onto the watercolor paper. Then stamp the bird using your Stamp Positioner next to mirror stamped bird. Next, stamp the daisy bunch from 4052 WC Flower Set 1 in 2 Red and 66 Dusty Pink in a heart shape and fill in with the leafy branch from 4867 WC Foliage Set 2 in 15 Olive Green. Pull the color from the lines on the foliage and flowers using your Watercolor Brush No. 4 and water. Onto the birds, use the Watercolor Brush No. 1 to pull the color. Darken any lines with the fine tip of 45 Sepia. Scribble a little 2 Red onto your Watercolor Paletteand brush onto the chest of the birds. Finish with a little bling for that extra sparkle!


Marvy Le Plume II Markers: 2 Red, 15 Olive Green, 45 Sepia, 66 Dusty Pink
Other Supplies: Swarovski size 10ss jewels, Crystal Katana, Stamps of Life Mirror Stamp, Glossy Accents

Tricia O'Bin - Blog - Instagram - YouTube - Pinterest - Facebook
I used my stamp positioner to place my Rustic Cottage to the middle of the tag. I inked it up using African Violet on the roof and Sepia on the rest of the cottage. In order to protect the cottage, I used a post-it note mask while I stamped the birch trees (inked with Sepia and a little African Violet) behind it. Once again, I used the stamp positioner to place it perfectly.
Once the stamping was complete, I removed the mask and using my paintbrush and water I pulled color from between the trees into the background and sky. I let some of the paint in the sky dry and then came back in with additional water for some hard edges.
I pulled color from the edges of the roof (that were inked with African Violet) to create the illusion of a snowy roof. Then, I pulled the Sepia from the cottage and added some additional Sepia and a mixture of Sepia and African Violet (creates a nice gray) from my palette and added it in lines to create a worn wood look.
Using my palette, I added some African Violet to create some snow underneath the trees and next to the cottage. I added some Prussian Blue to create a stream. You will notice I wasn't too worried about the right had side of the piece as I am going to die cut this out and that will be cut off.
On one of the tags, I used the small fir top to create some pine trees using Pine Green.
Check out my YouTube channel and Blog for more information on how to create these Watercolor Tag Money Holders.
Other Supplies: Post-it notes, Scissors, Tim Holtz Tag DieBig Shot MachineAltenew Garden Hydrangea Stamp SetScor-BuddySilver Brush, Black Velvet , Round, Size 8Scor-Tape

Thanks, team! These are fantastic ideas! Have these ideas inspired you? Comment below! If you are craving more sweet inspiration from our team, be sure to check out their social media links!

Dot Freel - Instagram - Blog - Pinterest
Tricia Kennedy - Instagram
Tricia O'Bin - Blog - Instagram - YouTube - Pinterest - Facebook

If we've inspired you, why not enter this week's "Feel The Love" Challenge while you are at it? Simply create a love-themed card and link it to our inLinkz at THIS post, and you'll be entered for a chance to WIN! You have until the end of January to enter!

Happy Stamping!

Saturday, December 2, 2017

Watercolor Weekend Roundup - Winter Wonderland

Happy December, Ai Fans! We are welcoming the first weekend of the month with another roundup of our favorite watercolor projects from our Watercolor Guest Design team! Let's get into the swing of winter with these snowy projects. Check them out!

Dot Freel - Instagram - Blog - Pinterest
Hello Watercolor Friends,

I've made a Christmas card for this Watercolor Weekend using a cabin from the new 4962 - WC Rustic Cabins Set. I also used the tree from the WC Tree Set - 4269 and the fence from the 4807 - Old Barn Set. I used some Zig Wink of Stella to add glitter to the snow. I used Glossy Accents on the lights and Nuvo Crystal Drops on the trees to add sparkle. I used a Uni-ball Signo pen to add the snow to the sky.

Tricia KennedyInstagram
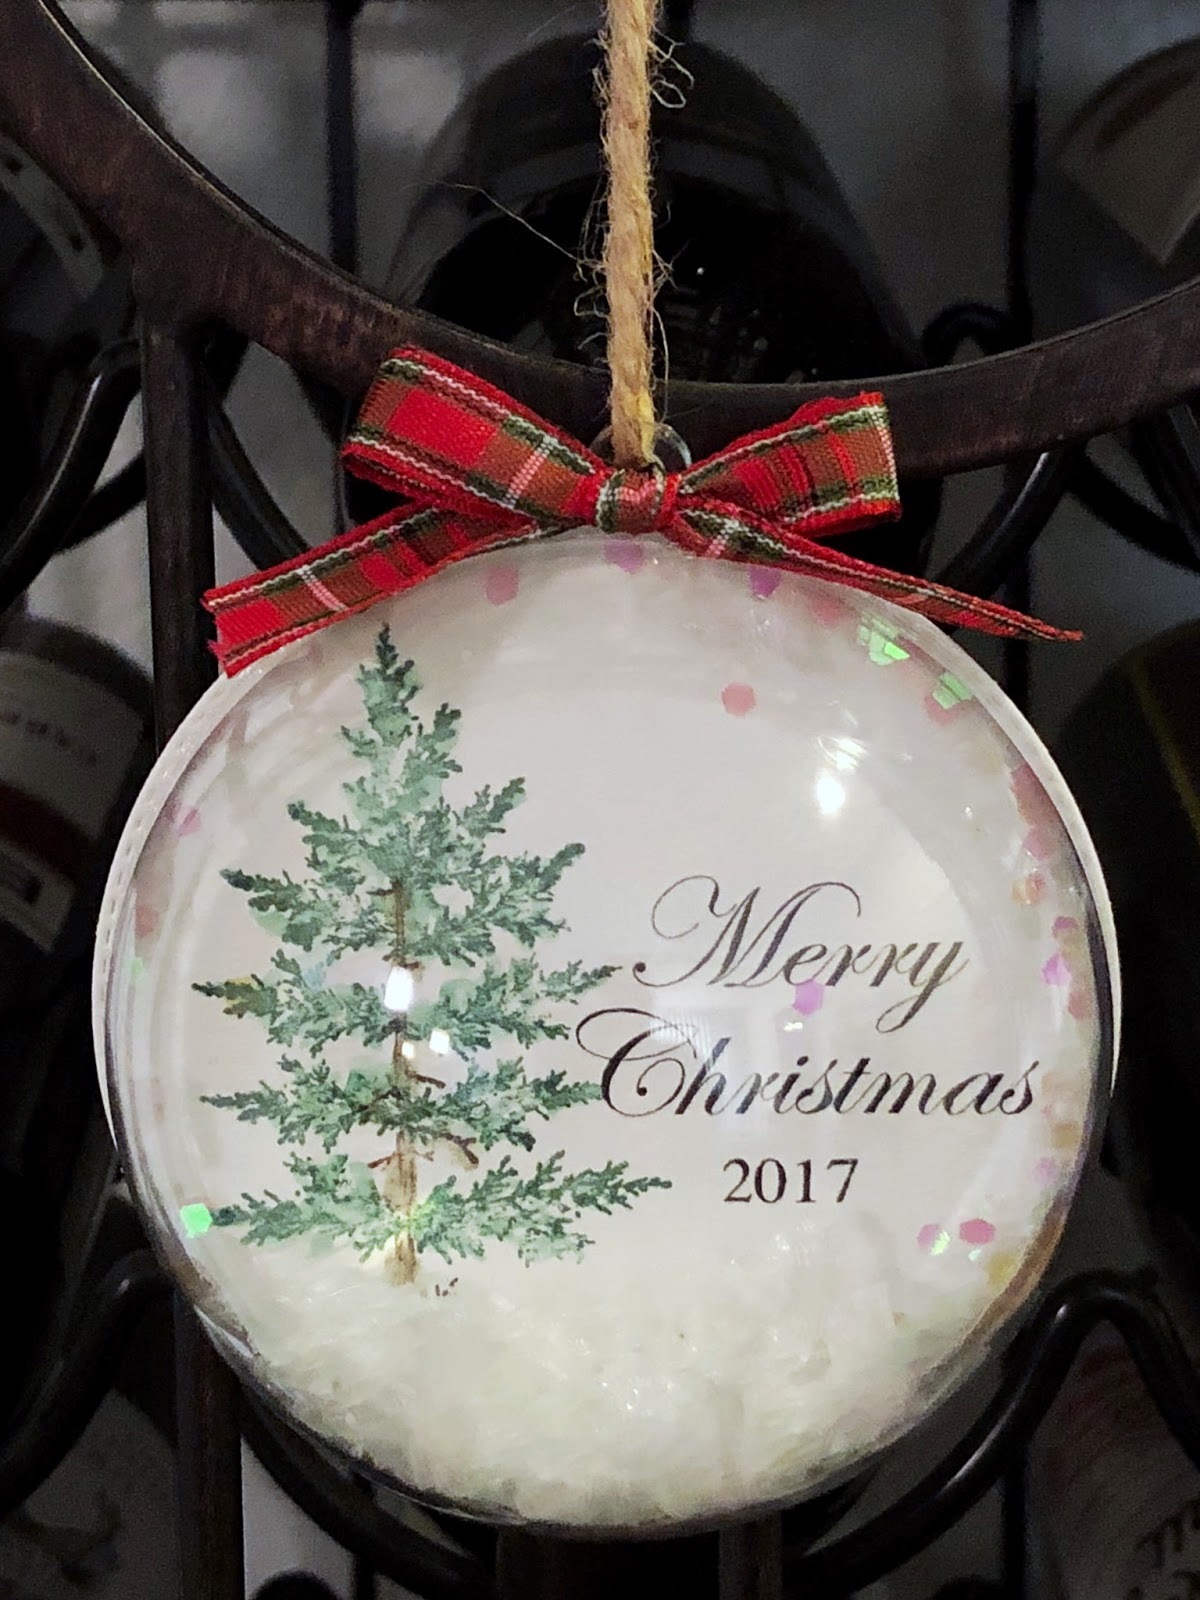
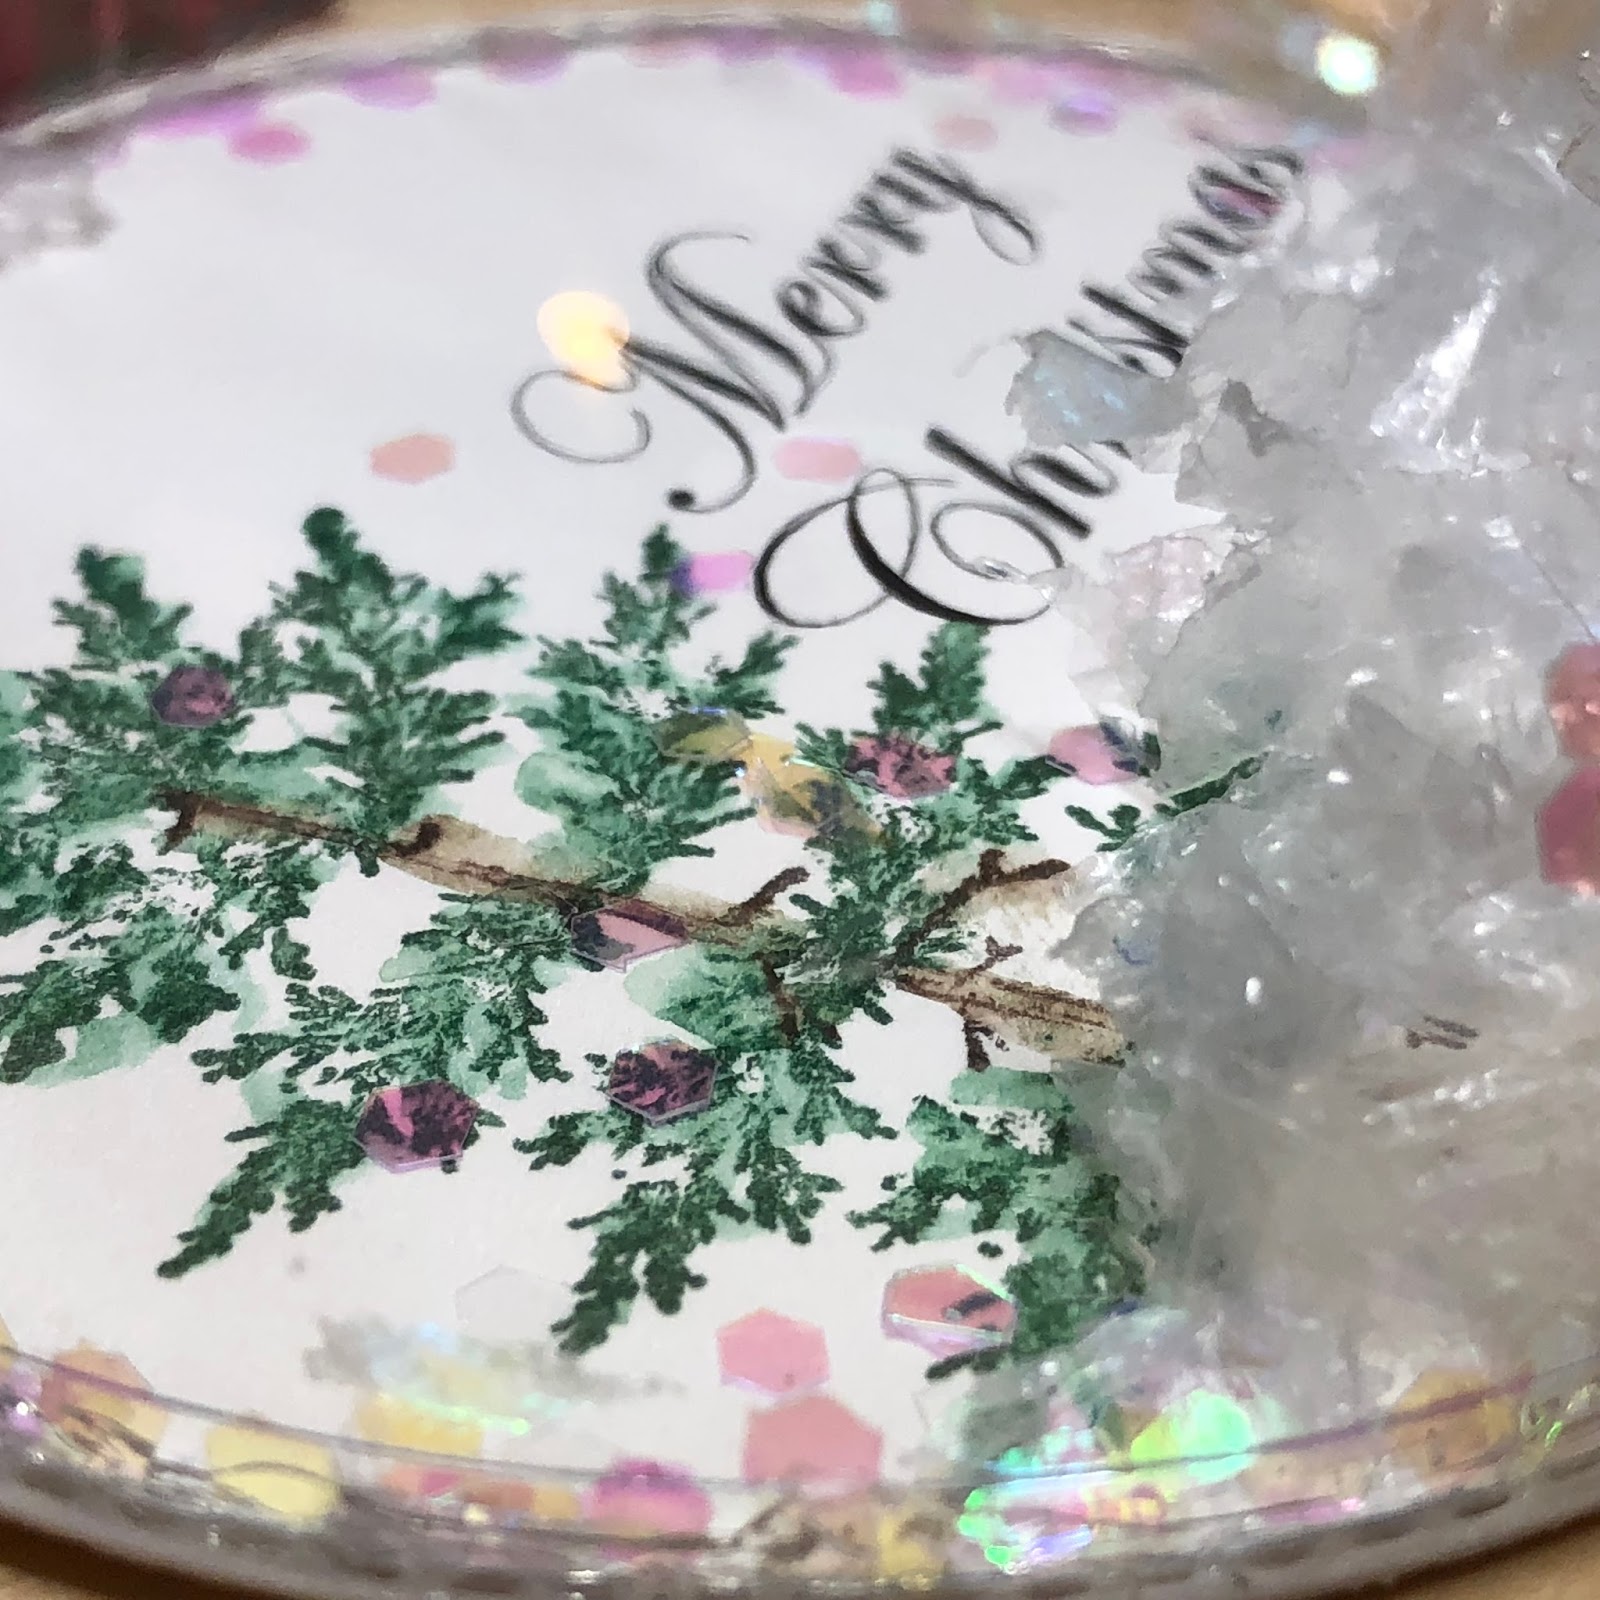
My “Merry Christmas Ornament” for today’s Art Impressions Watercolor Weekend is a perfect gift to make this holiday season.

To begin, either hand write, stamp or print Merry Christmas 2017 on your watercolor paper. I opted to print it. Cut out a 3” circle with Merry Christmas 2017 to the right, leaving room to stamp to the left. Stamp about ¾ of the tree trunk from the WC Fir Trees Set in 45 Sepia. Build the tree using the two straight fir boughs from the WC Fir Trees Set in 72 Pine Green. Stamp the large bough straight up on the top of the tree trunk then the small bough four times below on each side of the tree trunk and then the large bough at the very bottom on both sides of the tree trunk. Pull the color with your watercolor brush and water. Place about a tablespoon snow flakes and about a ½ teaspoon jumbo glitter in the ornament. Run a thin line of strong liquid glue on the edge of the ornament. Attach the watercolored piece to the ornament. Run another thin line of liquid glue where the ornament and paper meet. Let dry. Tie a piece of the Christmas plaid ribbon into a bow and glue on the top and let dry. Finally attach a piece of jute into the ornament and tie for the hanger. Shake the ornament to get the glitter and snow to move around.

Marvy Le Plume II Markers: 72 Pine Green, 45 Sepia
Other: Art Minds 3” Plastic Craft Ornament (comes in two pieces, each ornament requires only one piece), Celebrate It 3/8” Christmas Plaid Ribbon, Jute, Buffalo Frosty Snow Flakes, Tree House Jumbo Disco Glitter, Edwardian Script Font and strong liquid glue.

Tricia O'Bin - Blog - Instagram - YouTube - Pinterest - Facebook
I started out stamping the puppy (which I used a stamp positioner to get him straight) with Sepia. I pulled the color out of the lines. I added some color to my palette and filled him in. I darkened in his ears, eyes and nose with the fine tip of the marker. I decided to draw in a color and cuffs to make him look like he was wearing a sweater. I added some white gel pen dots to jazz it up. I created a mask and used it to protect him.

Using my stamp positioner, I stamped the bench over the masked puppy. I didn't ink up the area where the snow is on the bench. I pulled the color out of the lines and added some squiggly lines with my Sepia and darkened some areas. I drew in a wavy line for the lights and added some English Red, African Violet, Brilliant Yellow and Pine Green circles to make them look like lights.

I inked up the tree trunk with Sepia and the small top of the Fir tree and stamped it to the right of the bench. I added the light to the left leaving off where the wreath would be. I added Brilliant Yellow to the lamp and on a few areas on the snow. I added some masking fluid where the wreath would be to be able to add some ornaments. I then used the positioner to stamp the wreath in Pine Green. I added African Violet and English Red ornaments to the wreath.

Using the fine tip of my African Violet I drew in some the snow and pulled the color above the line to leave the snow white but it creates a shadow. I used African Violet to create the sky.

I cut the picture out with the stitched rectangle die and mounted it on a piece of Gina K Designs Cranberry Tart cardstock. I added the Season's Greetings sentiment which is also from Gina K.
Art Impressions Products: 4034 WC Series 8 Set 14959 WC Dogs Set4965 WC Bench Set

Such beautiful winter cards from three talented artists! Do you like what you see? Be sure to comment below! When you have a craving for more sweet inspiration like this, look up our designer's personal blogs for even more projects! Plus, you can find them on Instagram or other social media and follow them there, too:

Dot Freel - Instagram - Blog - Pinterest
Tricia Kennedy - Instagram
Tricia O'Bin - Blog - Instagram - YouTube - Pinterest - Facebook

We hope these wintery projects have inspired your creations this weekend! Happy Stamping!

Wednesday, October 18, 2017

NEW VIDEO - Multi-Tone Bench & Dogs Watercolor

Hello Ai Fans!

This. Video. Is. AMAZING! If you've watched our Watercolor Wednesday videos before, get ready for a whole new way of looking at your markers and stamps! Bonnie introduces our new WC Benches Set and WC Dogs Set in this stunning, multifaceted image. Bonnie starts by stamping the two dogs, with one masked so the sleeping pup is tucked behind. She stamps the bench using the positioner over the two masked dogs and inks the image in Prussian Blue AND Sepia. As you pull the color, you will see this beautiful, rustic blue tone for this antique bench. Next, she stamps some branches on each side of the bench in Sepia and the vine and large grass from our Foliage Set inked in African Violet AND Pine Green. She adds a darker shadow under the bench and builds some sky around the bench. For the last step she uses some bud flowers from our WC Fall Set on the sides with Sepia on the stem and African Violet on the blooms. Don't forget to sign and date!

We hope you enjoy these new ideas from Bonnie this week! If you liked this video, please hop over to YouTube to leave a comment and give it a thumbs up! Especially if you loved this new multi-tone stamping! Don't forget to share your images with us on Instagram by using the hashtag #AiWatercolor!

Happy Watercolor Wednesday!


View on YouTube: https://youtu.be/URlOg5MWtiE


Saturday, October 7, 2017

Watercolor Weekend Roundup - Beautiful Creations

The Watercolor Guest Design Team is so excited to share their creations this weekend! From a clean and simple bouquet to a large park scene, and a quaint fall scene in between, this week's post is sure to provide you with inspiration for your projects at home! Take a look!

Dot Freel Instagram - Blog - Pinterest
I made this card for the Watercolor Weekend round up with Ai's new stamps - 4958 WC Cottages Set and 4959 - WC Dogs Set. I just love that cute little puppy. There are six different puppies in the set and I am excited to use them all! I added that pumpkin from the WC Series 3 Set 1 - 4056 for a touch of Fall.

Other Supplies: Tombow Marker N15


Tricia Kennedy - Instagram
My Art Impressions Watercolor Weekend project is quick, easy and only requires two stamps to achieve the “glass vase” look.

Start by stamping the middle vase in the center of your watercolor paper using the Small Container Set in 86 African Violet. Using your stamp positioner, stamp the vase two more times, one to the left and one to the right of middle. Pull the color from the lines making sure to leave a white highlight in the center/center-right portion of the vase. This is essential for a “glass” appearance. Ink up the tall flower cluster in Flower Set 2 with 15 Olive Green for the stems and 13 Ochre for the flowers, stamping twice. You want some of the stems to go into the vase. Next mask off the flowers and stems by placing a post it note at the top of the vase. Stamp only the stem portion from the tall flower cluster in Flower Set 2 into the vase below those already stamped. Don’t ink up the stamp to do this step, use the ink left on the stamp from the previous step. Repeat for the vase on the left using 28 English Red and right 88 Terra Cotta. The flowers are tiny and just require a little water to activate the color and even less, if any, for the leaves. Imagine your light source is coming from the top right corner onto all three vases, the highlight is in the center/center-right. Pull the color from the stems in the vase in the same direction, to the left, leaving the highlight. It gives the idea that light is coming into the “glass vase” and the stems are distorted under the water. Place a little 86 African Violet onto your palette and add dot detail into the bottom of each base to simulate pebbles or marbles. Then, using the fine tip of 86 African Violet, add more dot detail in the same area. Also, add dot detail to the flowers using the fine tip of 13 Ochre, 88 Terra Cotta and 28 English Red. And finally, ground the scene by adding a line of 45 Sepia under the vases.


Other Supplies: Post It Notes


Tricia O'Bin - Blog - Instagram - YouTube

Welcome to this week’s watercolor weekend.  In the wake of all the tragedies happening around our country I wanted to create a scene that felt peaceful.  I hope it helps to give you some peace as well.  I wish that everyone could spread a little kindness, it goes such a long way.  Therefore, I thought I would use the Beauty is all around you sentiment.  It is so true and it’s a little reminder to be thankful for every day and enjoy your “Happy Place”.

Onto the details of my project.
First, I started by stamping the tree trunks from the New Fir Trees Set with Sepia.  I then added the Foliage from the branches in the Fir Trees Set with Pine Green.  I softened them Fir’s by adding water with my brush.

I added the tiny grass from the Foliage Set to the bottoms of the trees and used my palette to add some additional green to the ground.  I used the Teeny Tiny Flowers from the Flower Set with African Violet to add a touch of color.

Using my palette, I added some mountains in the background using Olive Green, Pine Green and Sepia.  I then added Salvia, Manganese and Blue to create the look of water.  I also used the same colors to create clouds in the sky.  Once it was dry I stamped the bench from the New Benches Set using Mocha.

I added the “Beauty is all around you” from the WC Sentiments set using Black Versamark Ink.  The panel is 3.75x5 which is adhered to a 4x5.25 panel of Dark Chocolate cardstock from Gina K Designs.  I placed the entire panel on an Asparagus card base from Gina K Designs.
Thank you so much for stopping by and I hope you have a crafty day!


Marvy Le Plume II Markers: 86 African Violet, 45 Sepia, 15 Olive Green, 72 Pine Green, 3 Blue, 36 Manganese Blue, 60 Salvia Blue

Thank you ladies, for your beautiful projects! Perhaps this weekend we can get a chance to create something beautiful to share with a friend this weekend! Share your creations with us by hash-tagging #aistamps and #aiwatercolor on social media!

You can find even more inspiration on our designer's personal blogs and Instagram accounts! 

Dot Freel Instagram - Blog - Pinterest
Tricia Kennedy - Instagram
Tricia O'Bin - Blog - Instagram - YouTube

Happy Stamping!