Showing posts with label 5915–Woodland Fairies Set. Show all posts

Monday, September 23, 2024

Make a Wish by Sharon Caudle

 Hello AI Fans!

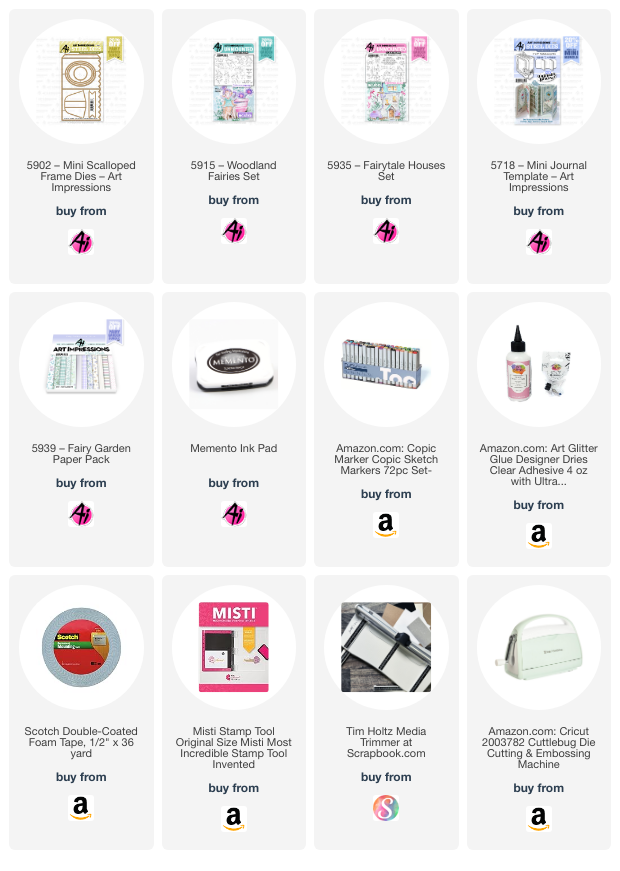
I just love the whimsical fairies and houses that Bonnie has blessed us with this year! I used them again today along with the amazing 5902 Mini Scalloped Frame Dies. I stamped the images onto Copic friendly paper and then colored them up with the markers listed below.  All the products I used are listed below. You can just click on the product and it will take you right to it in the shop!!  This was so much fun to decorate, and I love that it's small enough to brighten up a little area on your desk or anywhere else. I wanted to add a layer of grass on the front, so I just used the Scalloped frame to cut out a piece of green and cut it along the scored edges. I then cut it again with my grass die and then simply glued it to the front of the frame. 


Thank you so much for stopping by for a visit today. Until next time - stay crafty!!


Copic markers used:

Y00, 11, 15, and 17

BV000, 00, and 02

E33, 41, and 43

R00, 20, and 21

V91, 93, and 95

BG90 and 93

C2, 3, 4, and 5


Monday, August 12, 2024

All occasion magical card for anything by Sharon Caudle

 Hello AI Fans!

I hope you're having a great start to your week! I've got a card for you today that features those adorable Fairies from #5915 Woodland Fairies Set! They are just too adorable! That single adorable daisy is from #5935 Fairytale Houses Set, and that oh so cute caterpillar is from #5728 Mushroom Cubbies Set. Just a super quick and easy card to color up and put together! Added a couple little pearls and a little flower in the center of the bow and called her done! That beautiful paper is from #5939 Fairy Garden Paper Pack. Aren't they just goregous??!! I do apologize as I failed to note the Copic colors I used to color up these cuties! I'm so sorry! 


So that's it for me today. Thank you so much for stopping by for a visit today and until next time - stay crafty!!


Thursday, August 1, 2024

Fairytale Shaker by Dori Mendiola

 Happy Thursday AI Friends!

Today I have a fun little shaker card for you using the new Fairytale Houses #5935 stamp and die set along with the Woodland Fairies #5915 stamp set.

       I've been wanting to make a shaker card for the longest time, so I thought this stamp set would make a cute one using the coffee pot from the Fairytale Houses and the little accessories that are included in the set.  I stamped the coffee pot on a 4 x 4 piece of copic friendly paper and colored with my copic markers listed below.  Each of the other images were stamped with memento black ink on a separate piece of copic friendly paper and colored with copic markers as well.  I cut each of the images with the coordinating dies, other than the coffee pot. 

To make the shaker, I used a scalloped edge circle die from my stash to cut the circle from the white cardstock.  I stamped the saying, from the Fairytale Houses set, to the bottom before creating the shaker.  I adhered a piece of 4 x 4 acetate to the backside of the circle to make the window.  I then took a thin strip of foam tape and placed it in a circle form to the backside of the window.  I placed another strip of foam tape over the other to double it up.  I placed some clear sequins into the well of the circle and then adhered the 4 x 4 square coffee pot image onto the foam tape.  


To finish off the card, I glued the bee and the flowers onto the acetate, tucking the stems of the flowers into the scallop edge of the circle.  Then I glued the fairy and the mushrooms onto the outer edge.  I put foam tape all around the backside of this cardstock and adhered to a yellow piece of 4 1/4 x 5 1/2 cardstock and placed onto a side folding A2 card base.

I hope you enjoyed my shaker card and try one for yourself.  They are really quite fun to play with.

Have a great day and enjoy creating!
Copics used:  E000, E01, E11
E50, E51, E53, E55, E57
C1, C2, C5
B0000, B000
R02, R05, R22, R24
Y11, Y15, Y17
G40, G43


Sunday, July 21, 2024

"Stay Hydrated and Fabulous" Card and "Hope Your Day is Magical!" Card by Diane Mason

Hello, and welcome back for Watercolor Weekend!

Today I have two cards to share, featuring three fabulous, recently released sets:  5928 – Stay Hydrated Set, 5916 – Woodland Castle Set, and 5915 – Woodland Fairies Set.

The first card features the Stay Hydrated Set. With the hot summer heat upon us, we can all appreciate how important it is to stay hydrated. This fashionable gal is looking fabulous and ready for her day with her big tumbler! It’s fun to coordinate her outfit with the background paper. I’ve watercolored this image, but she looks great paper-pieced as well!

Stay Hydrated and Fabulous Card: 

This card came together quite quickly. I used a MISTI stamp platform to stamp the image onto Canson XL watercolor paper. I inked the stamp image with Ranger Pebble Beach Archival Ink and stamped it off once onto scrap watercolor paper before stamping it onto my watercolor paper. If I happened to miss a spot, I would repeat the process. I like to use this ink when I’m painting people. This ink retains the fine details, is waterproof, and works well with skin tones. I also inked just the tumbler alone and stamped it onto a separate piece of watercolor paper to use later on this card.­­­­ I stamped the Hydrated sentiment onto this tumbler in Versafine Onyx Black Ink.

For her face, arms, and ankles I painted them with 850 and shaded with 912. For her pants, shoes, and sunglasses lens, I used N35 and shaded with N25. Her oversized shoulder bag was painted in 977 and shaded with 969. For her hair and earring, I used 025 and 026. For her white shirt, I shaded with a watery mix of N52 and a less diluted N52 for the darker areas inside her shirt. For her pink shirt, sunglasses frame, and lips I used 703. I added a little diluted 703 for her cheeks. For the background, I brushed in a watery mix of 526. I used 565 to add a shadow under her foot. With a 0 brush, I added white highlights to the lens of her sunglasses. I used a gray or black TwinTone to add back details where needed.

For the separate tumbler stamped image, I used 703 for the body. I then used a Silver Signo Gel Pen to color the brim/lid. I shaded the straw, lid, and tumbler with a small amount of 565. Next, I die-cut the painting with a rectangle die and also die-cut another slightly larger rectangle in black for a mat. I closely trimmed the tumbler image with a pair of scissors and used foam squares to pop-up the tumbler on the painting. The pink gingham background paper is from the 5892 – Easter S2 Paper Pack. All were attached to a black card base. I stamped the Liquid Therapy sentiment in Onyx Black onto watercolor paper and die-cut with a circle die from 5064 – Circle Double Stitched Dies and die-cut a mat from black cardstock with a scalloped die from 5543 – Journal Template Die Set and adhered to the card front with a foam square.For the interior of my card, I stamped the Stay Fabulous sentiment and the tumbler in Versafine Onyx Black ink onto watercolor paper die-cut with a rectangle die. I masked the edges of the body of the tumbler and stamped the animal print onto the tumbler, using Onyx Black ink. The tumbler was painted in the same way as the one on the front and adhered the rectangle to the inside of the card. This card is now ready to send to a girlfriend who needs to be reminded of just how fabulous they are! Now on to my next card…

Hope your Day is Magical Card:­­­­­

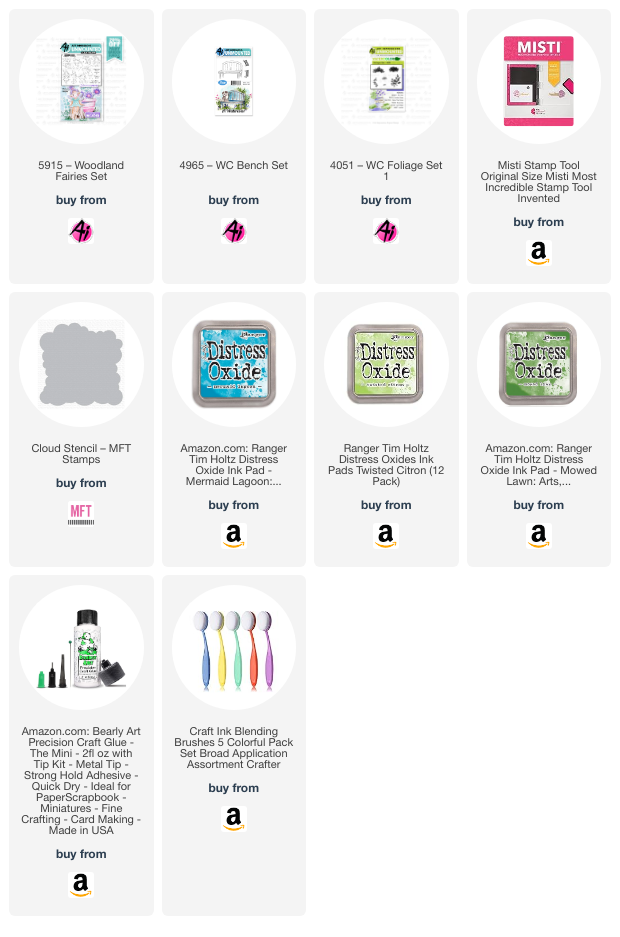
I think the new 5916 – Woodland Castle Set and 5915 – Woodland Fairies Set work great together to create a fun, whimsical scene. And they are super adorable sets with lots of options! This card was inspired by Bonnie’s recent Watercolor Wednesday LIVE video tutorial (Jun 12, 2024) showing how to place the wildflowers in the foreground to give your finished scene more depth.

I started by die-cutting a piece of Canson XL watercolor paper with a rectangle die. With the same sized rectangle die, I die-cut another rectangle from purple cardstock and then die-cut it again with a smaller rectangle to create a frame. I laid the frame on top of my watercolor paper and lightly traced the interior with a pencil to give me a boundary to paint within. Then, I masked off the edges with Post-it tape. I inked the large castle stamp from the Woodland Castle set in 969 and 565, and stamped it off once before stamping it onto my watercolor paper. With the castle now in place, I made a mask to place over it. Using the 5379 – WC Winding Scene, I inked the top two hillsides and the one on the right just below in N79 and stamped into place over the masked castle. With a pencil, I sketched in the remaining hills. Next, I inked just a portion of the curving road in N79 and stamped it into place at the castle doors to create a path/road.

First, I brushed in a watery sky with 526. I pulled some color from the image to shade the castle and add contours to the turret walls. Next, I inked the line of bushes stamp from 5372 – WC Mini Foliage Set in 177 and stamped along the top hills. With a damp No. 4 brush, I dabbed the bushes. With color from my palette, I added more 177 to the top hills and pulled some color from the bottom edges of the bushes. I did the same process for the next set of hills below, but used 249 this time. With 177 again, I painted in the grassy areas around the castle and added tiny grass to the hillside edge.

For the flowers in the foreground, I inked the daisy bunch from 4052 – WC Flower Set 1 in 993 and stamped in multiple bunches. I did the same with 526. Next, I dabbed the flowers lightly with a no. 4 brush. Before adding any more flowers or foliage, I painted in a light base of 177 below the daisy bunches. Once dry, I added tall grasses from 5007 - WC Foliage Set 3 inked in 177 along the bottom edge here and there, and kind of bounced the grass up and down as I stamped so they appear more random. Next, I stamped in the tall purple flowers from 4052 – WC Flower Set 1 inked in 636 for the flowers and 249 for the stems. Then I added the red flowers from 5008 - WC Flower Set 3, inking the flowers in 856 and the stems in 177 and stamped them here and there throughout the scene. I added foliage to the wildflowers throughout, inked in 249 or 177. I chose foliage from 4051 – WC Foliage Set 1 and 5126 – WC Foliage Set 4. I also stamped leafy vines from set 4051 inked in 249 to the top corners and center to look like leafy tree branches in the foreground. I dabbed all the flowers and leaves with a damp brush.

I used 526 to paint the turrets, roof edge, balcony, and door trim. The flags, turret edging, and doors were all painted with 025 and shaded with 026. The windows were painted with 565, and I painted a shadow along the top of the door. And with a mix of 565 and 969, I added color to the path. I inked the tiny vine from 5372 in 177 and added foliage around the castle edges and lightly dabbed with a damp brush. With Dr. Ph. Martin’s Bleed Proof White and a no. 0 brush I added frames to the windows and dabbed in some tiny flowers near the castle and some larger dabs of flowers among the wildflowers. I also added some white to the red flower centers. Once dry, I added yellow centers to the white flowers with the bullet tip of 993. I added a tiny bit of shading under the white flowers with 565. Where needed, I added some fine details with a brown or gray TwinTone marker.

With the painting now complete, I removed the tape from the edges of the painting and erased any pencil lines. I adhered the purple frame to the painting with foam squares. I attached the purple patterned paper from the new 5939 – Fairy Garden Paper Pack and the painting to a white card base. I stamped the “Hope Your Day is Magical” sentiment onto Watercolor paper and die-cut the circle and mat using the same dies from the previous card and attached them to the card frame. Added a little bling to the tag.
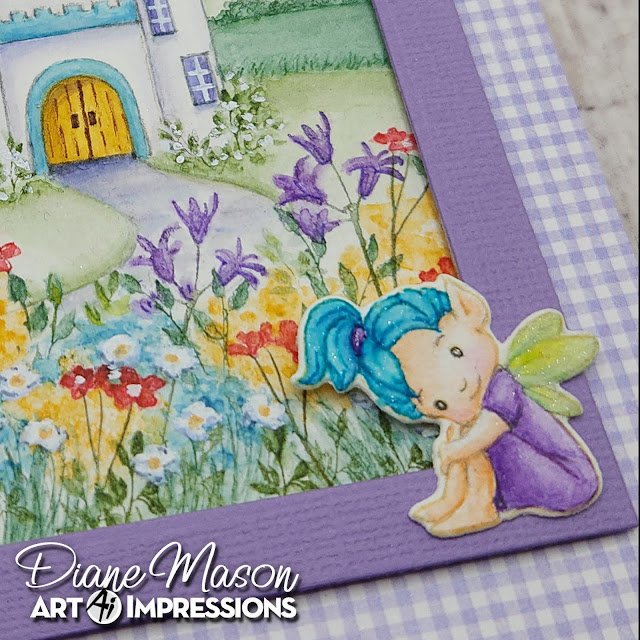

For the tiny fairy in the corner of the frame, I used Ranger’s Pebble Beach Archival Ink to stamp the image. I colored her skin with 850 and 912. I added a tiny bit of 703 to her cheeks. I used 526 for her hair and 636 for her dress and hair tie. I painted her wings lightly with 133 and 526. I darkened her eyes with a black Micron pen and brushed a little Spectrum Noir Clear Sparkle Pen onto her hair and wings to make them shimmer. After I die-cut out the little fairy, I attached her to the bottom edge of the frame.

For the interior of the card, I stamped the “Wishing you the best day ever!” sentiment and little fairy in Versafine Onyx Black Ink onto a rectangular piece of white cardstock and adhered to the card base.

I love how this sweet and whimsical fairy card turned out and I look forward to making more cards with these adorable new sets. Thank you for joining me for another Watercolor Weekend! Until next time, Happy Painting!
For the "Stay Hydrated" Card:

For the "Hope Your Day is Magical" Card:


Monday, July 15, 2024

Fairy thankful for you! by Sharon Caudle

 Hello AI Fans!


I have another magical card for you today. This time I used the Ta Da Diorama base for my fun, magical card. I love this die as it helps me easily create a wonderful diorama featuring all the amazing and magical images from Art Impressions! I used the Fairies from #5915 Woodland Fairies Set, that AMAZING shoe is from #5935 Fairytale Houses Set, and that gorgeous paper is from 5939 Fairy Garden PP!! The images were all stamped onto alcohol ink friendly paper and then colored with Copic markers which are listed below. This one is really hard to get good pictures of to show all the amazing dimension, so I hope you don't mind the ton of pictures I took to try and show you. But I LOVE that it folds flat for mailing! 


I put a butterfly onto a piece of acetate so it looks like it's floating about the Fairy's head and that's what she is looking at. 


Thank you so much for stopping for for a visit today, and until next time - stay crafty! 


Copics used:

E000, 00, 11, 30, 31, 41, 43, and 47

Y00, 35, and 38

B00, 01, and 02

BG02, 13, 15, 18, 32, 34, 49, 90, and 93

V01, 12, 15, 91, 93, and 95

G00, 21, 24, 40, and 43

R20, 81, 83, and 85

BV02, 04, 11, 13, and 17

RV10 and 11

W0, 1, and 3


Friday, July 12, 2024

Have a Magical Day Card by Tasha!

Happy Friday Friends!

Tasha here sharing a card inspired by the current Ai Challenge. The theme is Magical Creatures and I thought it was the perfect time to create with the new 5915 - Woodland Fairies Set!

I love fairies and when looking at the images included in this set, I just couldn't decide on which fairy to use, so I selected three for this card. To make a little scene, I stamped a bench and covered it with masking paper before stamping the fairy in the back. I just love masking!

Since I wanted it to look like the other two fairies were sitting on the bench, I used the included coordinating die set to cut them out and attached them to the card with foam tape. Don't they look so adorable, I love the little wings!


For the background, I used a cloud and grass stencil to make the ground and sky. I also used two Ai grass stamps to add more detail to the ground and attached several enamel flowers for extra color. 
Lastly, I attached silver paper, purple card stock, and a fun star pattern paper to complete the card. I hope you enjoyed today's project and will join in the Magical Creatures Challenge!


Thursday, July 11, 2024

Magical Creatures #382 Week 2

 Hello Ai fans and welcome to week #2 of our 
Magical Creatures challenge!


Last week, Lynn was our Featured Designer and she created this little beauty.
You can find links to products and her video tutorial HERE.


Dori's magical creation can be found HERE.


Sharon is hoping you have a magical day HERE.


Janet thought of something I didn't...Santa and his magical reindeer!
She used 5040-Sleigh Bells Set and one of my absolute favorite sets...


Plus...Janet's little pop up pocket makes her card 
perfect for our current Pockets Guest Designer Challenge!
You can enter more than one challenge to increase your chances
of winning a free stamp set.


Tasha has a summery HELLO from her mermaid HERE.
I also used the mermaid to create a thank you card for a little girl at school.
You can find links HERE.


Thank you to our incredible Design Team for all of the MAGICAL inspiration!
Amazing job ladies.
Now let's see what YOU create!
Remember, we pick one Top Spot and one Lucky Random Winner so
you have TWO chances to win a free stamp set!

Also remember, the July Throwback ends tonight at 11:59 PM PST.
Don't miss out!


✻ Please make a new card or handmade crafty creation. You can make any item you wish; this is not limited to cards!

✻ Limit two submissions per person. You will receive extra votes if you use Art Impressions stamps!
 ✻Please include your first name and last initial on your submission.
✻We love to comment on your entries, but keep in mind if you use a private group or a platform that you need to sign up for, we probably won't be able to.
✻ The Ai Challenge is open to everyone, international submissions are welcome!
✻ Include a link back to the Ai Blog or grab our button on the top right of our sidebar!
✻ Share the Ai love if you can, by clicking and commenting on your fellow crafters.
✻ Make sure to get your link up by the deadline to enter your creations.
✻ Good luck and happy stamping! 


You are invited to the Inlinkz link party!
Click here to enter