Showing posts with label 5939 Fairy Garden PP. Show all posts

Saturday, June 20, 2026

Furry Friends by Gennette Houghton


Hello, and Welcome to Watercolor Weekend!  I always love painting the animals that are in the Art Impressions line.  There are definitely some cute ones, yes mice are cute! LOL! (Well they are!) I also love all things rustic, which is where I went with my first card.  

I started out with a piece of watercolor paper and stamped in the pitcher from 5123 WC Decorative Jar Set, with Distress Ink in Pumice Stone, I also used this on the pot and mouse.  Being that this set is rubber, I stamped off twice first.  I then masked the pitcher before stamping in the 4869 WC Small Container Set, I also stamped this one off twice before using my stamp positioner to put on my project. I then added the mouse from 5599 Mini Mice & Squirrel Set, this one I only stamped off once and also used the positioner.  For the pitcher I used a mix of 565 and 969 to put in the base color leaving a highlight in the middle, then a put a light wash of 249 in for a bit of patina.  947 is my go to for rust, and I put this in various places, darkening some spots.  If you want a more deteriorated look add a bit of 969 to make it look like the rust is eating through the metal.   I also used 947 on the little pot and shaded with 969, this was also used to create the crack in the rim.  For the little mouse I started with N79 as the base and shaded with N57, I then added a light wash of 969 to get the variation in his coat.  I used a black micron on his eye and added a bit on his nose.  I then put in some 177 on the ground, darkening it around the pitcher and pot and I used 403 for the sky.  

I masked off the pitcher again to put in the foliage and flowers.  I started with 5919 Long Stem Floral Set and my stamp positioner.  I also stamped these in Pumice Stone and stamped off twice.  I then used masking fluid on the flowers because I wanted them to stand out when I was done.  6055 Water of Life Set has some long grasses that I used in 192, using my brush I added curls to the ends of some of the blades.  I then put in the long purple flowers from 4052 Flower Set 1 in 676.  I added a small leaf sprig from 5007 WC Foliage Set 3 darker towards the base and stamped the lighter ones towards the top. I also added them on either side of the pot and pitcher in 177.  I blended some of the foliage and flowers a bit to fill in the white spaces, adding extra color as needed so the Bleed Proof White would show.  I then rubbed off the liquid mask and put 055 and 025 in the centers of the 3 flowers and added 407 to the petals and 126 to the leaves.  I then added the BPW in various sizes.  I matted my card base with 5939 Fairy Garden Paper Pack and cut out a purple frame with a die from my stash.  I traced this die over my image, on both the inside and outside so I knew where I needed to cut this down to fit behind the frame and glued these 2 pieces together before mounting on my card.    


For my second card I tried channeling my inner Michelle, IYKYK.  If you don’t know, Michelle H. is an extremely talented artist and has a knack for whimsy.  I came up with this idea from a picture I had seen on Pinterest, if you ever struggle for ideas, the internet can be a good source of inspiration.  With the exception of the foliage, I used Distress Ink in Pumice stone, stamping each one off first before stamping onto my watercolor paper.  5465 WC Cliffs Set was used first, leaving the top back line off.  I then used a stamp positioner to put in the cat from 4873 WC Cats Set, and the left wings of the butterfly from 5200 Butterfly Set.  The 4th from largest in the 5063 Rectangle A2 Double Stitched Dies was used as a guide around my project.  I started with the rocks using a mix of 565 and 969.  I then added in touches of 969, 565, 526, 676, and 725.  For the side of the cliff I used 969, darkening areas for dimension.  For the ground and top of the cliff I used 177, darkening the areas that would be in shadow.  

For the cat I shaded her with 565, and used a black micron on the eyes and nose.  Adding a bit of 772 in the ear with some Bleed Proof White for a little bit of hair coming up in front of the ear.  I played around quite a bit with colors for the wings, I ended up using 850 for the base, contouring with 703, and shading with 725.  I also used 725 to create a bit of scrollwork in the wing that I went over with a bit of Wink of Stella, I also added this to the 2 purple areas in the rocks.  I added in 403 for the sky, and then used 5007 WC Foliage Set 3 for both the vine and the grasses, both in 177.  

I touched the leaves with a damp brush to soften and pulled some of the color up out of the grass.  I erased my guidelines and used the same die to cut out my project.  I matted this with a dark burgundy cardstock that I also used to mat the piece I ran through an embossing folder.  I matted my card base with paper from 6082 Bible Journaling S1 Paper Pack.  I popped up the image with foam tape over the embossed panel, to finish off my card.  I hope you enjoyed my projects today, thank you for joining me.  Until next time.  Create….Share….Inspire!


Saturday, May 9, 2026

Mother's Day Tulips and Hi Honey! Bear Frame by Diane Mason

Hello, and welcome back for Watercolor Weekend! 

Hello, my Ai watercolor friends and fans — I’m so happy to be back! My lovely daughter was married last weekend, and it was such a beautiful celebration for our whole family. With the help of guest designers Kristen Brown and Julie Worthing, I was able to take some time off in April to finish up all the wedding preparations. I’m so grateful to these very talented ladies for stepping in and sharing their creativity while I was away.

Now that the festivities have wrapped up and life is settling back into its rhythm, I’m excited to jump back into the studio and share two new projects with you today. First is a Mother’s Day card featuring the newly released 6186 – FG Tulip Border. The second is an adorable honey bear frame using the 6170 – Exclusive Honey Bear 2026 Freebie.

Mother's Day Tulips Card:

Happy Mother’s Day weekend to all the amazing moms celebrating this Mother’s Day!

The new Countryside Series includes two structure sets and three floral foreground border sets. These fabulous new sets make it easy to create endless mix‑and‑match watercolor scenes. You can use the Euro Cottage Set or Swiss Villa Set as your background focal points (or any other small structure that fits), then layer tulips, poppies, or daisies in the front to create depth.


For my card, I used 6186 – FG Tulip Border. Each floral border set includes a sentiment, but since this was a Mother’s Day card, I chose the sentiment from 6039 – Just For Her Set.

Using a stamp platform, I inked the tulip border stamp in 177 for the stems and leaves, and 603 and 743 for the tulips and stamped onto Canson XL watercolor paper.

Colors and supplies used:

Tombow Dual Brush Pens: 

  • 177, 177+565 – leaves and stems
  • 603, 606 – purple tulips
  • 743 – pink tulips
  • 555 – sky

Tombow TwinTone Pens used for details:

  • Fuchsia (80)

Dies: 

  • 5065 – Oval Double Stitched Dies

Patterned Paper: 

  • 5939 – Fairy Garden Paper Pack (purple gingham)

Other:

  •  foam squares
  •  purple cardstock
  •  white organza ribbon

Hi Honey! Bear Frame:

How darling is this sweet little Honey Bear? To create this honey-themed framed scene, I used the frame die from 5901 – Mini Rectangle Frame Dies and the oval dies from 5902 – Mini Scalloped Frame Dies. I love how elements from each set work beautifully together.

The honey bear is one of six brand-new 2026 exclusive Art Impressions Freebies:

Using my stamp platform, I inked the 6170 – Exclusive Honey Bear in Versafine Onyx Black Ink and stamped onto Canson XL watercolor paper. On another piece of watercolor paper, I stamped the honeycomb from 5925 – Honey Bee Set in Versafine Vintage Sepia twice — once in the top left and once in the bottom right.

Colors and supplies used:

Honey Bear: 

  • 947 – bear
  • 856+947 – cheeks
  • 025, 985 – honey pot
  • 526 – honey pot lid
  • 025 – bee body
  • 526 – bee wings
  • 177 – grass (4051 – WC Foliage Set 1, Teeny Tiny Grass)
  • 555 – sky 
  • Dr. Ph. Martin’s Bleed Proof White - highlights on nose and eyes

Honeycomb: 

  •  985, 026 – honeycomb framework 
  • 025, 985 – honeycomb cells

Dies:

  • 5901 – Mini Rectangle Frame Dies
  • 5902 – Mini Scalloped Frame Dies

Paper for frame:

  • Coordinating Yellow cardstock


The die set includes a stand piece to keep the frame upright. The sentiments are from 5925, stamped in Versafine Onyx Black. This sweet little frame is perfect for gifting or slipping into a card to brighten someone’s day!


Thank you for joining me today for Watercolor Weekend. I can’t wait to see what you create with the new Countryside Series! When sharing your work, be sure to tag Art Impressions on social media. Until next time, Happy Painting!


Saturday, April 25, 2026

Fresh Flowers For You by Janet


 Happy Saturday everyone! I'm in such a mood for spring so it's a good thing there are so many great Art Impression sets to explore the season with! Here I've had a great time exploring coloring with pencils and watercolor using the new 6196 - Fresh Flowers stamp set. 

Those of you who see my work here each week, know that I almost exclusively use markers but this set and the other five sets in this line have inspired me to try using two coloring mediums that I'm not very experienced using. Is this perfect? Absolutely not. But I had a wonderful experience using something out of my comfort zone and overall, I'm happy with the result. I hope you agree. 

Sometimes we are afraid to do something we haven't done before. Believe me, there were moments when I was tempted to quit and give up. I was critical of my technique and my skills. But you know what? Art and expression is about the journey not perfection. I'm so glad I didn't quit!

After finishing my coloring, I used a die from 6047 - Scalloped Squares Dies to cut it out for my card. I cut a larger scalloped lace border with the largest die from the set and mounted the two pieces together. I backed this with a slate blue glimmer cardstock. Then I mounted that on a piece of glimmer pink cardstock before mounting the stack on a 5 x 5 square card base. I added the sentiment from the set and I used a gold Signo pen to draw a dash dot border around the card edges. I used a white Signo pen to add some highlights to the canopy and flowers. Finally I added a pink satin bow to the corner.

Thanks for joining me on the blog today. I hope I've inspired you to try a technique that's outside your comfort zone. You might discover something that surprises you!

Please stop by the Ai store. You'll find your favorite stamps, dies, papers, and accessories at the Ai Store!

Happy Crafting!

Saturday, January 31, 2026

'Cause We Need A Little Sunshine Right Now by Janet

Hi Art Impression fans! It's cold almost everywhere right now, so I hope you are all staying safe and warm out there. Spring is coming though it's hard to believe it by looking at the thermometer lately!

If you have the winter blues, Art Impressions has a way to kick it to the curb with the many spring sets they have in their collection. One of the newest just landed this week. I used it on my side-step rocker card and it's called 6106 - Spring Keepsake Set.

To make this card, I used a template to create the card base. Then I cut mats out in dark purple and a patterned page included in the 5939 - Fairy Garden PP.

This one just begged for a bird and a few butterflies so I made them with the ever handy 5561 - Birds and Bugs Set. I also colored and cut the pot, flowers, watering can and bunny from the new Keepsake set. Then I placed them on the card using foam pads behind the bunny, watering can and bird. 

One fun thing about this set is that the pot die cuts a slice at the top. This allows you to slip in the flowers or even the bunny into the pot. Also included is a frog and a duck which can also be posed to be in the pot. So cute and there's lots of possibilities with this one!
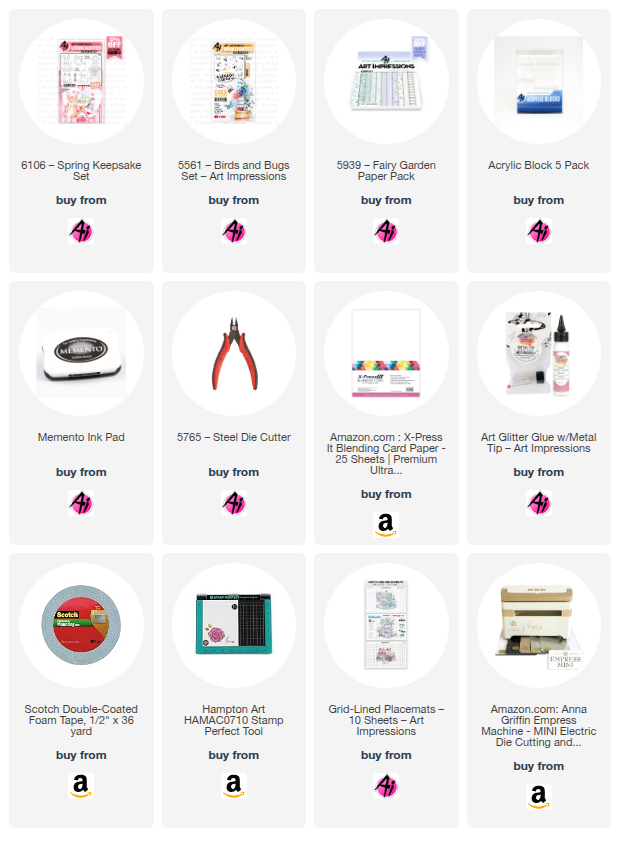
The side-step rocker card is 3" x 6" so I needed to make an envelope for it. Rocker cards are fun to make and a little unusual. This one is sure to make it's recipient have a little more sunshine in their day. 

Thanks for joining me on the blog today. As always, find your favorite stamps, dies, papers, and accessories at the Ai Store!

Happy Crafting!

Janet YouTube - Blog - Facebook - Instagram - Pinterest  

Monday, July 28, 2025

Let Them Eat Cake Challenge by Sharon Caudle

 Hello AI Fans! 

Today I have a card that is for our current challenge which is Let Them Eat Cake! I chose to use one of the new Match Book sets. The Match Book line is so cute and FUN!! I just love all the fun that is packed into such a tiny little package! I started off with #6013 MB Bakery. I stamped the images onto Copic friendly paper and then used the colors I've listed below. For the front of the envelope, I featured a piece of cake from #5793 Mini Journal Birthday Set. If you haven't created something for the challenge yet, you still have some time left! You could win a free stamp set of your choice and who doesn't love free??!! 


So that's it for me today! Thanks so much for stopping by for a visit and until next time - stay crafty!!

Copic markers used:
E21, 23, 25, 31, 33, 35, 39,40,41, 43, 51, 53, and 55
BV0000, 000, 01, 02, 04, 13, and 17
RV00, 02, 32, and 34
R20, 22, 24, 81, and 83
B000, 00, and 02
T1 and 3


Thursday, July 17, 2025

Gardener Gail by Dori Mendiola

 Happy Thursday AI Friends!

WOW! WOW! WOW!  Have you seen the newest AI release?  OMGosh this release has got to be the best EVER!  I just LOVE the girlfriends line and this is right up that alley.  Add the papers to go with and WOW!  Bonnie and Joel knocked it out of the park with this release!
Picture a happy dance right now!!  Sorry, no video attached.  LOL!

My card for today uses #6076 - Gardener Gail.  These AI People are so fun to color and they are a great size (about 3 1/2 inches tall).  And the best part, they come with corresponding dies!  
I stamped each of the images onto copic friendly paper with Memento black ink and colored with my copic markers (colors listed below).  The bee and flowers come from the #5925 - Honey Bee stamp set and the papers are from two different paper packs - #5742 - Easter PP and #5939 - Fairy Garden PP.  
The watering can with the little flower is from the #5336 - Garden mini dies.  These mini dies make such a cute little addition to any card.  I love them as a simple accent or a charm hanging from a bow.  Adds a perfect extra little touch.

Make sure to check out yesterday's watercolor wednesday video  to see and hear all about the other sets.  Also, make sure to visit this blog daily for other inspirations.  There will be many more posts for these as well as other available sets.

Thanks for joining me today!  Hope you have a wonderful weekend and enjoy creating!

Copics used:  E000, E00, E11, E21, E23, E25
E51, E53, E55
N1, N3, BG32
 R20, R22, R24
Y11, Y13, Y15, YR65, YR68
YG41, YG61, YG63


Friday, May 16, 2025

Happy Birthday Grandma! Card by Tasha

 Happy Friday, Art Impressions friends!

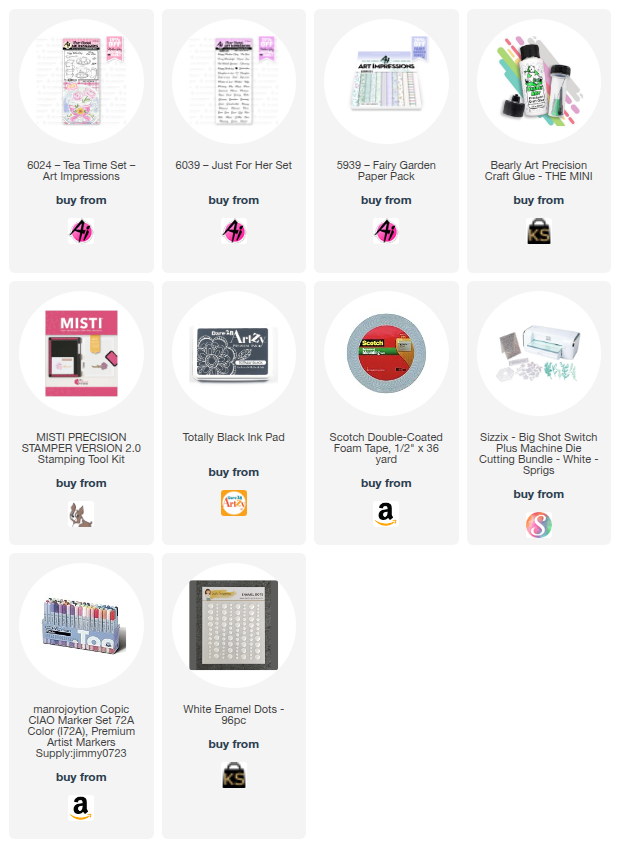
Tasha here sharing a fun birthday card inspired by the current Art Impressions challenge. For this card, I used the new 6024-Tea Time Set and 6039-Just For Her Set to create something sweet for a special grandmother.

I started by stamping the stacked tea cups and had a great time coloring them in with markers. I added different designs to each cup using shades of blue and green, and of course, some highlights with my favorite white gel pen; I love my gel pens! Once everything was colored, I used the coordinating die to cut the image out.

For the sentiment, I stamped “Happy Birthday” and “Grandma” with black ink onto white cardstock. To give it a little extra flair, I matted the greeting with gold glitter paper; because a little sparkle goes a long way!


To bring in more color, I added layers of blue and cream cardstock along with a piece of patterned paper from the Art Impressions 5939-Fairy Garden Paper Pack. I finished the design with a few white enamel dots before adhering the card to a white card base.

I hope you enjoyed today’s project and feel inspired to join in the challenge. Thanks so much for stopping by, and have a crafty weekend!


Monday, April 28, 2025

Welcome Little One by Sharon Caudle

 Hello AI Fans!


Art Impressions released the absolute cutest Baby Panda set I think I've ever seen! And who doesn't love Pandas?? And it was perfect timing for the new challenge that started last Thursday, Un-Bearably Cute!! So you can enter to win a free stamp set of your choice, just use any bear at all on your card or project! I chose to use 6017 Baby Panda Set. Since I don't have the beautiful new baby papers that were released along with this adorable set, I chose to use 5939 Fairy Garden PP. I stamped all the images onto Copic friendly paper and then colored them up using the markers which I've listed for you below. 


So that's it for me today! Thanks so much for stopping by for a visit and until next time - stay crafty!!

Copic markers used:
B91, 93, and 95
C1, 2, 3, and 4
R20, 81, 83, and 85
G40, 43, and 46
E33
BV00, 01, and 02


Saturday, April 26, 2025

For Mom by Janet Axtman


It's always a treat to discover unexpected versatility in our stamp sets! While putting away my Easter supplies, the lovely lily from the 6029 - Easter Lilies Set caught my eye with its potential for a Mother's Day card.

Inspired by a similar circular background created by Tina Smith, my card began with cutting nine 1" circles using the 5724-Nested Circle Dies. One of these circles was then cut in half. To add dimension, I gently brushed the edges of each circle with Victorian Velvet and Shaded Lilac Distress Oxide inks, creating a soft two-toned effect.

Next, I selected a piece of lilac polka dot cardstock from the 5939-Fairy Garden PP, cut to 3 1/4" x 4 1/2" with a die from 5726-Nested Rectangle Set. This was adhered to a white A2 card base, leaving a consistent 1/2" border.

The circles were then arranged onto the polka dot panel using foam tape for added lift. Starting with the center row and working outwards allowed for even spacing. The half circles were positioned on either side of the middle row. I appreciated the small border Tina left before the circles began, a detail I incorporated as well, enhancing the overall background.

Before focusing on the lily, I used the new 5910-Large Letter Die Set to cut out two M's and an O for the "Mom" sentiment and set them aside.

The elegant lilies in a vase image from the Easter set were then stamped and colored with Copic markers. After carefully fussy cutting the image, I arranged it on the circular background along with the die-cut "Mom". Finally, I scattered lavender, iridescent, and gold sequins across the card for a touch of sparkle.

Thanks for joining me here today. I hope you enjoyed seeing how I created the background using circles and big letters. Please make a visit to the Ai Store this weekend for all your card making needs and don't forget to image all the different uses a stamp set can have to extend your dollars and collection.


Janet YouTube - Blog - Facebook - Instagram - Pinterest 

Friday, April 11, 2025

Easter Blessings! Card by Tasha

 Happy Friday Art Impressions Friends! 

Tasha here sharing a new Easter card featuring the sweet 4886K-Easter Blessings Set. The bunny stamps included in this set are so cute and have a whimsical look that I love.

To begin, I stamped the bunny with the tulip on to white paper to start creating the Spring scene. After stamping, I used Copic Markers to color the grass and sky before attaching little white clouds. It's hard to tell in the photo, but I used foam tape on one cloud to raise it up a bit. 

The greeting "Easter Blessings" was also included in this set and I used a small scissors to cut around the letters. This greeting fit perfectly in the center of the card and I like the handwritten lettering.


To complete the card I added two little Easter eggs to go with the theme and attached layers of pastel colored card stock, and a piece of Art Impressions floral pattern paper. This paper is so pretty and I love the purple flowers!

Thank you for checking out today's card and I hope you are inspired to create an Easter card using the 4886K-Easter Blessings Set!

Have a wonderful day!


Saturday, April 5, 2025

Young At Heart by Janet Axtman

The Ai Laugh Line sets have fun characters that are perfect for putting in scenes created by papers and inks. Today I've made a fun indoor scene using the 5422 - Rock On Laugh Lines stamp set. 

To create the interior background for this gleeful lady, I used a flowered paper from the 5939 - Fairy Garden Paper Pack. I made a window using the frame in the 5408 - ShadowBox Window Die. For the view through the window, I used a small scrap piece of swirly blue and white paper from my stash. Then I created a window valance out of a dark purple polka dot patterned paper also in the same paper pack. I stamped the sentiment from the Rock On set on the valance and attached it over the window with foam tape. 

I got to work on the lady by first stamping her and the chair image. Then I made a mask to cover the bottom of the chair so I could stamp and color the wood floor. Once I got everything colored, I fussy cut her and the floor out as one piece. I added a strip of white cardstock to the floor to create a baseboard. Then I glued the lady, chair, floor and baseboard section below the window and "wallpaper." To finish it, I trimmed the excess floor and baseboard that extended over the piece that represent the wall of the room and then glued this piece on an A2 sized black card base.

This card meets the criteria for the current challenge, Milestone Birthdays. We are celebrating our 400th challenge on our blog. Isn't that amazing! To make it special, there will be 5 stamp sets given away for this challenge. I encourage you to submit your own birthday cards to our challenge post for a chance to win and celebrate this milestone with Ai and the Design Team! Just click on the link to enter your creation. We love seeing what you make! 


Janet YouTube - Blog - Facebook - Instagram - Pinterest