Showing posts with label WC Little Girls Set. Show all posts

Saturday, July 20, 2019

Watercolor Weekend Roundup - World Watercolor Month Continued!


Have you been making extra watercolors this month? July is World Watercolor Month (#worldwatercolormonth), so let's celebrate! We all know practicing is so important to build your skills. But it can be so fun, too! Join us in a watercolor adventure by sharing your artwork with hashtag #aiwatercolorchallenge on Instagram, along with Bonnie (@bonniekrebs.biblejournaling)! Ok, inspiration time! Let's see what the design team made especially for today!

Dot Freel - Instagram - Blog - Pinterest
Hello Friends,

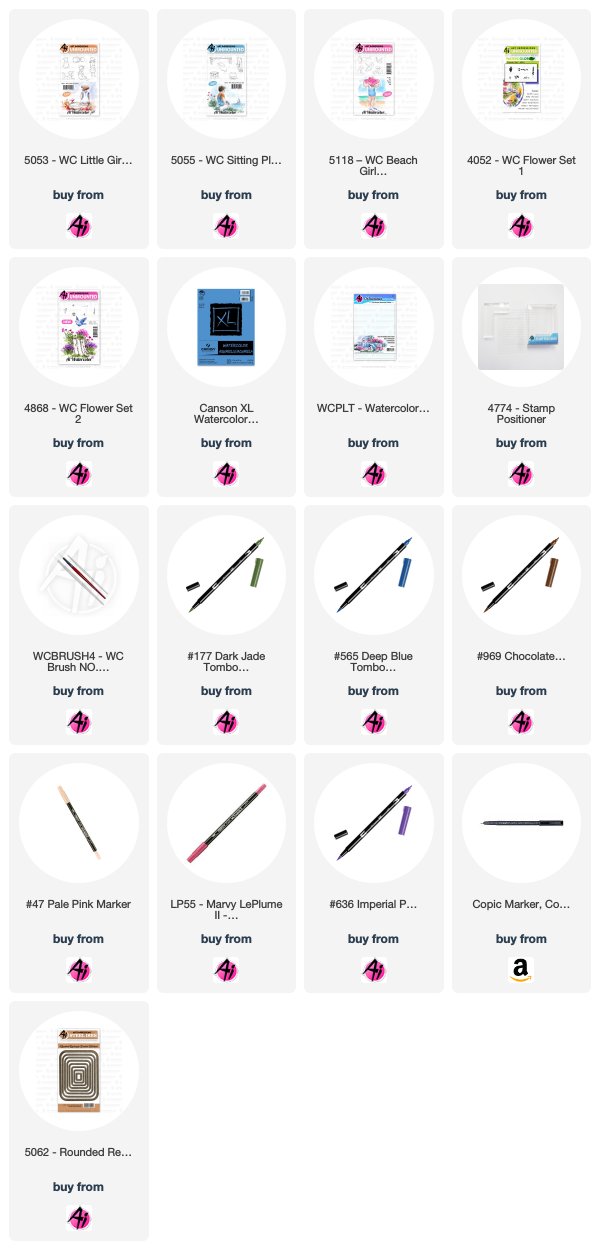
I made this card using Art Impression's stamps for the Watercolor Weekend. I stamped the little girl in 969 from the 5053 - WC Little Girls Set and stamped her off on a piece of scratch paper then stamped her on my watercolor paper. I used the stamp positioner to stamp the bench also in 969 from the 5055 - WC Sitting Places Set. I pulled the color out of the lines, then I watercolored the skin in with No. 47 pale pink, her cheeks in No. 55 iris purple, her hair in 969 and her overalls and headband in 603. I used 67 bubble gum pink to paint stripes on her shirt. I used 158 to watercolor the bench. Next, I stamped the umbrella in 969 from the 5118 - WC Beach Girls Set. I used a ruler and the Tombow twin tone brown fine tip pen to extend the umbrella pole under the bench. I pulled the color out of the lines then colored the umbrella in 158, bubble gum pink and 636. I stamped the small grass with 177 from the 4052 - WC Foliage Set 1 and pulled the color out and up. Then I stamped the flowers in 177, 636 and 55 iris purple from the 4868 - WC Flower Set 2. I used 565 to watercolor the sky and add some shadows under the bench. I used the 5062 - Rounded Rectangle A2 Double Stitched Dies to cut out the scene and background pieces then adhered them all to a card base with double sided tape. I added my name and date to the corner and drew the eyelash with a very fine black pen.


Karen Day - Blog - Facebook - Pinterest
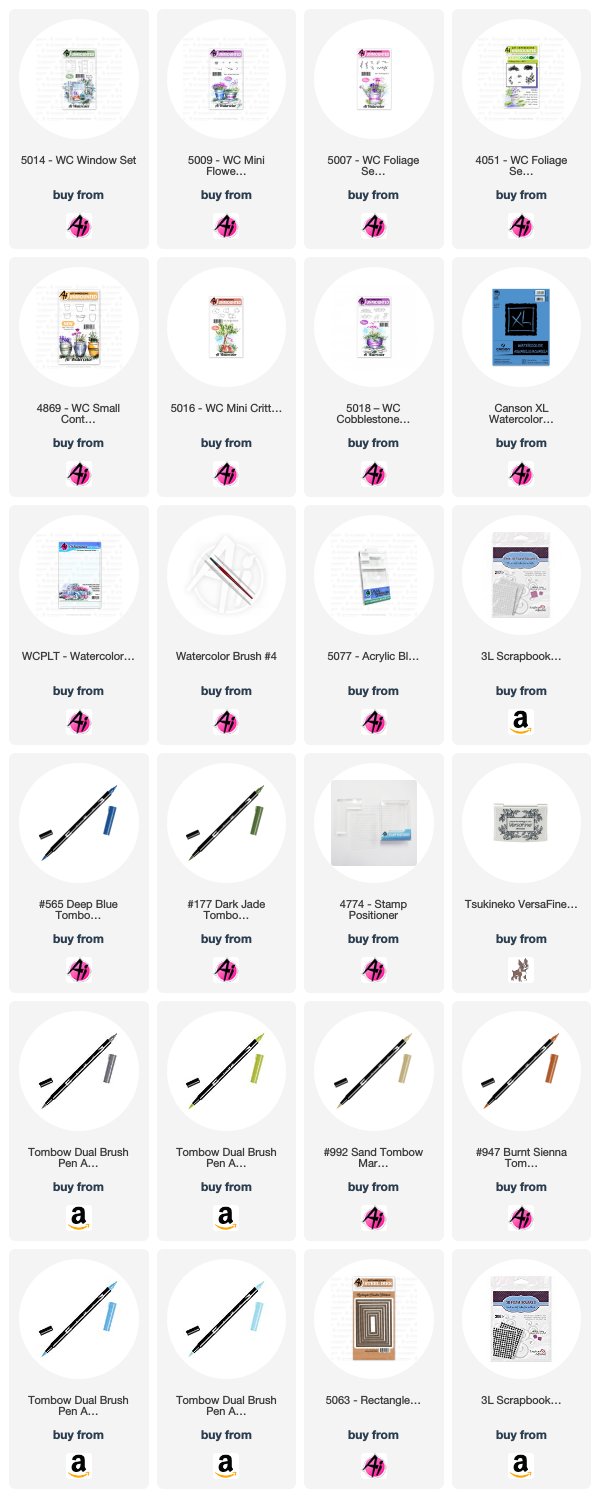
Today I'm featuring the 5014 WC Window Set. The base is cut with a 3 1/4" x 4 1/2" stitched rectangle die, from Canson Watercolor paper, and I started by colouring the smaller window in the set with my N55 Cool Grey 7 Tombow marker, stamping it about 3/4" down from the top edge. Still using the N55, I stamped the kitten from 5016 WC Mini Critter Set on the window sill, and the pot from 4869 WC Small Container Set about 3/4" below the window. I masked off the pot, and stamped the bricks from 5018 WC Cobblestone Set with N55. With the fine point of the marker, I sketched in the curtains directly on the paper. (If you're nervous about adding details with a marker, use a pencil to get it exactly as you like, first!). I used my damp #4 paintbrush to pull the colour out of all the lines, dragging it towards where the shadows would fall. I scribbled 992 Sand onto my palette, and painted it in streaky strokes to suggest weathered wood on the shutters. I used 947 Burnt Sienna to add colour to the kitty, and the terra cotta pot, going in a second time to add another layer of colour where the shadows would be. With 177 Dark Jade and a sprig from 5007 WC Foliage Set 3, I created the vine leading up from the pot, through and over the shutters, adding a few smaller sprigs using the tiny greenery in 5009 WC Mini Flower Set to fill in a few areas. With 533 Peacock Blue/177 Dark Jade I coloured the floral cluster from the Mini Flower Set and added it to the pot. With the tiny dotted flowers from the set, and the 533 marker, I put clusters of flowers throughout the vine. I dabbed all the foliage with my damp brush to soften all the lines. With the tiny grass from Foliage Set 4051, and my 126 Light Olive, I added grass around the pot & cobblestones, then pulled out the colour to add a suggestion of a grassy area on the ground. I picked up 565 Deep Blue from my palette to paint in the shadows on the window, around the shutters and cobblestones to add a little depth to my scene. You really can't see it in the photos, but there is a faint wash on the wall of 491 Glacier Blue, which softens the look of the wall quite nicely.

Tricia O'Bin - Blog - Instagram - YouTube - Pinterest - Facebook
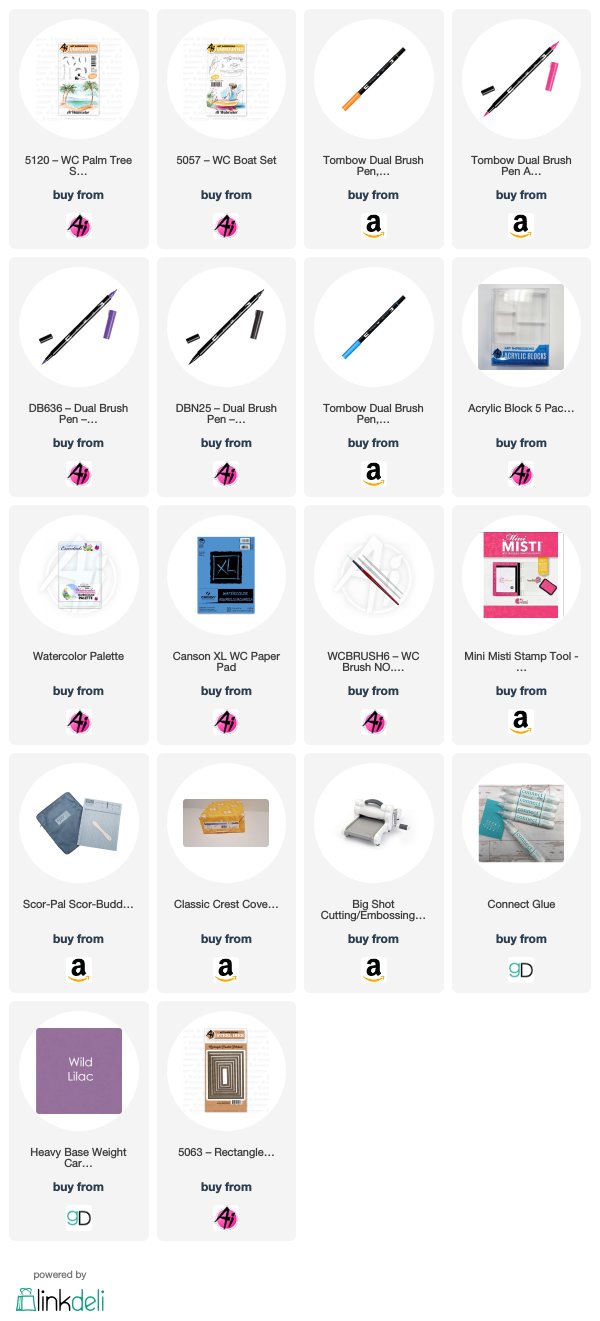
Hi AI Fans, welcome back to Watercolor Weekend! I decided to try out a design that I fell in love with when I was young. We used to go to the beach and they had a guy who airbrushed license plates, shirts, hats etc. This was a design that I just loved and always wanted so I decided to re-create it using my AI watercolor stamps. I call it Silhouette Stamping. It was so easy and fun, I hope you will give it a try.

Here is how I did it!

I began by adding PINK to my palette. I added water and painted from the horizon line up sporadically using a horizontal brush stroke. I left lots of white space. I added another layer of PINK to it. Once that dried I repeated the same steps with the YELLOW, PURPLE and GRAY. 

I added BLACK to the horizon line with my paint brush. I added water to my PINK, YELLOW, PURPLE AND BLUE and painted a light wash of each color for my reflection in the water below the horizon line. I made the YELLOW a little darker near where the sun would be. 

Once that was completely dry, I inked up the large palm tree with BLACK ink. I stamped it below the water. Using my brush, I pulled the color out of the left side of the tree to create dimension. I re-inked the stamp and stamped it again to the right of that tree, angling it so the tops weren’t too close. I again pulled the color out of the left side of the tree.

Using the left and right palms, I inked them up using BLACK ink and stamped them several times on each side of each tree. To create the palms closest to the tree trunk, I only inked the end of the stamp. I used a damp #2 brush to pull the color out of each of the palms using a brush stroke.

I added BLACK to my palette and created the sand using a horizontal brush stroke. I put the sailboat on my small acrylic block and inked it up with BLACK ink. I stamped it off once and then stamped it into the middle of my sky. Using my #2 brush pulled a small amount of color from the left sides of the sails and the bottom. I also added some black beneath the boat for a shadow. Finally, I signed and dated it.

Once the painting was complete, I cut it out using my Stitched Rectangle Die. I added it to a 4.25 x 5.5 inch card made from Gina K Designs Wild Lilac cardstock with GKD Connect Glue.

That’s it, easy peasy! Tag us on Instagram and let us see what you are up to!

Have a crafty day!

Don't forget to leave a comment to tell us what you like about these projects! Also, remember to join the fun with our #aiwatercolorchallenge!

Happy Stamping!

Saturday, February 2, 2019

Watercolor Weekend Roundup - Love Cards!


Hello, Ai Watercolor Fans! We have three lovely projects for you here on the blog with our fabulous watercolorists! Enjoy a slice of spring featuring flowers, children, windows, and a whole lot of LOVE!

Dot Freel - Instagram - Blog - Pinterest
Hello Watercolor Friends,

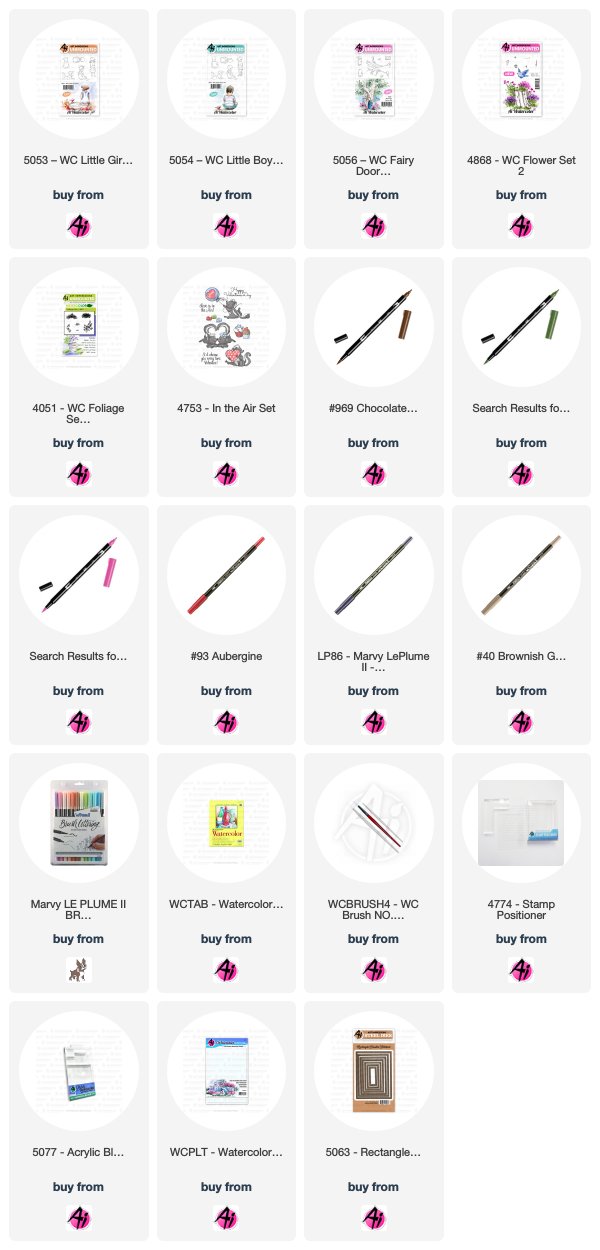
I made this Valentine's Day card for the Art Impressions Watercolor Weekend. I stamped the little girl from the Little Girls set and little boy from the Little Boys set in brownish grey. I feel it doesn't spread much when you add water so it's pretty perfect to use for the kids. Then I colored the little girl and boy's skin in from the palette using pastel peach. I used 725 to watercolor in the hat and shorts on the little girl and African violet to color in the boy's overalls. I colored their hair from the palette using 969. I added stripes to the boys shirt using 177. I stamped in the tree trunk from the Fairy Door set with 969 then stamped in the leaves using 177. I pulled the color out of the lines and added more 969 to the trunk of the tree from the palette. I added grass from the Foliage Set 1 and pulled the color out of the lines with a wet brush. I stamped the flowers from Flower Set 2 using the 177 for the stems and aubergine for the flowers. After I added water, I ended up re-stamping just the flowers again because the flowers washed out too much and I used the tip of the 177 to draw in more stems. I added a lot of water to some African violet on the palette and colored in the sky and the shadows under the kids on the ground and on their white shirts. I used the sentiment from Love is in the Air stamp set by only coloring the "Happy" in 969, then I cleaned the stamp and only colored in the "Valentine's Day" with the 969 so it would all fit on the bottom. I used aubergine to paint in the little flowers on the girl's shirt. I used the Rectangle Stitched Dies to cut out my picture and a background piece, then I glued it all to the card base. I finished it all off by glueing on the three sparkly hearts.

Tricia Kennedy - Instagram
I decided a spring scene was the perfect project for today’s Art Impressions Watercolor Weekend since it’s been soooooooooooooooooo cold across the country. Perhaps this will warm everyone up!?!

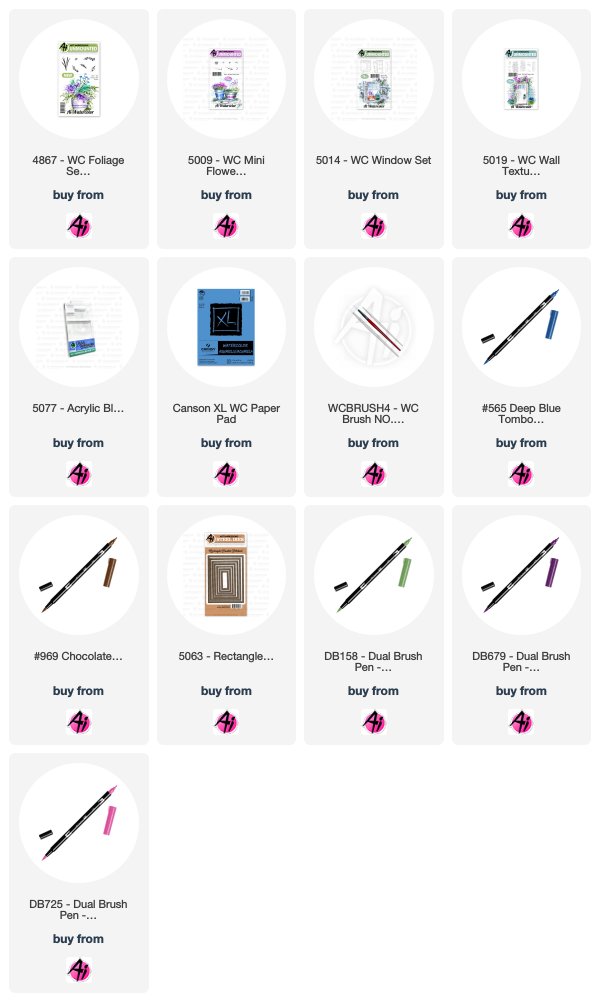
Begin by inking up the window from 5014 WC Window Set with a combination of 969 Chocolate and 565 Deep Blue to create a lovely greyish color (I did not ink up the shutter). Next ink the foliage from 4867 WC Foliage Set 2 in 177 Dark Jade for the greenery at the bottom of the window and 158 Dark Olive for the greenery at the top of the window. Watercolor the Art Impressions way by pulling the color from the lines with your paint brush and water. Stamp in the tiny cone shape flowers from 5009 WC Mini Flower Set in 679 Dark Plum and the long stem multi flower in 725 Rhodamine Red (not pictured in photo) and 177 Dark Jade. Finally stamp a portion of the bricks from 5019 WC Wall Texture Set in the same greyish combination of 969 Chocolate and 565 Deep Blue on both sides of the window. I die cut the piece using 5063 Rectangle A2 Double Stitched Dies. I opted to put it on the cute little clip frame, but it would be great on the front of a card.


Tricia O'Bin - Blog - Instagram - YouTube - Pinterest - Facebook
Welcome back watercolor fans! Today I am sharing a scene I created using some watercolor stamps from Art Impressions as well as a non-watercolor set. I wanted to create this Love Is In the Air card using all types of “couples”. These little animals were so cute! I did a video so you can create your own masked scene. If you want to watercolor along with me, click here.

Step 1 – The Animals
First, I inked up the rabbits up with the Tombow 569. I stamped it to the bottom left side of my watercolor paper. Next, I inked the mice up with the 969 and 569 which creates a nice gray color. In order for them to be a little lighter, I stamped it off first. Then, I stamped this into the middle of my watercolor paper. Finally, I inked the chipmunks up with 969 and stamped it on the bottom right hand side of my paper. I placed masks over each of the animal pairs. 

Step 2 – The Kids
Using the mask I created for the pier, I placed it so I could determine where to stamp the boy and girl. In order to get them placed where I wanted them I used my stamp positioner. I removed the mask stamped the little girl on the right. I replaced the mask and positioned where I want my boy to sit on the pier, I removed the mask and stamped him down. I added masks to the girl and boy.

Step 3 – The Pier and Birds
I stamped the pier behind the animals and underneath the kids. I masked it and then re-inked and positioned it to the left to extend the pier. I stamped each of the birds and positioned them to the left of the kids. 

Step 4 – Watercolor
I started by pulling the color out of the kids. Next, using just my brush and water, I pulled the color out of the birds. These birds are really small, so I try not to use a lot of water. If I don’t have enough water, I slowly add water until I am happy with the results.

Then I pulled color out of the rabbits. The 569 marker, much like the Marvy African Violet is very pigmented, I usually stamp it off. It only requires a very small amount of water to pull out the color. Once I soften those lines, I added additional color from my palette. On the bunnies, they are white so its important to just highlight the shadowed areas. 

I repeated with the mice, chipmunks and pier. Make sure to use the fine tip of the marker to darken in the eyes. I added some additional color underneath the kids for a shadow. I also added some 569 below the pier and animals to ground them.

Step 5 – Love
I lined up the word Love which I wanted to show behind the kids and birds. I placed it on a block and inked it up with 569. I stamped this down. From my palette, I added color to the kids. I pulled the color out of the words “Love”, only on the right side. I then added some 847 to each of the letters.

Don’t forget to sign your work, I keep doing that lately LOL. I am so happy you stopped by and I hope you give this a try. If you do, tag us on Instagram (#AIWatercolor, #AIStamps). 

INSERT

Check out the video on YouTube here: https://youtu.be/sOd4LtzGi_0

Tombow Markers – 969, 992, 569, 905, 847, 526, 990, 346, 676

Aren't these projects so cute? Leave a comment below to tell us what you think! If you aren't already following these ladies on social media, today is a great day to start, there is exciting inspiration ahead of us for spring!

Dot Freel - Instagram - Blog - Pinterest
Tricia Kennedy - Instagram
Tricia O'Bin - Blog - Instagram - YouTube - Pinterest - Facebook

Happy Stamping!

Wednesday, November 14, 2018

NEW VIDEO! Little Girl in the Snow Watercolor

Hello Ai Fans!

Welcome to another Winter Watercolor Wednesday (say that five times fast!). This week, Bonnie creates a little girl in a snowy field and an adorable blue jay with holly in its beak. This winter scene can be easily changed to one of our Little Boy images.

We love to always hear from you, leave a comment on the video and make sure to subscribe to our YouTube channel for notifications of our newest uploads!


View on YouTube: https://youtu.be/Gqkw6_nNFpQ


Saturday, October 6, 2018

Watercolor Weekend Roundup - Fall is Here!

Hello, Ai Watercolor Fans! Who's ready for fall? We have some great inspiration for you today featuring some our NEWEST products! We hope you enjoy this week's selection of projects from our Watercolor Guest Design Team!

Dot Freel - Instagram - Blog - Pinterest
Hello Watercolor Friends,

I was blessed with three sons and three grandsons. So the inspiration for my card for the Art Impressions Watercolor Weekend is a Fall fishing scene with my three grandsons - Conor, Caide and Charlie, using the brand new 5054 - WC Little Boys Set. Both the little boys and little girls are must have sets! I used the bucket and log from the brand new 5055 - WC Sitting Places Set for two of the boys to sit on. The trees are from the 5010 - WC Tree Set 1 and the 4960 - WC Fir Tree Set. I used the grass and tree foliage from the 4051 - WC Foliage Set 1. I made the fishing poles from the 4964 - WC Branches Set.

Other Supplies: Ranger Watercolor Paper

Tricia Kennedy - Instagram
My project for today’s Watercolor Weekend – “Petite Fille” (Little Girl).

Prepare your paper (I used a sheet from a French Dictionary) with watercolor ground, let completely dry. Stamp the darling seated girl from the WC Little Girls Set in Sepia. Mask her off with a post-it note and stamp the long stem flower from the WC Mini Flower Set in African Violet and Olive Green. Watercolor the Art Impressions way by pulling the color from the lines with your paint brush and water. Add a bit of Pink, Prussian Blue, Dark Brown and Rosewood to your palette. Brush the color onto the little girl. Add dot detail to the flowers and tiny hearts to her shirt. Stamp the grass from Foliage Set 1 in Olive Green. Scribble Salvia Blue onto your palette and brush in for the sky.

 Art Impressions Products: WC Little Girls Set,WC Mini Flower Set, WC Foliage Set 1, Acrylic Block 5 Pack, Stamp Positioner, Watercolor Palette, Watercolor Brush No. 4, Canson XL WC Paper Pad
Marvy Le Plume II Markers: 9 Pink, 15 Olive Green, 18 Dark Brown, 29 Prussian Blue, 30 Rosewood, 45 Sepia, 60 Salvia Blue, 86 African Violet
Other Products: Daniel Smith Watercolor Ground, Post-It Notes

Tricia O'Bin - Blog - Instagram - YouTube - Pinterest - Facebook
To start, I inked the small grass from the Foliage Set 1 with Olive Green. I added it to the bottom left of my watercolor paper. The small grass needs to be walked from side to side or up and down, or both! I pulled the color up and out of the lines using a brush stroke.

Next, I created a mask to protect it when I stamp the bucket from the Living Water set. The bucket is inked up with African Violet and Sepia. I masked off the bucket and stamped the mums into the bucket. I used the flower bunch from the Flower Set 2 using Olive Green and English Red.

I masked the entire bucket and stamped the pot from the Small Containers set in Sepia. I used the stamp positioner to make sure I stamped the pot perfectly where I wanted it. I masked the pot using some post it tape. I stamped the mums inked in Olive Green and Orange. I pulled the color out of the lines and softened the mums and added some Brown to the pot using my palette.

I inked up the pumpkin from the Harvest Set in Sepia and stamped in on the right side of the paper. I masked it and using my positioner stamped another pumpkin to its left. I used the other pumpkin in the set and stamped it to the right. I pulled the color out of the lines and added Brilliant Yellow and Orange to all the pumpkins. It is best to slowly build up the color. I added some additional grass in Olive Green below the pumpkins.

I masked the bucket and the pumpkins and stamped the wishing well from the Living Water set inked in Sepia and African Violet. I excluded the back of the well to make room for the flowers. I pulled the color from the lines, being sure to stay within each section.

I added an additional mask to the middle of the well and stamped mums to the right of the well. I inked it up with Olive Green and Brilliant Yellow. I added the flowers to the left side of the well inked in English Red. I used the same flower stamp from the mini flowers set inked in Olive Green, English Red, Orange and Brilliant Yellow and stamped them in the middle of the well. I added water to the blooms. 

I added some additional grasses to the bottom of the stones in front of the well. Then I added some Manganese Blue to the background for the sky. As always, I signed and dated the painting.

Thank you so much for spending some time with us and we hope this will be inspiration for you to create a fall scene of your own! Can't wait to see what you come up with. Have a crafty day!


Thanks, team! Love how you created lovely scenes with our new Little Boys, Little Girls, and Living Water well! We love the diverse look you can create with our stamps!

If you enjoyed this week's roundup, please leave a comment below! We love to hear what you think!

Happy Stamping!

Thursday, September 6, 2018

NEW VIDEO! Little Girl on a Boat Watercolor

Hello Ai Fans!

Welcome to a new video from this week's Watercolor Wednesday! This video kicks off our tutorials using our Summer 2018 Watercolor Sets! Bonnie is back sharing adorable little girl sitting in a boat, floating on a peaceful lake. She uses our new WC Boats Set, WC Little Girls Set, and WC Fairy Doors Set to create this beautiful nature scene. Make sure to hop over to YouTube and leave Bonnie a comment saying hello!


View on YouTube: https://youtu.be/XTfGg2LYKnU


Saturday, September 1, 2018

Watercolor Weekend Roundup - Love and the Sea!

Hello, Ai Watercolor Fans! Did you catch our NEW release on Thursday? We're having fun all month long with these new stamp sets! Our Watercolor Guest Design Team is back for Watercolor Weekend inspiration!

Dot Freel - Instagram - Blog - Pinterest
Hello Watercolor Friends,

I am in love with Art Impression's brand new 5053 WC Little Girls Set and there's also a brand new WC Little Boys Set. Both are must haves. Think of the possibilities! All of our favorite Ai scenes can now have kids in them. I created this card using the rock from the brand new 5055 WC Sitting Places set, and the little sailboat from the new set 5057 WC Boat Set. The grass is from 5007 WC Foliage Set 3.

Other supplies: Ranger Watercolor

Tricia Kennedy - Instagram
My “By The Sea” card for today’s Watercolor Weekend features three new Art Impressions items – WC Little Boys Set, WC Boat Set and Circle Double Stitches Dies.

Stamp the little boy from Little Boys Set in Sepia onto watercolor paper. Mask him off with a post-it note and stamp the dock from the Boat Set in Sepia using your stamp positioner. Watercolor the Art Impressions way by pulling the color from lines with your brush and water. Using a combination of Manganese Blue and African Violet on your palette, brush in for water. Stamp the sailboat from the Boat Set in Sepia. Stamp in the grass from Foliage Set 3 in Sepia and Olive Green. Add dot detail to the tops of the grass using the fine tip of African Violet. Scribble Rosewood onto your palette and brush on for his skin then Sapphire onto his overalls. Add detail to his shirt by brushing on Persimmon. Brush on Sepia into his hair, leaving a highlight at the top/crown of his head and onto the dock. Add detail on the dock using the fine tip of Sepia. Finally, brush Salvia Blue into the sky for clouds. Cut the watercolor piece out using the third to the largest circle double stitch die, a blue mat in the second to the largest circle double stitch die and a folded over card base with the largest circle double stitch die (let the die hang over the folded edge just a bit, this will allow the card base to remain hinged once cut).


Other Products: Post-It Notes

Tricia O'Bin - Blog - Instagram - YouTube - Pinterest - Facebook
First, I stamped the LOVE using the new San Serif letters stamps in Sepia. I pulled the color out of the lines. I added Steel Blue from my palette to each of the letters.

I stamped the small foliage from the Foliage Set 3 around the bottom on the L and around the top using the Olive Green. I also stamped the flower bunch from the Flower Set 3 inked in Iris Purple and Olive Green to the left of the L. I stamped the leaves from the Foliage Set 2 inked in Olive Green to the right of the O. I added the heart flowers from the Mini Flower Set in African Violet.

Next, I stamped the vine from Foliage set 3 around the V in Olive Green. I added a flower from the Flower Set one inked in Prussian Blue. Then I added another vine from the Foliage set 3 around the E and added flowers from the Mini Flower Set inked in Orange.

To finish up I added the flower bunch from the Flower Set 2 inked in Magenta and Olive green to the base of the word. To ground the letters I added some Sepia from my palette. I added water to all the flowers and foliage.

To finish up I cut the bookmark down and die cut the piece using the Tim Holtz tag dies cut a base of Gina K Designs Dark Chocolate card stock. I then cut the hole and added some lace.

I hope you will join us for Watercolor Weekend. These new stamps are so versatile and will be a great addition to your collection. Tag us with your projects on Instagram with #AIWatercolor.

Have a great day and thanks for stopping by!


Thank you for your projects, team! Comment below to let us know what you liked best about these projects! Are there certain new WC stamps you are especially looking forward to? We'd love to know!

Happy stamping!

Thursday, August 30, 2018

NEW Watercolor Stamp Sets! PLUS Challenge 240 Bookmarks & Tags!

Visit Our Blog
Hello, Ai Fans!

Hooray! Today is a special day because we are releasing new additions to our Watercolor Line! Check out our NINE new sets featuring wonderful images for year-round watercoloring! Our Little Girls and Little Boys sets, the first characters in the Ai Watercolor line, pair perfectly with our Sitting Places Set. We heard your requests for more masculine stamps, so we hope you enjoy stamping with our Boats and Harvest sets. Create magical scenes with our Fairy Doors featuring a large rustic tree! Let's not forget the holidays are right around the corner with our Churches and Snowman set! Additionally, mix your favorite flowers and foliage with our Serif Letters clear stamp set to make beautiful floral monograms and words! Get a closer look at these sets in our video from the Mixed Media Event! These sets are now available at artimpressions.com, so nab yours today!

WC Little Girls SetWC Little BoysWC Sitting Places Set WC Boats SetWC Fairy Doors SetWC Churches Set WC Harvest SetWC Snowman SetSerif Letters Set 

To share some inspiration, we have our Watercolor Guest Design Team here with some fabulous projects!

Dot Freel - Instagram - Blog - Pinterest
Hello Watercolor Friends,

My tag for this launch was made using the tractor from the brand new 5059 - WC Harvest Set. My oldest son who lives on five acres in Colorado, actually has chickens and an old blue tractor. This would be the perfect tag to put on a present for him. I used the chicken from the 4207 - Feathers TF stamp set. The flowers are from 4868 - WC Flower Set 2.

The bookmark was created with my best friend in mind. Her name is Jamie and she goes by J. She loves to read and her daughter has blonde hair. I'm sure she will love it! I used the brand new 5053 - WC Little Girls Set. It's probably my favorite stamp set from this new release! The stool she is sitting on is from another one of the new sets 5055 - WC Sitting Places. The letter J is from another must have 5071 - WC Serif Letters Set. The flowers are from 5009 - WC Mini Flower Set.

Other Supplies: Ranger Watercolor Paper

Tricia Kennedy - Instagram
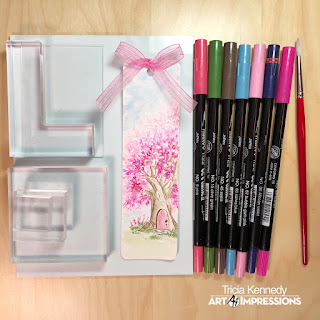
The moment I saw the NEW Art Impressions Fairy Doors Set I envisioned my project PINK, PINK and more PINK with FAIRY DUST! Welcome to my “Land of Enchantment”.

Cut a piece of watercolor paper to approximately 6½ x 2 inches. Stamp the tree trunk in Sepia from the WC Fairy Doors Set using your Stamp Positioner. Stamp the fairy door in Sepia and the little cobble stones in a combination of Sepia and African Violet for a lovely grey color from the WC Fairy Doors Set using your stamp positioner. Watercolor the Art Impressions Way by pulling the color from the lines with your paint brush and water. To create an ombre look, I stamped thedarkest leaves toward the trunk, getting lighter further out (leaves from WC Foliage Set 2 inScarlet, Pink and Bubble Gum Pink). Add the tiny grass from WC Foliage Set 1 in Olive Green and the tiny flowers from WC Mini Flower Set in Scarlet. Scribble a little Bubble Gum Pink on your watercolor palette and brush onto the fairy door. Add detail to the fairy door using the fine tip of Bubble Gum Pink. Add Sepia to your palette to darken up the shadows on the tree trunk and use the fine tip to add detail to the fairy door. Brush on Salvia Blue for the sky and Olive Green for the grass. And finally, add FAIRY DUST to the leaves and door.
Marvy Le Plume II Markers: 9 Pink, 15 Olive Green, 45 Sepia, 60 Salvia Blue, 67 Bubble Gum Pink, 86 African Violet, 94 Scarlet
Other Products: Post-It Notes, FAIRY DUST (Ultra Fine and Jumbo Iridescent Glitter), Zig Two Way Glue Pen, Corner Rounder, Hole Punch, Ribbon

Tricia O'Bin - Blog - Instagram - YouTube - Pinterest - Facebook
I am so excited about this most recent release from Art Impressions! I used the Little Girls and Sitting Places sets for this scene. I planned this out by making masks for the little girl and the bench. This way I could move it around until I was happy with it. I really wanted her to look like she was looking out towards the water.

I removed the little girl mask and using the positioner lined up the little girl. I removed the bench mask, re-inked the little girl and stamped her. I replaced the mask, stamped the bench onto the positioner and stamped it below the little girl. I pulled the color out of the lines of the little girl and the bench. I added additional color from the watercolor palette. I added Sepia to the bench along with some African Violet below the girl. I added Pale Pink to her legs, arms and face. I added Sepia to her Hair and Blue and Iris Purple to her clothes.

I brushed in some African Violet for the water. 

I added grass below the bench and trees in the background using the small foliage in the original foliage set. I softened and washed out the trees in the background and added some additional shadows below the bench. To finish up I added some blue to the sky. 


Thanks, team! We always look forward to seeing what you create!
With a new release, we have a new challenge! Let's switch it up from our usual card-making challenge to something a little different - bookmarks and tags! We'd like to see you create either one of those in this challenge. It does not need to be a watercolor project, you certainly can use any of your favorite stamps! With back to school happening now, bookmarks would be perfect for students, teachers, or your favorite bookworm friend!

Here are the Challenge Rules
✻ Please make a new card or creation. You can make any crafty item you wish; this is not limited to cards!
✻ Limit two submissions per person. You will receive extra votes if you use Art Impressions stamps!
✻ The Ai Challenge is open to everyone, international submissions are welcome!
✻ Include a link back to the Ai Blog or grab our button on the top right of our sidebar!
✻ Share the Ai love by clicking and commenting your fellow crafters.
✻ Make sure to get your link up by Wednesday, September 12 at 5:00 p.m. PST to enter your creations.
✻ Good luck and happy stamping!

Before we go, let's celebrate the winners of last week's Treat Bag challenge!

Top Spot goes to...

Milene!

Congrats, Milene! We couldn't resist your stitched treat box with our Southwest Christmas cactus! Email annelise@artimpressions.com with your address to claim your prize pack!

Honorable Mentions go to...

Inez!

A post shared by Inez Gregg (@igregg) on


Congrats, you two! Inez, we love your box featuring a lovely embossed and watercolored Meow-lloween image! And Lisa, your use of our Fairy Spinner for a Halloween treat bag is too cute! Email annelise@artimpression.com with your address and a stamp set of your choice for a prize!

Thanks for joining our challenge! Come back again for our new Bookmarks & Tags challenge!

Happy Stamping!