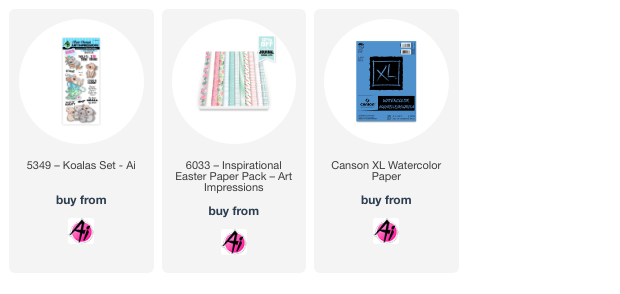
Though we miss Sharon and can't WAIT to have her back next week, we know you're going to LOVE Simone's card.
These Koala bears are so precious and Simone did a fabulous job coloring them. The new Art Impressions papers are the perfect compliment to the shades in her image. What a sweet little card!
This is one of those months where we get a bonus, 5th Sunday, so Simone Carr will be filling in as our Guest Designer for our last Sunday in March.
Please enjoy her amazing art!
Hello Fellow Crafters,
It’s my turn for Watercolor Weekend, and I’m excited to share two new watercolor cards with you! I hope they inspire you to create something beautiful this weekend!
Card 1: Easter Bloom Wreath
For my first card, I took an egg-shaped die to draw an outline so that I knew where to stamp my flowers and foliage. I placed my Canson watercolor paper into my stamp platform. I used the stamp from the Frameworks Set and colored parts of it with 969 before stamping it along the penciled egg shape. Once that was done, I stamped in the bunnies using 569 and 969, stamping off twice before applying them to the paper.
I colored the wreath first by pulling out the stamped color, then moved on to the bunnies, adding layers as needed. I stamped in some foliage but left space for flowers. I stamped grass in front of the bunnies using the larger grass stamp and then added flowers from Flower Set 2. For the white flowers, I used Dr. PH Martin’s Bleedproof White. Finally, I stamped the little bird on the branch using only 969. The sky was softly blended with 526 to complete the scene.
For my second card, I created a scene using the Matchbox Chickens Set and Hen House Cubbies.
I began by placing Canson watercolor paper into my stamp platform. Since the Matchbox stamps include flaps designed for creating 3D matchbox scenes, I used tape to block off the edges before inking the stamp with Memento Toffee Crunch. After removing the tape, I stamped the image, ensuring only the main elements transferred onto the paper.
With my scene set, I started coloring. For the chicks, I applied Tombow 055 around their heads, blending into 025 and 985 for the body. Their beaks were painted with 925. The hens were given warm, natural tones using 947 and 856. For the chicken coop, I used a combination of 947, 992, and 296, while the chicken feed bag was shaded with 027. To enhance the rustic feel, I stamped a hay bale from the Harvest Set (5598) using 026 and 985.
To tie the whole card together, I used patterned paper from the Basic Green PP (6009) as a background.
Today I have made a card made with the new 6008 - Bunny Hugs Set. This set was one of several new items added to the store this past week. It's oozing cuteness with bunnies, flowers, and Easter accessories. This is one of those have-to-have sets if you celebrate the Easter season.
To start the card, I worked on the background, coloring it with Copic markers. Then I colored the bunny and tulip images, along with the basket of carrots, and two butterflies. I also stamped the Easter Greetings sentiment and drew a border around it with a Navy Twintone marker.
After coloring, I cut the images out with the included dies. I arranged the bunnies, pots and baskets by attaching them at different heights using foam pads to make some images higher than others. The sentiment was also attached with foam pads. I cut the panel down to 4" x 5 1/4" and mounted it on white cardstock sized 4 1/8" x 5 3/8". This was mounted on a pre-printed pink and white A2 card base. Finally three clay carrots and two clay tulip embellishments were glued on the card. This bunny is ready to share with someone special for the Easter holiday!
Tasha here sharing a new card featuring the super cute "Happy Spring" Stamp Set. Spring is a wonderful time of year and Spring cards are so much fun to make. For my project I used the bunny with a carrot car and love everything about this stamp!
I started the card by stamping the sweet bunny and used the included dies to cut him out. Once cut, I used Copic Markers to color him; I love these colors! For the background I layered a piece of polka dot pattern paper and cut two clouds to make a Spring scene.
This set includes several sentiments, but I thought "Happy Spring" went perfectly with this image. He looks like he is loving the warm Spring weather driving his carrot car with his pretty tulips!
Lastly, I added layers of teal and tan card stock and a piece of Art Impressions plaid paper. I also attached several white enamel dots to complete the design.
Thank you for checking out today's project and I hope you are having a wonderful day!
400 challenges and going strong. How many companies can say that?
To celebrate this special milestone, we're calling our challenge
MILESTONE BIRTHDAYS!
Think special birthdays like 1, 5, 10, 16, 18, 21, 30, 40 etc...
I'm also going to be doing a giveaway. I have 3 extra Throwbacks from 2024 that I'll be giving away in addition to the regular Top Spot and Lucky Random Winner. So...to keep this fair, I'm doing things a little different this month. There will be 5 winners chosen. All winners will be randomly selected. No Top Spot. Just 5 lucky winners.
What do you need to do to enter?
Upload a birthday card/project using Art Impressions products to our challenge. In the comments, let me know which Throwback set you're interested in, or if you'd like to select a set from the current stock on the Art Impressions website. You'll see a place to leave a comment at the bottom of this page.
Here are the Throwbacks that I'll be giving away. This is open to everyone, even international fans. Yay!
January 2024 #5868 Daffodil & Tulip Set
March 2024 #5876 Watercolor Lilies Set
May 2024 #5900 Garden Bench Set
Remember, upload a birthday card/project using Art Impressions products and then leave a comment as to what set you'd like to win.
Before we see what our fabulous Featured Artist Lynn created to inspire you, let's see who won our last challenge, I Like to Move It, Move It.
For our Top Spot we selected Kathy R. for her pop up card.
Please contact Leah at Feedback@artimpressions.com
to claim a free stamp set of your choice!!
Our Lucky Random Winner was Irene R. for her "flutters" card.
Please contact Leah at Feedback@artimpressions.com
to claim a free stamp set of your choice!!
Now let's check out this INCREDIBLE masculine card and video tutorial from Lynn.
Today we will create this fun masculine interactive swivel surprise card! This card was inspired by the current Art Impressions "Milestone Birthday" Blog Challenge, and I'm honored to be the featured artist for this fun and fabulous challenge!
Watch video tutorial here!!!
For the focal images on this card, we will be using the Ai Reel Great Guys Set (4900). This set will give us plenty of fun stamps to create the fishermen for the outside of the card and several cute coordinating images for our interactive feature on the inside of the card!
Let's begin by stamping and coloring all of the images that we will be using today. All of today's coloring was done using the Zig Clean Color Real Brush Pens in the following colors: Blender, Flesh Colour, Lt Pink, Geranium Red, Bright Yellow, Aquamarine Blue, Cobalt Blue, Blue Gray, Lt Gray, Ochre, Beige, Mid Brown, Gray, Ever Green.
Next, we can use our detail scissors to fussy cut out all of the images leaving a little white border around the edges.
To create the standard size card base we will use some Kraft cardstock and then we will die-cut the panels needed to decorate the front and inside of the card. For patterned paper we will use the brand-new Ai Basic Teal Paper Pack (6011). Select the patterns you like best.... there are so many wonderful choices in this paper pad. We will die cut these papers using the Ai Rectangle A2 Double Stitched Dies (5063). We can go ahead and attach these to the card.
Now we can add a sentiment from this same set on the front panel and stamp another sentiment from the Kraft cardstock and die-cut it with a banner die.
Let's also die cut the "Milestone" numbers from the brand-new Ai Large Numbers Die Set (5911) and add them to this unique and personalized birthday card!
We can add the fisherman by popping them up with a bit of 3D Foam Tape. And now, for the fun part, we will die-cut and assemble the Swivel Surprise interactive elements for the inside of the card. To do this, we will be using the Lawn Fawn Swivel Surprise Die Set. This is really fun and easy to create. It actually looks way more complicated than it actually is to do. I will show you exactly how to do this in today's video!
Now let's add the jumping fish, the floating puppy, the banner sentiment, and the bucket of fish!
When we open up the card, we will see all of our images in motion! This card is just so much fun and can be used with so many of your favorite stamp sets!!!
Thank you so much for joining me today! Have a fun and crafty day!!!
✻ Please make a new card or handmade crafty creation. You can make any item you wish; this is not limited to cards! (unless specified)
✻ Limit two submissions per person.
✻Please include your first name and last initial on your submission.
✻We love to comment on your entries, but keep in mind if you use a private group or a platform that you need to sign up for, we probably won't be able to.
✻ The Ai Challenge is open to everyone, international submissions are welcome!
✻ Include a link back to the Ai Blog or grab our button on the top right of our sidebar!
✻ Share the Ai love if you can, by clicking and commenting on your fellow crafters.
✻ Make sure to get your link up by the deadline to enter your creations.
A new release came out yesterday and boy, is it a good one! Okay, let's be honest, aren't they ALL? This one included new alphabets and numbers, a new Easter stamp set and papers as well as a set of belly bands. Make sure to check out the Art Impressions website. Lots of fun new items!
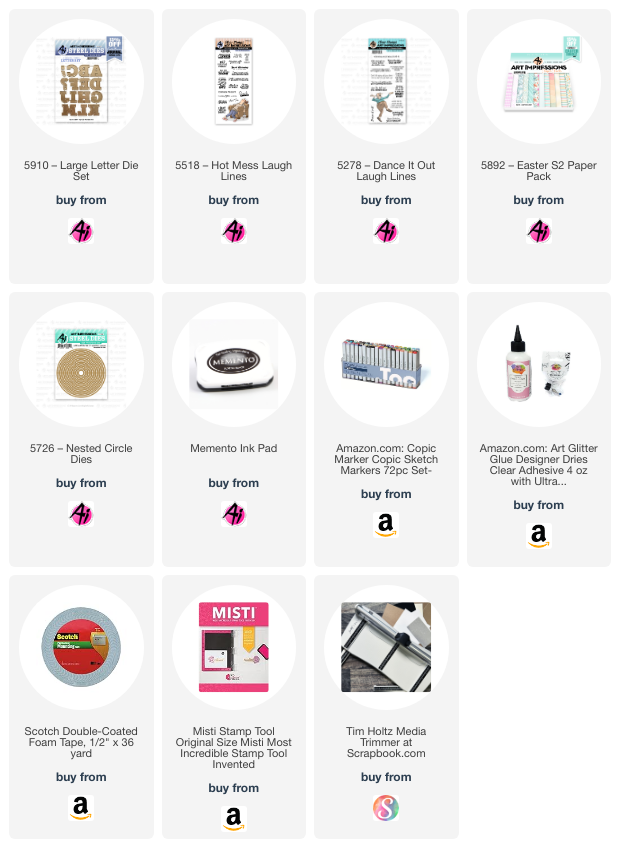
My card today features the new #5910 Large Alphabet letters. Have you ever purchased word dies only to wish you could adjust them by adding another letter or making up your own word? Well, these letters are the perfect size to create your own word or spell it the way you want to. Actually, I should have put another couple of G's to emphasize the word "UGGGH".
I started out by stamping the image from the #5518 - Hot Mess Laugh Lines set onto copic friendly paper with Memento black ink. I then colored with my copic markers listed below. I stamped the image again on a piece of pattern paper from the #5892 - Easter S2 PP and fussy cut the chair so that I could paper piece onto the image. I cut the image with a circle die from the #5726 - Nested Circle die set and matted onto a scallop circle die I had in my stash. I die cut 2 of each of the letters U, G, H and the exclamation mark from yellow cardstock. I layered each of the letters together for added dimension. I stamped the sentiment from the #5278 - Dance It Out set and cut with a banner die I had in my stash. I mounted the banner sentiment onto a piece of yellow cardstock and fussy cut it for a matted banner. I then took a 5.5" square piece of pattern paper (stripe) and mounted it onto yellow cardstock. I did the same for the top layer 4.5" square piece of pattern paper. I then assembled the card together and staggered and overlapped the letters to add more fun to the card.
Today we will be creating a few simple, yet inspirational bookmarks! These would be perfect for your Easter Bible Journaling, or a friend, teacher, or avid reader!
Let's begin by stamping the pretty floral border from the Ai Lily Border Set (5374) and coloring the images using the Zig Clean Color Real Brush Pens in the following colors: Blender, Haze Blue, Mid Green, Moss Green.
This stamp set includes the center of the flower, and we will stamp the centers using the Tim Holtz Spiced Marmalade Dye Ink. This little stamp is so easy to use and adds so much more interest to the flowers!
Next, we will die-cut the images using this stitched label die from the Ai Decorative Journal Page 1 Dies (5768) Set. Once this is die-cut, we will add some ink around the edges using the Tim Holtz Tumbled Glass Distress Oxide Ink.
Now we will die-cut the bookmarks using the Ai Bookmarks Die Set (5223) from the brand-new 6"x6" paper packs in Basic Teal and Basic Yellow. If you lay this bookmark die on a little bit of an angle it will fit perfectly on this smaller paper. We will also die-cut the reinforcers and butterflies from this same set.
Before we assemble the bookmarks, let's stamp a few inspirational sentiments on each of the bookmarks using the Ai Little Things Sentiment Set (5797). This set has so many wonderful sentiments to choose from that it will be hard to decide!
To assemble the bookmarks, let's add the florals, reinforcers, butterflies, and add some pretty hemp twine in white!
For a finishing touch, we can add a bit of sparkle, without adding any bulk by using the Wink of Stella Clear Glitter Pen on the center of the flowers!
Thank you so much for joining me today! Have a fun and crafty day!!!
There are some fun new releases on the Art Impressions website.
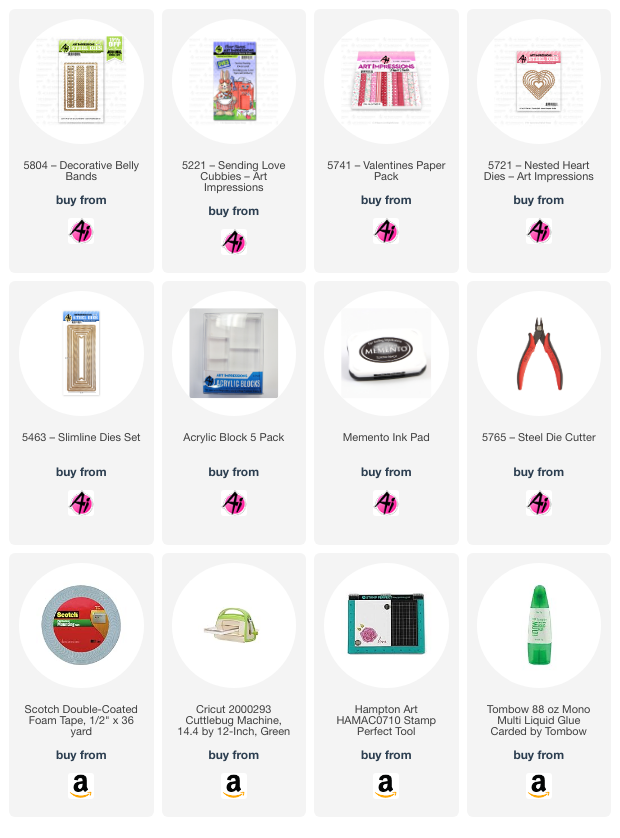
Today I've used the brand new 5804 – Decorative Belly Bands. There was a delay in shipping initially, so my card is a bit late for Valentine's Day.
This would be SO CUTE as an Easter card though. Just swap out the sentiment with one from one of your favorite Easter sets. If the pink paper isn't your thing, Art Impressions has lots of pretty Easter sets or basic pads that have other beautiful spring colors and patterns in them.
I love that Art Impressions is offering so many die sets now. They really compliment their adorable images and help create such a finished and special look to your cards and craft projects. I don't think that I could pick a favorite.
Happy watercolor weekend! I love pastel spring colors, and I had so much fun making my cards this month.
I applied the same method to each card. I started by stamping with Tombow markers 565 and 969. Then, I stamped off once onto a scrap piece of watercolor paper and painted all four cards using the same markers. For the chicken coop, I stamped various items from the set onto watercolor paper and painted them with markers. After everything was painted, I die-cut the pieces. I used the polka dot paper from 6009, Basic Green paper pack, for the grass. I utilized various dies from my collection to add details to the card. Once all the die cuts were glued down or popped up, I added some tiny rhinestones to the flowers. This stamp set is so cute, and I adore the tiny chicks!
Tombow markers used for all of the cards are as follows: 969, 992, 565, 025, 623, 723, 195, 817, 401, 491, 177, and 636
_____________________
For my next three cards, I used the 5918 Floral Long Stem Bouquet Set.
The first step I took was to create masks for each of the stamps so I could position them where I wanted without the flowers overlapping. Next, I determined how far apart I wanted the flowers and used masking tape to cover the line indicating where I wanted the flowers to stop. I stamped each flower bouquet and painted them. After painting and removing the masking tape, I cut scraps of paper from the teal paper pack and glued them down. I cut a strip of black cardstock approximately 1/4 inch wide and placed that over the gingham paper. Each card features a unique detail. For the "Love you, friend" card, I created a shadow around the flowers on the right side using a pale blue marker and added white dots with Dr. Ph Martin's Bleed Proof White. For "sending hugs," I added a shadow around all of the flowers using marker 969. Finally, for "happy little moments," I splattered the card with a green marker after covering the flowers with the masks I had made earlier and glued tiny rhinestones onto some of the flowers.
Thank you all for spending your time with me. I hope you enjoy the rest of your day! If you have any questions, please feel free to ask.