Showing posts with label 5929 - Christmas Train. Show all posts

Thursday, November 20, 2025

Flurries Forecasted Challenge #417 Week 1

 Hello Ai fans!

Welcome to our FINAL challenge of 2025.

Can you BELIEVE IT??
We're that close to the end of 2025.
Where did the time go?

For our final challenge we're sticking with the season.

Flurries Forecasted


We want to see your winter projects featuring snow, snowflakes, snow globes, snowmen, snow embossing folders, puffy snow, glittery snow, snowflake stamps and dies and more.

Our Featured Designer is Dori.

She created the most spectacular winter scene.
She has an adorable train sludging through the snow, penguins sliding down a snowy
hill and plenty of snowflakes to keep all of the penguins and snowmen happy!

Take a look at her wonderful tutorial and then scroll down to see who won our
Gobble Gobble challenge.

Take it away Dori!
---------------------------------------------------------------------------------------------------------------------------

       Happy Thursday AI Friends!

I'm so excited to be the one to introduce the new blog challenge called "Flurries Forecasted"!  I'm not quite ready for the snowy weather but I'm sure ready to add snow flurries to my cards, tags and projects.  Hope you are just as ready as I am and decide to play along with us!

You may have noticed that I love interactive cards, so yep, I have a fun one for you today using the 
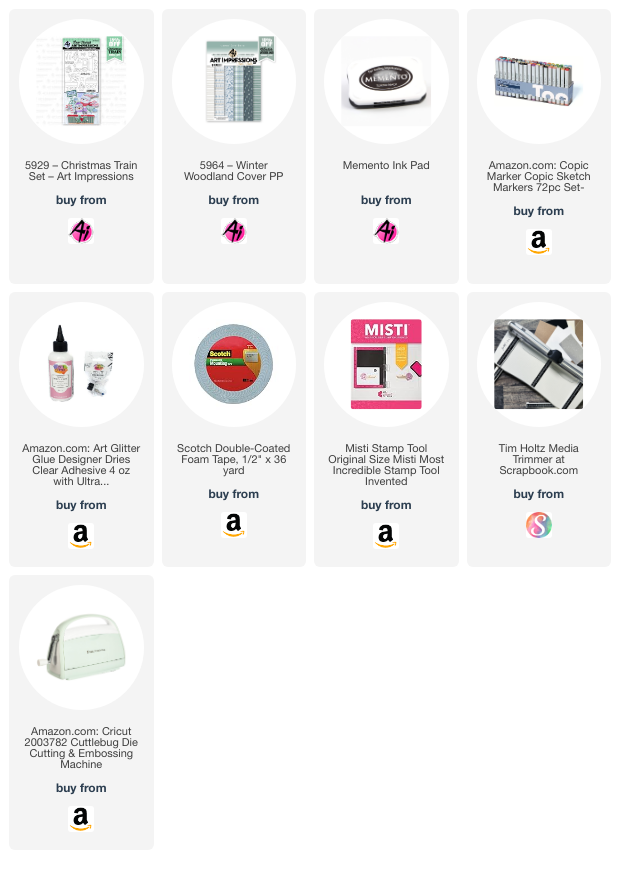
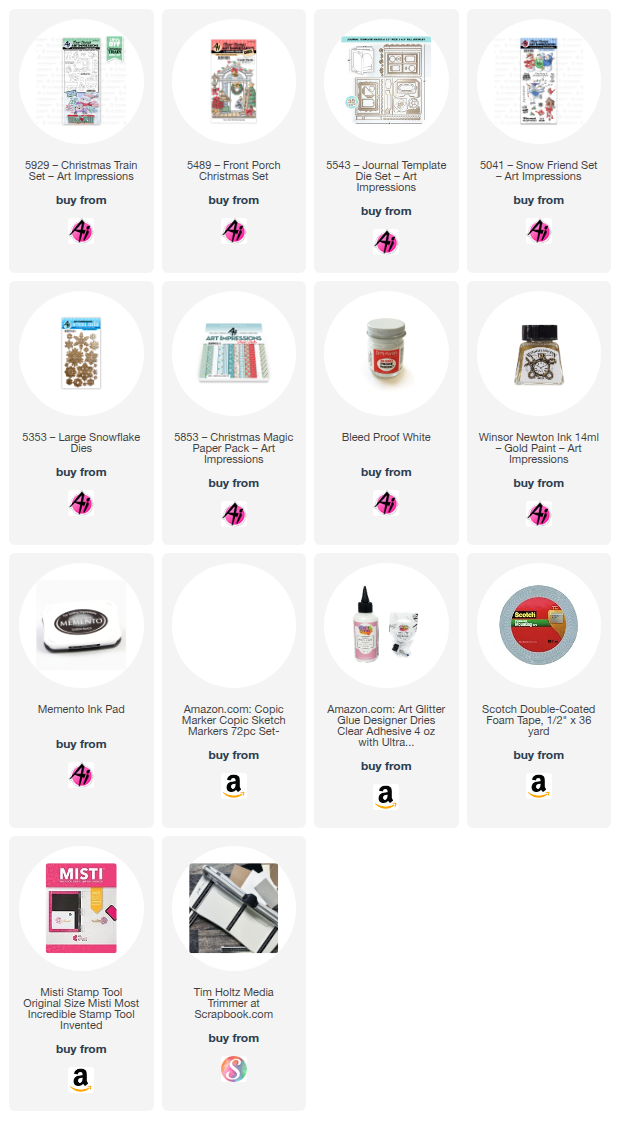
#5929 - Christmas Train set along with some accessories from the #5489 - Front Porch Christmas set.
I love the way these sets work together so that you can combine and stretch their use.


The video below will show how this card opens and stores.  When folded it's an A2 card, but pops open to be approx. 5 1/2 x 12" wide.  Because of the panels that extend out, the card is much thicker than a standard A2 card and will need a larger envelope plus additional postage, if mailing.  


So to get started - I stamped the images with Memento black ink onto copic friendly paper and colored with my copic markers listed below.  I then die cut each of the images with the coordinating dies that are included in both of the stamp sets.  For the two penguins rolling down the snowy hill (on the front of the card), I die cut an extra one, out of heavy cardstock, and adhered to each to give a little extra weight for them to roll better.  I die cut various size snowflakes using the #5353 - Large Snowflake dies from glitter cardstock.  I also cut several trees out of the #5853 - Christmas Magic PP using a die set from my stash but any pine tree dies will work nicely. 

Now, we're ready to build the card.  I started with a standard top fold A2 card from heavy cardstock.  I scored at 5 3/8" as well as the 5 1/2".  This will allow the folds to come up and over the thickness of the final card.  Fold and burnish these score lines really well.  Hint:  I found that my card stood up better if I trimmed off about 1/2" from the bottom of the back panel.  The inside pop out card is cut from heavy cardstock and measures 4 3/4" x 9 1/4".  Score at 1", 3 3/4" and 6 1/2".  This will provide you with three panels that are 2 3/4" wide.  This is a nice size for each of the train cars.  Score and burnish these folds quite a few times back and forth to help breakdown the fibers.

For the front of the card, cut two slider tracks in blue cardstock, far enough apart so that the penguins won't bump into each other when then roll.  I also cut three blue panels to fit each panel of the fold out base.  I spattered Dr. PH Martin Bleed Proof white paint over each of the blue panels to create the snow-like look.  While those were drying, I cut two panels of glitter cardstock (larger than the front A2 blue panel) and cut the same tracks to match up to the ones on the blue base and I fussy cut each to extend the top of the hill.  I found it easier to cut the glitter panels down after lining the tracks up with the blue panel.  I inked the edges with Ranger Distress Oxide ink - Broken China before adhering and used foam tape for the bottom hillside.  Adhere the hillsides down onto the blue base panel matching up the corresponding tracks and leaving some areas to tuck the trees.  The bottom glitter panel will be stacked over the top panel to create a forward hill.  
To create the rolling penguins, I die cut six 5/8" discs from heavy cardstock (or you can use a penny, button or anything flat and round).  Glue one set of three discs together for each penguin.  Stack and glue two foam dots in the middle of each disc (making sure the dot will fit freely in the slider track).  Place the dots through the slider track from back to front and glue the penguin to the top of the dot poking through the track.  Do the same for the other penguin and track.  You should be able to test to make sure they roll freely at this point.  If all is good, place two layers of foam tape to the back of the blue panel.  Be careful not to place foam tape too close to either slider track as this will prevent the penguins from rolling.  Test again before adhering.  Place a piece of glitter cardstock face down over the tape, so that the glitter will show through the tracks, and then glue down to the front of the A2 card. 


Now, for the extended pop out card.  Glue the one inch tab to the inside back panel of the A2 card base.  See below.

Cut several snow drifts from glitter cardstock.  For the two main snow hills, I cut two long ones (different heights), ink the top edges and then cut into thirds so that the hillsides with match up from one panel to the next.  I put foam tape under the front hillside so that the train cars will fit behind with a little dimension.  This is the only dimension I did so that the panels would fold nicely.  If there are too many pop up items, the panels will not fold.  I added a few scrap pieces in back for added snowy hills. 
 
I added a blue panel to the inside as well as a sentiment panel.  Fold your panels in to make sure it is closing nicely.  They should fold in as follows:  right panel closes onto center, then under left and then into the card.  If you are having any trouble, you may have to trim down the blue panels slightly. 

Now the fun, you are ready to decorate the front and each of the panels.  Remember not to add any more dimension to the inside panels.  Foam tape, at this point, is not your friend.  ;)  
However, the front is fair game.  Have fun!

I hope you enjoyed my card today to kick off the new blog challenge "Flurries Forecasted".  
Hope you play along for a chance to win a free stamp set.  We love to see your creations!
Have a wonderful day!  Keep creating!!

Copics used:  C00, C1, C3, C5
B0000, B000, B00, B01
E21, E23
R20, R22, R24, R27
Y32, Y35    YR16, YR18
G40, G43, G46
Can you even believe how cute that card is??
So much talent and love went into it.

Now for our winners.

Our Gobble Gobble Top Spot went to Dot Freel for the gorgeous
card that she made for her sister.


Congratulations Dot!
Please contact Leah at feedback@artimpressions
to claim your free stamp set.
Be sure to grab your Top Spot badge to share on
your social media as well.

Our Lucky Random Winner was #13 Becca Yahrling.


Congratulations Becca!
Please contact Leah at feedback@artimpressions
to claim your free stamp set.
Be sure to grab your Lucky Random Winner badge to share on
your social media as well.


Also, be sure to check out Simon Says Stamp for the Art Impressions Exclusive
6123 Snow Globe Gift Card Holder Die Set.


Be sure to check out all of the inspiration from the Art Impressions Daily Design Team
and Simon Says Stamp Design Team.

This is a limited edition exclusive set and once it sells out, it's gone forever.
The bundle that included the envelope has already sold out.
The envelope die set can still be purchased separately at either Simon Says or Art Impressions.

Now for the details of our Flurries Forecasted challenge.


✻ Please make a new card or handmade crafty creation. You can make any item you wish; this is not limited to cards! (unless specified)

✻ Limit two submissions per person.
 ✻Please include your first name and last initial on your submission. You may include your entire last name, but it's not necessary.
✻We love to comment on your entries, but keep in mind if you use a private group or a platform that you need to sign up for, we probably won't be able to.
✻ The Ai Challenge is open to everyone, international submissions are welcome!
✻ Include a link back to the Ai Blog or grab our button on the top right of our sidebar!
✻ Share the Ai love if you can, by clicking and commenting on your fellow crafters.
✻ Make sure to get your link up by the deadline to enter your creations.
✻ Good luck and happy stamping! 

You are invited to the Inlinkz link party!

Click here to enter

Saturday, December 21, 2024

Janet's Top 10 for 2024

 Hello Ai Fans! It seems impossible but 2024 is coming to a close. It's been a wonderfully creative year as a design team member of Art Impressions. I am honored to be here every week to share an AI creation. It's truly a joy. As is the custom, I'm sharing with you my top 10 projects of the year. They're in no particular order as there is no way I can rank them. I love them all! So here it goes. I hope you enjoy the trip down memory lane.


I wish you all a very happy holiday and a fantastic 2025! As always, please visit the Ai store for the products I used and all the things you need for your card, journal, and tag making projects. Happy creating and see you next year!

Janet YouTube - Blog - Facebook - Instagram - Pinterest  

Thursday, November 28, 2024

Masculine Masterpieces Challenge #392 Week #2

 Hello Ai fans and welcome to week #2 of our Masculine Masterpieces challenge!

We want to see your cards and crafty projects fit for a guy or boy!
They can be holiday themed but they certainly don't have to.

Last week, our Featured Designer was Sharon. She created an adorable interactive train card.  Visit her post for her tutorial.


Now let's see what the rest of the Design Team made.

I made a retirement card.


Tasha made a beautiful winter scene.
Dori has a humorous card for you.


Lynn also has a fun train card!
Visit her blog or YouTube channel for her tutorial.


Janet has a beautiful, blustery gingerbread house scene.

5353 – Large Snowflake Dies


Thank you to all of our wonderful designers for their amazing inspiration.
They work so hard to bring you exciting new designs each week.


✻ Please make a new card or handmade crafty creation. You can make any item you wish; this is not limited to cards! (unless specified)

✻ Limit two submissions per person. You will receive extra votes if you use Art Impressions stamps!
 ✻Please include your first name and last initial on your submission.
✻We love to comment on your entries, but keep in mind if you use a private group or a platform that you need to sign up for, we probably won't be able to.
✻ The Ai Challenge is open to everyone, international submissions are welcome!
✻ Include a link back to the Ai Blog or grab our button on the top right of our sidebar!
✻ Share the Ai love if you can, by clicking and commenting on your fellow crafters.
✻ Make sure to get your link up by the deadline to enter your creations.
✻ Good luck and happy stamping! 

You are invited to the Inlinkz link party!

Click here to enter

Thursday, November 21, 2024

Masculine Masterpieces #392 Week #1

Week #2 coming tomorrow with all the other Design Team cards.

I host Thanksgiving and time got away from me. 

Happy Thanksgiving everyone!


-----------------------------------------------------------------------------------------------------------------------


 Hello Ai fans and welcome to our latest challenge!

Masculine Masterpieces!

Over the next two weeks we want to see your cards and crafty projects fit for a guy or boy!
They can be holiday themed but they certainly don't have to.

Before we see our Featured Designer Sharon's adorable card, let's see who won our Under the Dome challenge.

For our Top Spot we chose Irene Rhodes
for her adorable penguin cheer shaker card.


Please contact Leah at Feedback@artimpressions.com
to claim a free stamp set of your choice!! ***Leah is out of the office until further notice***
There is someone covering for her but I don't have details yet. Please send an email to this address and someone will help you. Be aware that there may be a slight delay.
Also, be sure to grab our badge to display on your blog, Facebook or Instagram!

Our Lucky Random Winner was #8 C. Dunn.


Please contact Leah at Feedback@artimpressions.com
to claim a free stamp set of your choice!! ***Leah is out of the office until further notice***
There is someone covering for her but I don't have details yet. Please send an email to this address and someone will help you. Be aware that there may be a slight delay.
Also, be sure to grab our badge to display on your blog, Facebook or Instagram!


Congratulations to our winners.

Now let's all enjoy Sharon's darling, interactive, slimline Christmas card!
Be sure to check out her video clip of the train moving.  SO CUTE!!

--------------------------------------------------------------------------------------------------------------------------

Hello AI Fans!    

I'm so excited to show you a card I made for the Masculine Masterpieces challenge. I have a nephew that absolutely LOVES trains, so this was made in honor of him! I love this new set #5929 Christmas Train Set from Art Impressions, and it's just so festive!! Ever since I saw it, I knew I wanted to make it into a slider card so I got to work! I actually used a die set from My Favorite Things called Movin & Groovin Slimline Set. You want to hold on cause it's going to be a bumpy ride! LOL! I thought it would be the perfect slider set to use with a train! So instead of moving across the card smoothly, it looks like it's going clickety clack! I started by stamping all the pieces onto a Copic friendly paper with Memento Tuxedo Black ink and then coloring them with Copic markers which are listed below. One of the issues I have with slimline cards is that you can't use 6" papers. But guess what!!!  The new Art Impressions Cover papers are PERFECT for slimline cards!!  So I grabbed #5964 Winter Woodland Cover Paper Pack for the background. I created a couple snowy ground coverings by tearing my white paper. I glued one piece to the pattern paper background and then cut the slider channel out of it. The top piece was popped up and is used to cover the slider channel.


The Movin & Groovin slide channel


In order to move through the bumpy slide channel, the image has to be attached to a certain piece on the pull tab. Therefore, I could only attach the engine to the pull tab, not both cars. I had to connect the second train car to the engine so it would move as well, so I grabbed some acetate to connect the two cars. 


A Christmas train just isn't a Christmas train without glitter. Would you agree?? Here are all those adorable penguins all colored up as well! So adorable!!


And  a picture of the final card. I added some trees from a die in my stash and added some Stickles to them as well. 


Here's a little video that shows you how it works. I love how it turned out! 


Thank you so much for stopping by for a visit today, and I can't wait to see what you create for the new Masculine Masterpieces challenge!  Until next time - stay crafty!!

Copics used:

R12, 22, 24, 27, and 29

G43, 46, 82, and 85

Y35 and 38

E33, 95, 97, and 99

YG03, and 05

T1

C3, 4, and 5


✻ Please make a new card or handmade crafty creation. You can make any item you wish; this is not limited to cards! (unless specified)

✻ Limit two submissions per person. You will receive extra votes if you use Art Impressions stamps!
 ✻Please include your first name and last initial on your submission.
✻We love to comment on your entries, but keep in mind if you use a private group or a platform that you need to sign up for, we probably won't be able to.
✻ The Ai Challenge is open to everyone, international submissions are welcome!
✻ Include a link back to the Ai Blog or grab our button on the top right of our sidebar!
✻ Share the Ai love if you can, by clicking and commenting on your fellow crafters.
✻ Make sure to get your link up by the deadline to enter your creations.
✻ Good luck and happy stamping! 

You are invited to the Inlinkz link party!

Click here to enter

Sunday, November 17, 2024

Gather Together and Merry Penguins cards by Diane Mason

Hello, and welcome back for Watercolor Weekend!


Hello, AI Watercolor Friends! It's that wonderful time of year - Thanksgiving is on its way, and Christmas is just around the corner. Today, I'm excited to share two festive cards with you. The first is a quick and easy Thanksgiving card, perfect for the season. The second is a playful, interactive Christmas shaker card featuring the adorable penguins from the newly released 5929 – Christmas Train Set.

Gather Together card:

For this quick and easy card, I selected the chair stamp from 5593 – Harvest Scenes Set. I love the beautiful colors of autumn and thought this scene would look so pretty paired with the patterned papers from the new fall paper pack (5973- FALL S2 PP).

I inked the image with the usual combination of 565/969 and stamped it off once before stamping it onto my Canson XL watercolor paper. With a damp brush, I pulled some color from the image to add shadows and dimension. I added a little 565 to the white chair for added shadows. For the birds, I painted 947 for the wings and 933 for the tummies. I wanted to give the watering can an old and weathered look. I used N52 to shade the watering can and a touch of 565 to deepen the shadows. For the rust, I dotted on some 947 here and there and blended some of the dots with a damp brush. I painted the red stripes with 856. I made sure the stripes curved upward for proper perspective since you could see the bottom of the watering can. I left the milk can white and added a little more 565 for contours. The handle was painted with 947.

The green pumpkin was painted with 228. I really like this green, it’s similar to 177 but has a grayer undertone. I added 993 for the yellow highlights. For the orange pumpkin, I used 933 for the base and 933/947 to shade the pumpkin. Both stems were painted with 969. I painted the wooden basket with 947 and 969.

Before adding the flowers and foliage, I brushed in a sky with a watery mix of 565. I added vines to the milk can using the vine stamp from 5126 – WC Foliage Set 4 inked in 177 and dabbed with a damp brush. Next, I added flowers to the wooden basket. I used the daisy bunch stamp from 4052 – Flower Set and stamped in 933 and 856. Using the same vine stamp, I added some foliage below the flowers and dabbed the vines and flowers with a damp brush. I got a little carried away with the flowers, so to tone them down a bit, I dotted in some tiny white flowers with Dr. Ph. Martin’s Bleed Proof White.

I added a shadow under the chair and near the basket and milk can with 565. I used a brown TwinTone marker to add fine details to the scene. The painting was die-cut with a stitched rectangle die and matted with patterned paper from 5973 – FALL S2 PP. The “Gather Together” sentiment is from 5600 – Harvest Sentiments Set and was heat embossed in gold.

You all know I like to decorate the interior of my cards. The sentiments are from 5600 and the fall leaves are from 5598 - Harvest Set. The leaves were painted with 947, 228, 177, 856, 933, and 993.

Merry Penguins Shaker Card:

I think the little penguins from the 5929 – Christmas Train Set are so adorable. They look so excited and happy, and ready to shake up some fun!

I stamped the four penguin images, and an extra sitting penguin for the interior of my card, with Versafine Onyx Black ink onto my watercolor paper. Versafine ink is permanent once dry, stamps clean sharp images, and works perfectly for watercolor. It is also easy to remove from your stamps. I shaded all the white areas with N52 and a little 565. For the hats and scarves, I used 526 and decorated the scarves with a white gel pen. The bodies were painted with N25 and the beaks in 933. Rosy cheeks were added with a watery mix of 856. I then die-cut all the penguins and set them aside.


For this slim-line card, I cut a 7 x 8 ½ inch piece of white cardstock and folded it in half for the card base. I cut a 3 ½ x 8 ½ inch piece of shimmery white cardstock and adhered it to the card front. Next, I added a 2 ¼ x 8 ½ inch piece of blue cardstock to the center of the card. For the MERRY shaker windows, I created a template using a piece of white cardstock and the letter dies from 5072 – Block Letters Die Set. Since there is only one “R” die, I used an “N” die as a placeholder for spacing. I used a strip of removable tape to hold my dies in position, removed the “N”, and die-cut a template from the white cardstock. I added the second “R” to the template and ran it through the die-cutting machine again. Next, I cut a 2 x 8 ½ inch piece of blue plaid patterned paper from 5964 - Winter Woodland Cover Paper Pack. I positioned the template over the plaid strip, aligned the letter dies in place, and die-cut the windows for the shaker. Using a pencil, I lightly traced the letter openings onto the blue cardstock to mark where the shaker wells would go. Then, I used foam tape to build the wells and filled them with a wintry mix of beads and sequins. I added clear acetate to the back of the letter strip and carefully adhered the strip over the shaker bits. I used a die-cut 'R' as a guide to position and adhere the inner pieces of the letter, securing them in place.


Next, I glued the penguins onto the card and added a touch of sparkle by scattering die-cut silver glitter snowflakes from the 5782 - Snowflake Frame Die.

For the inside of the card, I adhered a ½ inch strip of plaid paper along the bottom edge and placed a sitting penguin on top for a fun finishing touch. The “Merry Christmas” sentiment is from 5953 – Woodland Critters Set. Let the merry-making begin and shake, shake, shake!

Thank you for stopping by for Watercolor Weekend. I hope today’s cards have inspired you to create some cards to share with your friends and family this holiday season. Until next time, wishing you and your loved ones a very Happy Thanksgiving and, as always, Happy Painting!