Showing posts with label 5062-Rounded Rectangle A2 Double Stitched Dies. Show all posts

Saturday, June 13, 2026

Enjoy the Ride! by Janet


 Hello Ai Fans! I'm so happy to be here today to share my card for the new Ai challenge, Enjoy the Ride. I was super excited for this challenge because I knew I was going to break out one of my all time faves, 5044 - Born to Ride.

To make this, I started by stamping the motorcycle guy on a piece of marker friendly cardstock. I really enjoyed putting him in a leather coat and jeans. This guy actually reminds me of an old boss I once had. He looked so much like this biker and he also loved his Harley. 

Once colored, I cut him out with the 5062 - Rounded Rectangle A2 Double Stitched Dies. I also stamped the two sentiments and cut them into strips with angled ends. I used a stencil in my stash and three different colored inks to make a background that is bright and has movement, perfect for my motorcycle guy! 

What will you make for the challenge? We can't wait to see! You get to show off your talent and get a chance to win a free stamp set. Win! Win! 

Thanks for stopping by and spending time with me and Art Impressions. Please visit the Ai store to pick up your favorite stamps, dies, papers, accessories, and supplies. 

Happy Crafting!

Saturday, April 11, 2026

Petals & Blooms with Pencils and Watercolor by Janet

There's something so therapeutic about sitting down with a fresh stamp and a palette of colors. Today’s project features a charming garden scene using stamps from Art Impressions, brought to life with a mix of watercolors and colored pencils for a rich, textured look.

I started by stamping the image from 6193-Petals and Blooms. It's a lovely cabinet that I stamped onto watercolor paper. I started by coloring the cabinet itself with colored pencils. I love the depth and deep color achieved with them. The oranges and blues work nicely together and they are a great backdrop to the flowers and fauna I added into the pots. I stamped those in with Tombo Duel Brush Pens and softened and blended the Art Impression way! I used three flower sets: 5009-WC Mini Flower Set, 5476-Foliage Set 5, and 5825-Geranium Set. 

After coloring the image, I added a watercolor blue and lavender halo around the entire cabinet. Adding a background wash is a personal decision by each crafter. To me it elevates the image and makes it look finished.

To finish the look, I added white gel pen to add highlights on the pots and to draw in the drawer pulls. It's a small detail but can make a big difference in the final result.

To frame the floral scene, I used a multi-layered approach. I used 5062-Rounded Rectangle A2 Double Stitched Dies to cut a soft rectangle shape with a charming stitched border all around. Behind that, I cut a piece of pink vellum with lavender metallic polka dots. The dots add just the right of shine to the card. The two stacked pieces were then centered on a preprinted A2 card base with a fun, geometric hexagon pattern. All the patterns and colors add a modern touch to a classic floral theme.

What are your favorite colors to use for spring cards? I’m currently leaning heavily into these purples and pinks! Happy spring!

Thanks for joining me on the blog today. As always, find your favorite stamps, dies, papers, and accessories at the Ai Store!

Happy Crafting!

Janet YouTube - Blog - Facebook - Instagram - Pinterest  

Friday, October 3, 2025

Bon Voyage! Card by Tasha

 Happy Friday Art Impressions fans! 

Tasha here sharing a travel-themed card inspired by the current In the NavyChallenge. For my project, I used the sweet couple from the 4932-Pack Your Bags Set; this set always makes me smile since it reminds me of my husband carrying all the bags on trips!

For the background, I chose a scenic pattern from the 6100-Lounge Paper Pack and framed it with the 5062-Rounded Rectangle A2 Double Stitched Dies. I love how the stitched edges give it a polished finish. To tie in the challenge theme, I layered in nautical navy pattern paper, along with Red, White & Blue cardstock to complete the design.


I hope you enjoyed today’s card and feel inspired to join this month’s challenge!


Friday, August 22, 2025

Time to Par Tee! Card by Tasha

Happy Friday Art Impressions friends!

Tasha here sharing a new card inspired by the current Art Impressions Sports & Leisure Challenge. For this project, I used the 4902-Par-Tee Golfers Set and the 5062-Rounded Rectangle A2 Double Stitched Dies to create a fun golf-themed design.


I stamped the golfer lady with black ink and colored her outfit in pink Copic shades; perfect for a sunny day at the country club! The background features fluffy stenciled clouds and green grass (my favorite combo to make!). To frame the scene, I layered white and pink cardstock with plaid paper and added a pop of gold glitter.


To finish the card, I stamped “Let’s...Par Tee!” in pink ink and die-cut it with a rounded rectangle before popping it up with foam tape. I also attached two clear rhinestones to her skirt for extra sparkle. Such a fun way to celebrate the challenge theme!

I hope you enjoyed today's card and will join in the Sports & Leisure Challenge!


Thursday, August 14, 2025

Vacation Vibes by Dori Mendiola

Happy Thursday AI Friends!

Wondering if you've seen the five new paper packs from Art Impressions yet.  If not, make sure to visit the Art Impressions website.  These paper packs were designed to go with the five new fun AI People stamps sets.  However, I wanted to show you how versatile they are and how you can use them with some other stamp sets.  They make such fun backgrounds.  All you need to do is add some images to them and your card is complete.  I used the #6100 - Lounge PP, #5187 Happy Trails stamp set for the couple on the beach, added a few accessories and the card is full of fun and relaxation.  
Total Vacation Vibes!

I began by stamping the images with Memento black ink onto copic friendly paper and coloring them with my copic markers listed below.  The couple are from the #5187 - Happy Trails set and the accessories (beach ball, hat and cooler) are from the #5509 - Beach Accessories and the #5510 - Sports Accessories.  The sun and the cloud are from my stash.


The accessories come with corresponding dies but the beach chair couple, I had to fussy cut. 
I used the largest #5062 - Rounded Rectangle A2 Double Stitch die to cut the background and then placed a layer of foam underneath to pop it up on the card base.  I also popped up the sentiment cloud, the couple and the accessories for added dimension.

Hope you look through your stamp sets and find other fun images to use with these papers.  Such a great way to add a scene as your background.

Thanks for joining me today.  Have a wonderful day and keep creating!
Copics used:  N0, N1, N2
E000, E01, E11, E21, E23 E25, E51, E53, E55, E57
R20, Y32, G40, G24
B0000, B91, B93, B95

Thursday, July 31, 2025

Magnetic School Bus by Dori Mendiola

 Happy Thursday AI Friends!

I have a fun little project today using the #5226 - Bus Cubbies.  This stamp set comes will all of the cute little animals, the bus and the treats on the top along with corresponding dies to cut each of them out.  Instead of a card, I decided to make all of the pieces magnetic.  This is cute on the refrigerator or a magnetic board for the little ones to play with.  


I began by stamping all of the images onto copic friendly paper and colored with my copic markers listed below.  I die cut each out with their coordinating dies.  I also cut each out of an adhesive magnetic sheet (sticky side of magnetic sheet against the cutting part of the die) to be placed on the back side of the colored image.  Peel each of the adhesive magnetic backings and adhere to the corresponding colored images.  Each of the pieces should now stick to the refrigerator or magnetic board and let the fun begin.  However, if you choose, you can create a magnetic base.  To do this, I cut a black and a white piece of cardstock using the #5062 - Rounded Rectangle A2 Double Stitch dies.  I also cut two magnetic pieces using the same die.  I adhered the magnetic pieces sticky sides together and then glued the white and black cardstocks to one magnetic side.  The other side will adhere to the refrigerator.

Hope you enjoy this project and have fun making it with other stamp sets, too.  Years ago I made a castle magnet with the #5225 - Castle Cubbies and it turned out sooo cute.  Let your creativity flow!  LOL!

Have a wonderful weekend and keep creating!


Copics used:  R20, R22, R24
E21, E23, E25, E40, E42, E44, E70, E74
W0, W1, W3, W5
YG95, YG93, YG91
Y32, Y35, Y38, YR27
G21, G24
B01, B000

Saturday, June 21, 2025

Hi Little Bear! by Janet

Hi everyone! I hope you're enjoying your weekend. Today, I'm thrilled to share a card featuring the super cute 6017 - Baby Panda Set! I'm so happy Art Impressions released this charming baby-themed set; it's just too precious.

For the star of the show – our little bear peeking out of a teacup – I got a bit creative! First, I stamped the tiny bear from the Baby Panda Set. Then, I masked him before stamping the teacup image from the 6024 - Tea Time Set. This makes it look like he's playfully peeking right over the rim! I just love how versatile this "peeking bear" can be. I also borrowed the balloons from another image in the set, carefully cut them out, and attached them behind the bear for a festive touch. Finally, I stamped and colored the block and rattle image and used the included dies for a perfect cut.

Next, it was time to build the card base to showcase these adorable elements. I chose two sweet, gender-neutral patterns from the 6057 - Baby Girl Paper Pack – they were perfect for a soft, welcoming feel. For the sentiment, I cut a small stitched rounded rectangle from the 5062 - Rounded Rectangle A2 Double Stitched Dies set. I then heat embossed the sentiment with lavender embossing powder.

With the base ready, I arranged my focal images. I placed the teacup and block images on foam tape, positioning them in the corners of the flowered paper for dimension. The sentiment was then added, accented with a sweet yellow and white polka dot ribbon bow.

Thanks so much for stopping by today! I hope you enjoyed seeing this sweet baby card. If you're looking for your new favorite stamps, dies, and accessories, be sure to visit the Ai Store!

Until next time, happy creating!

Janet YouTube - Blog - Facebook - Instagram - Pinterest     

Thursday, April 3, 2025

Birthday Humor Reveal Wheel by Dori Mendiola

 Happy Thursday AI Friends!

Today I have a humorous birthday card for the "Milestones" challenge using the #5279 Be Happy Laugh Lines set.  If you haven't checked out these Laugh Lines sets yet, make sure you go to the website and check them out.  Bonnie hit the mark on these.  The sayings are perfect as well as the images!  

I stamped the image on copic friendly paper with Memento black ink and colored with copic markers listed below.  I die cut the image panel with the largest #5062 Rounded Rectangle A2 Double Stitch Die.  I then used a smaller circle die from the #5064 Double Stitched Circles die set to cut out the notch for the reveal wheel.  Measure a circle die over each of the sentiments to make sure that you can read each within the circle.  Once you find the circle die that fits the sentiments, make sure that where you cut the hole on the image panel is low enough for the wheel to fit without popping out on the sides.  Place a brad in the center of the wheel and through the pattern paper border.  Pop the image panel up with foam dots, avoiding the wheel area, and place down over the pattern paper panel.  I then placed a circle frame over the reveal hole to finish it off.


I hope you enjoy my card today and that you will join in the fun with the current challenge - "Milestone Birthdays".  Play along for a chance to win a free stamp set.

Have a wonderful day and keep creating!
Copics used:  E000, E00, E11, B000
R20, R22, R24, R27
C1, C3, C5
G12, G16, G17

Tuesday, February 18, 2025

Let the shenanigans BEGIN! by ReneƩ Matarese

 Hello Ai fans!

Today I'm sharing the card that I made for the current Drink Up! challenge.


You all know that I'm obsessed with the Ai shaker domes.
I couldn't wait to put some green and gold bits in this one for St. Patrick's Day.


I made my card a little on the masculine side but most women would love this too. The little beer mug is what makes it fit the Drink Up challenge.


Copics used:
W3, E84, YR21, Y000, Y04, Y35

Friday, February 14, 2025

Happy Valentine's Day!


Happy Valentine's Day Art Impressions Friends!

Tasha here, sharing a new Valentine's Day card created with the fun 5181-Happy Mailbox Cubbies stamp set. I absolutely adore the Art Impressions cubbies sets, and this one is perfect for spreading Valentine's cheer!

To make this card, I started by stamping the mailbox and all the tiny letters with black ink. I then cut everything out using the included dies, which made assembling the pieces a breeze. One of my favorite parts of this set is the variety of envelopes and packages you can mix and match to create a personalized design.

Next, I created the background by gluing die-cut grass onto a cloud-patterned paper. I used the 5062 - Rounded Rectangle A2 Double Stitched dies to cut the center panel; I love the stitched detail!


To finish the design, I layered metallic pink and teal cardstock, white cardstock, and Art Impressions heart-patterned paper. The combination of textures and colors adds dimension and a festive Valentine's Day vibe!

I hope you enjoyed today's card creation and feel inspired to craft your own Valentine's Day projects. 


Thursday, December 5, 2024

Birthday Man card by Dori Mendiola

 Happy Thursday AI Friends!

I thought I'd share a card that I made for my husband for his birthday.  The image from the #5421 Sit Back Laugh Lines was just perfect for him.  Remote control and all.  😁  This guy is just so cute and funny!


 I stamped the image on copic friendly paper with memento black ink and colored with my copic markers listed below.  I decided to use the pattern paper from the #5606 Harvest Journal PP to paper piece the recliner.  Love the plaid!  I layered pattern pieces with a white strip for the floor board and die cut with the #5062 Rounded Rectangle A2 Double Stitched dies.  I then used the #5724 Nested Rectangle die to cut a center rectangle, creating a frame, to inset the image.  I popped up the "frame" with foam tape.  I also added the wall clock from the #5323 MB Wall Accessories.

This was a simple card but I hope it inspires you to create masculine cards.

Thanks for joining me today!  Have a wonderful day!

Copics used:  E00, E01, E11, E55
B000, T0, T2, T4
Y21, Y23
BG70, BG72, BG75

Thursday, September 12, 2024

Not Just Paper Challenge #387 Week #1

Hello everyone and welcome to our new challenge!

Not Just Paper

We want to see your creations featuring something that ISN'T paper.
Maybe you love fabric, ribbon or metal? Beads, gems or buttons?
Whatever you like, you can't just use paper to create you project.

Before we see what our Featured Artist Dori created, let's see who won
our last challenge.

For our Top Spot we selected
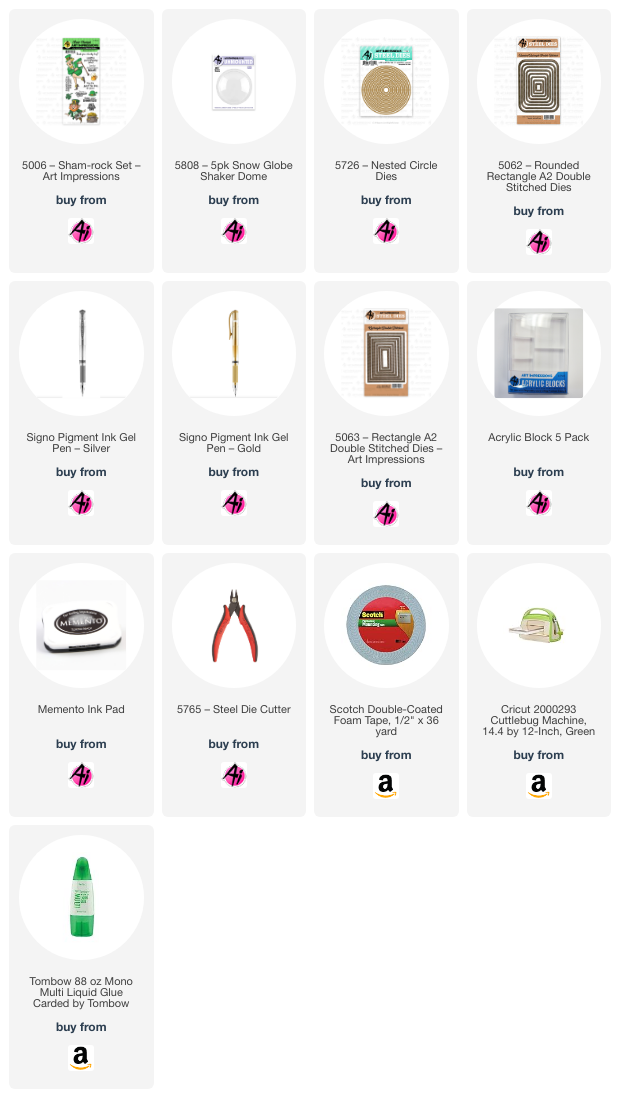
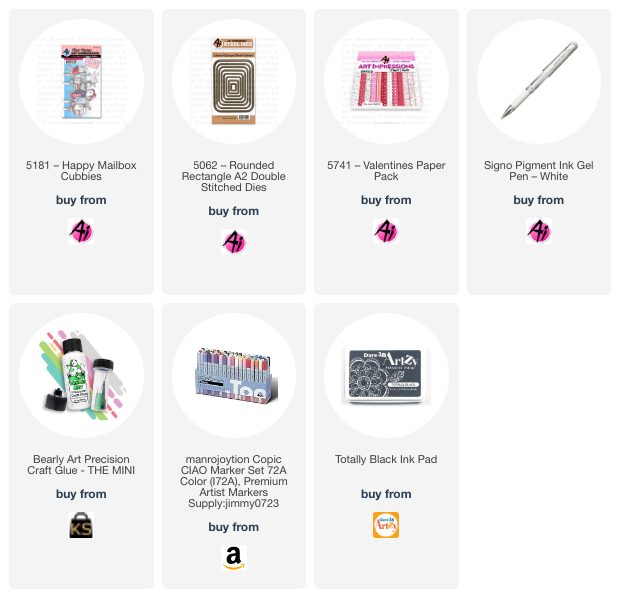
She used: 5111 – Loads of Fun Set – Art Impressions
(retired)


Please contact Leah at Feedback@artimpressions.com
to claim a free stamp set of your choice!!
Also, be sure to grab our badge to display on your blog, Facebook or Instagram!

Our Lucky Random Winner was:
#8 Pineywoods Papercrafter


She used:

Please contact Leah at Feedback@artimpressions.com
to claim a free stamp set of your choice!!
Also, be sure to grab our badge to display on your blog, Facebook or Instagram!

Congratulations!

Now let's take a look at the fun Halloween card that Dori created using mesh, string and an enamel dot!
It's SO cute!

----------------------------------------------------------------------------------------------------------------------------

Happy Thursday AI Friends!

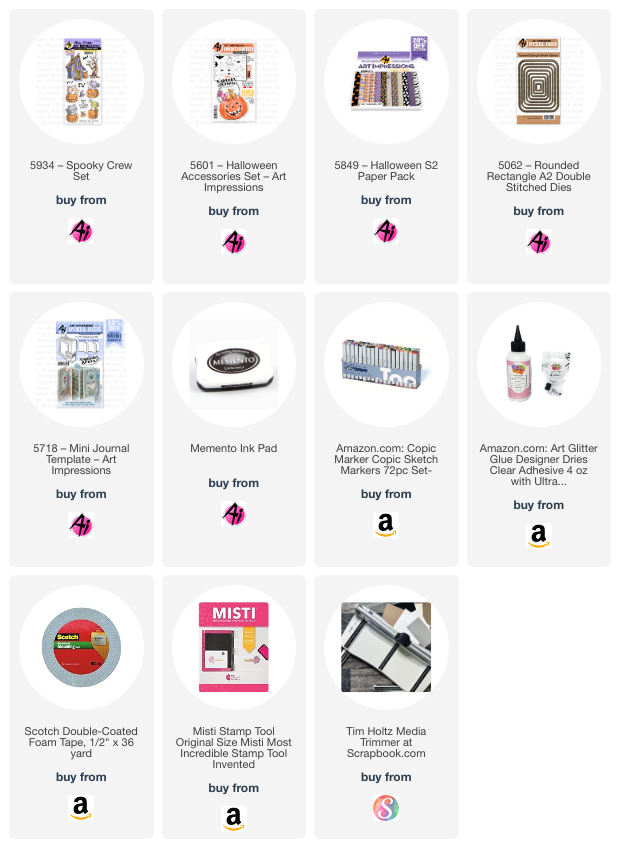
 My card for the "Not Just Paper" challenge is a fun Halloween card featuring the #5934 Spooky Crew stamp set.  I don't usually decorate for Halloween, but Bonnie makes the cutest Halloween stamp sets that it's very hard to resist creating a card or project.  I made a fun-fold decoration using specialty halloween spider web mesh (from the dollar store) as the background.  You can easily turn it into a card by just adding another layer to the back.  This can fold flat and fit nicely into an A2 size envelope.


To create the fun fold, cut an A2 top folding card base out of black cardstock.  Cut another piece of black cardstock 4 1/4" x 6" and score at 1", 3 1/4" and 5 1/2".  Fold this piece on the score marks as a valley, mountain and valley. 
To create the background, cut a 6" x 6" piece of the spider web mesh and a corresponding 6" x 6" piece of iron on fusible webbing (which I found at my dollar store).  Iron the fusible webbing onto the mesh.  Let cool and peel the backing off.  Then iron onto a 4 1/4" x 5 1/2" piece of black cardstock.  To save your iron, take a piece of parchment paper and fold in half.  Place your mesh and webbing in between the parchment paper and then iron the parchment paper vs. directly onto the mesh or webbing.  


Before adhering the background to the inside of your A2 base, do two things.  1) Adhere the pattern piece to the front of the A2 base and cut the window with the 5062 Rounded Rectangle A2 Double Stitched Die.  2) Take your fun fold piece and glue the 1" fold piece onto the bottom on the back side of the A2 top fold base.  Adhere your background to the back side of your top fold base.  Add another piece of pattern paper (striped paper) to the front of the bottom fold.
I stamped the images onto copic friendly paper and colored with copic markers listed below.  I die cut the images with the corresponding dies that are included in the stamp sets.  I then adhered the front 1/2" fold piece to the back bottom of the front A2 card base.  Your project is now ready to decorate with the images that you have colored and cut.  I layered these images and placed the spiders throughout, placing some on the web background.  I tied a black string bow and placed a glow in the dark enamel dot in the middle of the bow. 

I hope my project inspires you to join in the current challenge - "Not Just Paper".  
Have a great day and keep creating!!
Copics used:  W0, W3, W5, R20, 
V15, V17
E21, E23, E25, E27, 
Y15, Y17
YG21, YG23, YG25, 
YR14, YR16, YR18


✻ Please make a new card or handmade crafty creation. You can make any item you wish; this is not limited to cards!

✻ Limit two submissions per person. You will receive extra votes if you use Art Impressions stamps!
 ✻Please include your first name and last initial on your submission.
✻We love to comment on your entries, but keep in mind if you use a private group or a platform that you need to sign up for, we probably won't be able to.
✻ The Ai Challenge is open to everyone, international submissions are welcome!
✻ Include a link back to the Ai Blog or grab our button on the top right of our sidebar!
✻ Share the Ai love if you can, by clicking and commenting on your fellow crafters.
✻ Make sure to get your link up by the deadline to enter your creations.
✻ Good luck and happy stamping! 


You are invited to the Inlinkz link party!

Click here to enter