Showing posts with label HM Garden Set. Show all posts

Sunday, May 28, 2023

Hello Friend! by Reneé Matarese

Hello Ai fans!

It's May so we have flowers!
Fabulous Flowers
That's the current challenge here on the blog.


I used several Art Impressions products on my cards.
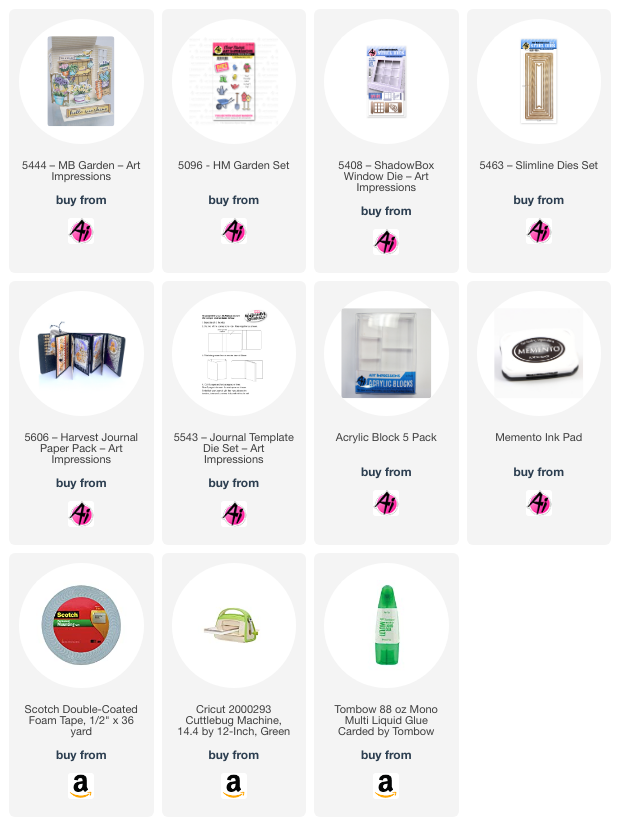
5444 – MB Garden for the bucket of tulips and sentiment
5096 – HM Garden Set for the little birds
5463 – Slimline Dies Set to cut the designer paper
5408 – ShadowBox Window Die to create the 3-D window
and


I just love how you can mix and match all of the Ai sets.
Their versatility makes them so useful.
I think my card is so cheerful.
One of them will be my friend Rhonda's birthday card.


I colored my birds bright yellow because at this time of year, our goldfinches have just turned back from their winter mustard brown color to their brilliant yellow.  We love to see that because it means the weather is turning nice again.


Copics used:
BG02, G20, G82, YR21, R81


Tuesday, May 23, 2023

Spring Time Tag Journal by Nina

 Hello Ai fans, Nina here with a new adorable Tag Journal tag using the cute HM Garden Set which is an add-on for the Holiday Mansion Set.


I stamped the cutesie images from the HM Garden Set on a white paper using Memento Tuxedo Black Ink and my Mini Misti.

I colored the images with Copic Markers, shades are:

Reds: R35 R37

Orange: YR07 YR09

Green 1: YG23 YG25

Green 2: G43 YG67

Yellow: Y17 Y38

Browns: E99 E09 E07

Grey: C2 C4 N6

Beige: E11 E13

I then cute the images and backed the larger images with foam tape.


I cut one grass border and the letter for the word "SPRING" which is going to be our sentiment today.

For the back ground I used blue shades from Distress Inks. Mermaid Lagoon, Speckled Egg, Broken China, Peacock feather. Blended then irregularly to create a sky background.

I attached the grass hillside with foam tape to the bottom of the tag then tucked my wheel burrow, watering can and the garden boots between the grass.

I cut the wooden posts of the birdhouses since I wanted to hang them. I attached them as if they are hanging and drew a couple lines as they are the ropes they are hanging with.

I then decorated the tag with enamel dots and stickers and attached my tag to the Tag Journal.


Friday, June 25, 2021

Garden Time card by Tasha

 Hi Ai Fans!

Tasha here sharing a card created with the fun Gotta Garden Set and HM Garden Set!


I have been busy lately with yard work and thought this image is perfect for this time of year. This happy gardener has all her tools in hand and is ready to tend to her garden! I stamped her with black ink and colored with Copic Markers before cutting the image out. I love her purple work gloves!


For the background, I used a cloud stencil for the sky and a grass stencil for the ground. I layered the image with foam tape and attached a pink banner along the bottom. The sentiment "I'm so excited I wet my plants" was stamped in a coordinating Mint colored ink and I used my circle punch to cut it out. 


The Gotta Garden Set includes accessories, but I thought it would be fun to add the flowers and little birds from the HM Garden Set. The little birds are so cute and happy; these two sets work great together!


To finish off this card, I added layers of Mint check pattern paper and dark pink card stock before attaching the card to an A2 sized card base. 

I hope you enjoyed today's project. If your don't already mix and match your sets, give it a try. It's a good way to spark your creativity and get more use out of your stamps!


Monday, January 11, 2021

Ai Friends Are Never Far Away by Bri Firth

Hello Ai Fans - Bri here! Today I am sharing an interactive card featuring the Holiday Mansion stamp set, HM Garden stamp set, and EZ-Lights from Pear Blossom Press!  This card is also featured on my personal blog, check it out here! 


First I ink blended a rainbow sunset background using Blueprint Sketch, Wilted Violet, Picked Raspberry, and Squeezed Lemonade Distress Oxide inks. I used pigment black ink to stamp a sentiment on top of the sunset background. Next, I die cut the grass borders and the wooden fence and used them to create the outdoor scene. I used Copic markers to color the holiday mansion and the garden accessories. I used the V20's series to color the house. I used the steps below to make the windows illuminate. I finished the card by placing the garden accessories throughout the scene. 

How I create a light up card:
  • Color the image, use an X-Acto Knife (or dies) to cut out the areas on the image where you want the light to shine through (i.e. the house). 
  • Select your image placement on the card background (sunset background) and with a pencil trace the openings onto the card background. Now you know where to attach the lights!
  • Use glue dots, tear tape and Scotch tape to adhere the EZ-lights mechanism (battery holder and button, the wires, and the lights) to the card background. I attach the lights to the background so that the illuminated areas aren't so concentrated.
  • Add vellum to the back of the house to hide the lights and attach the image to the card background using double layered foam tape to account for the height of the battery and button mechanism.
  • Attach the house to the card base. 
  • For final touches add a "Push Here" button and now you have a light up card!

On the inside of the door openings stamped the sentiments onto distressed gray cardstock. I stamped the sentiment in the large door way opening and I stamped the "Push Here" sentiment inside the smaller doorway for the light up mechanism. 

Check back next week for more Ai inspiration made by me!

Ai Products Used:

Monday, August 3, 2020

Whimsical HM Garden by Bri Firth

Hi everyone! I'm excited to share my very first creation as a member of the Art Impressions design team. A little while ago Art Impressions shared sneak peaks of some of our challenge creations on Instagram, I wanted to share this card as my first blog post so I can provide some extra details on how I created it. This beautiful card features the Holiday Mansion Set and the HM Garden Set. This card is also featured on the my personal blog today, check it out here!
First, I cut the card base to 5 1/2" x 8 1/2". The side step portion of the card is 2" wide and the center fold of the card is scored at 4 1/4". For more details on how to make a side step card check out this tutorial from All That Scraps Blog here.
To create the sky I ink blended some clouds with the Cloud Stencil and Tumbled Glass Distress Oxide ink. To create the ground I die cut two pieces of grassy borders from solid green cardstock. I also used my Copic Sketch E80's series markers to create the ground and the dirt in the garden. I used the WC Fence dies to create the garden area. 

I stamped the Holiday Mansion and HM Garden images with Memento Tuxedo black ink and colored them with my Copic sketch markers. I used the BG10's series to color the house. I colored the rest of the images in pinks, purples, and yellows to contrast from the teal.
I stamped the "Your friendship makes my heart sing!" sentiment inside the door flap. I adhered the birds and garden decor throughout the house and garden and add extra pops of color. The side step card design worked perfectly for this HM Garden card! The garden layout looks great even when the card is laying flat!
Check back next week for more Ai inspiration made by me!

Friday, March 20, 2020

You Make My Heart Sing | By Jessica Shier

Hello Ai fans!

It's Jessica here on the blog today! I have a cute little Spring time card, using the HM Garden set. These accessory sets to the Holiday Mansion are fun to decorate the house with but I also love using them on their own. So that is what I will be doing today.


I stamped and die cut the birdhouse, flower pot, boots and birds from the HM Garden set. I'll have the list of Copic Markers I used below.

For the background I used Inkadinkado masking paper which you can find on the Art Impressions website. This is some of my favorite masking paper. I used two larger circle dies and die cut the masking paper. Before ink blending the background I placed the smallest circle down. Then I added the stencil over the top and ink blended with a light tan dye ink. This stencil has a cool log background that I thought went well with the HM Garden Set. 


I peeled off the circle mask and added the negative of the large circle, centering it over the first masked circle. This creates a outline that I used a darker brown dye ink. You can just slightly see the stencil through that darker ink blending! Looks layered but it is actually flat.

I added the garden scene circle with the craft foam backing to the center of the masked white circle and adhered everything to a A2 card base. Adding a sentiment and bird last. The inside has a few extra elements that I didn't use on the front along with another die cut circle.


Thank you so much for joining me today!
Happy Stamping.


Wednesday, September 18, 2019

Friendship Blooms by Niccole Kulig

Hello Ai fans!!

Today I am sharing a card I made using the Art Impressions HM Garden set.  I paired it with the WC Sentiment set.
As you can see I started with a dies cut I had in my stash.  Once I cut it and placed it on my navy card stock, that is where I got the idea for the HM Garden set randomly placed around the circles.  

As you can see the items in the HM Garden set fit perfectly in the circles, or should I say on the circles? 

The sentiment "Friendship Blooms From The Heart" from the WC Sentiment set fit perfectly with the theme and the middle of the card.
I finished thecard off with a little Wink Of Stella to the metal on the watering can and the shovel, just to make the metal shimmer a little.  I can't decide if I like the orange one or navy one better.  Which one do you like better?

Thank you so much for stopping by ... have a great week and we will see you soon!

Copics used:
B00, B02
C0, C2, C04
E25, E27, E29
G21, G24, G40, G43, G46
Y15, Y19
YR09

Until next time ... Hugs & inky fingers!


Sunday, July 7, 2019

Holiday Mansion in PINK! by Reneé Matarese

Hello Ai fans!

I'm back with another Mansion card.

because I love them so much.


I have loved this series since day one. I'm glad Bonnie keeps adding more accessories for the house.


You might be thinking these look difficult to make but they're not!
The sets all come with dies to cut all those little pieces which makes them super easy to assemble!


The windows and doors open to reveal hidden surprises.
How cute is that?!  I like to add some vellum or a solid color behind some of the openings to kind of hide the designer paper when I make these.
I feel like it makes the hidden treasures pop a little more.

Copics used:
RV02, RV17, RV55, R29,
Y08, Y13, Y35, Y38, YR16, B02, B14,
YG97, YG17, 100,
T1, C5, C7, W00, E35, E97


Sunday, June 30, 2019

Holiday Mansion in Black! by Reneé Matarese

Hello Ai fans!

I have another Mansion card to share today.

because they're just so darned cute!

I have loved this series since day one. I'm glad Bonnie keeps adding more accessories for the house.  I did something new on this one.  I stamped the house twice and then cut off the roof and all of the window toppers.  I then popped them up using foam tape. The shutters are also popped up. I really like the added dimension it gave the card.


I added a sweet fence with 4967 – WC Fence Dies.

These are super easy to assemble because the sets come with all the dies you need to cut the little accessory pieces.


The windows and doors open to reveal hidden surprises.
How cute is that?!  I like to add some vellum or a solid color behind some of the openings to kind of hide the designer paper when I make these.
I feel like it makes the hidden treasures pop a little more.

Copics used:
RV02, RV55, R29,
Y08, Y35, Y38, YR16, B02, B14,
YG17, YG07, E97
T1, C7, W00,