Showing posts with label Mini Action Wobble. Show all posts

Saturday, October 16, 2021

Christmas Truck Interactive Card by Janet


Hello! It's Janet with a new card for you today. Have you seen the new Rides Interactive Series just released? So far there are three stamp sets and they are awesome. I especially like that all the images are interchangeable between the three sets. The images can also be used on their own without the cars or trucks to give you maximum versatility. 

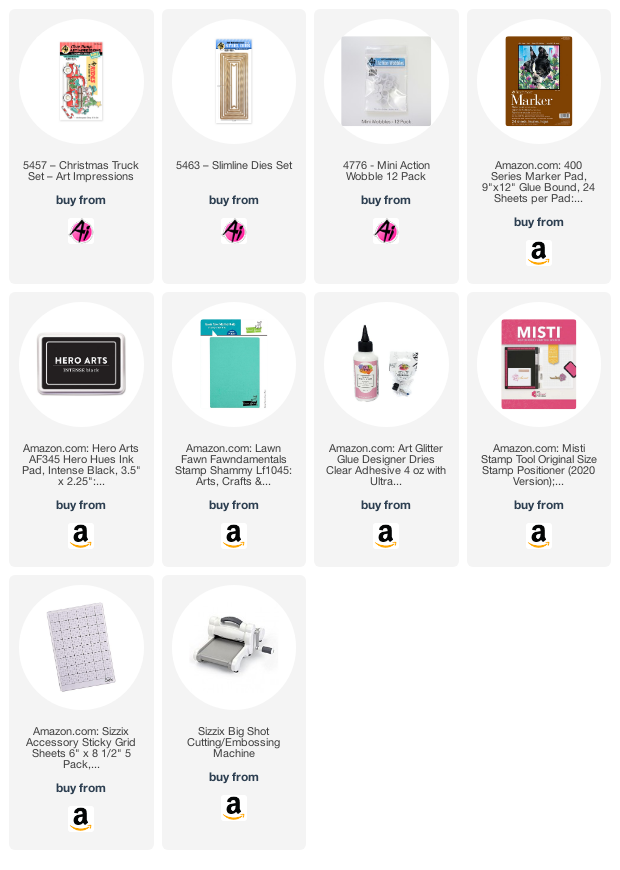
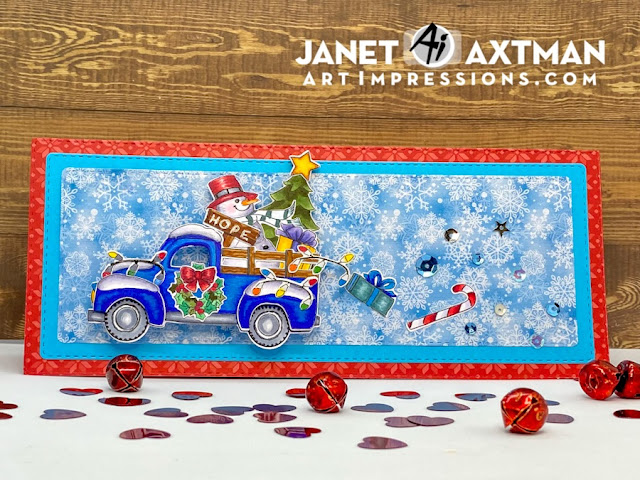
Today I'm showing you the card I made using the new Christmas Truck Set and the Slimline Dies Set. There is a lot packed into this one. It includes the truck, separate fenders for the wheel wells, two presents, a tree, a candy cane, wreath, snowman, star, bow, string of lights and sign. I really love that this set comes complete with matching dies. That's a lot packed into one set! 

I invite you to watch the video I made for this card. Find it by clicking on it below.


I chose to create a slimline scene. After arranging goodies into the truck, I put it on an action wobble. It's so fun to make the truck shake. I arranged a package, candy cane and some magic dust (aka sequins!) to the rear of the truck. This makes it appears that along the way, a few things escaped!  

I hope you enjoyed the card I made for you today. I invite you to make a visit to the store to see all the wonderful new stamps sets released so far!

Happy Creating!

Janet YouTube - Blog - Facebook - Instagram - Pinterest


Tuesday, July 20, 2021

Utterly Fantastic Birthday Card


Hello Ai fans!

I used the Udderly Fantastic stamp set to make a interactive Birthday Card. There is a Mini Action Wobble behind the cow and she wobbles around when touched.  I made two similar cards and oriented them horizontal and vertical.
I started by stamping the images onto Spectrum Noir Ultra Smooth card stock with Gina K Black Amalgam ink and colored them with Copic markers.  The colors I used will be listed at the end of this post.  I then cut the images out with Cutterbee Scissors.  I added a Mini Action Wobble behind the image and set it aside.
The base is an A2 side folding card. I added strips of patterned paper from Echo Park Let's party paper collection to the front of the card.  I then added a piece of patterned paper that was cut with the Flag Double Stitched Dies. I also scalloped circle cut from a piece of teal paper.  I then added a circle that was cut from white shimmer paper.  I added the circles with foam squares.  I then added the cow on the Mini Action Wobble to the center of the circle.
I stamped the greeting onto a piece of white card stock with Versafine Clair Nocturne ink and cut it into a thin strip and attached it to the bottom of the card with foam tape.  
Copic Colors Used:
Cow - C1, 0, R30
Spots - C7, C5
Rose - R85, R83, R81
Green - YG62, YG61
Yellow - YR24, YR15

Thanks for stopping by and Have a Great Day!

Tuesday, March 16, 2021

Easter Bunnies Interactive Card by Jil Lebel


Hello Ai fans!

I used the Easter Bunnies stamp set to make this card that has a surprise. When you pull the tab, a bunny hops across the top of the card.
I started by stamping the images onto Spectrum Noir Ultra Smooth card stock with Gina K Black Amalgam ink and colored them with Copic markers.  The colors I used will be listed at the end of this post.  I then cut the images out with Cutterbee Scissors.  I stamped the greeting onto a piece of white cardstock with Versafine Claire Nocturne ink and cut it into a rectangle.  I then edged it with Wilter Violet Distress ink.
I used the My Favorite Things Launch Party Dies for the interactive element.  I watched a video that is in the resources section of their website.  I cut a layer of patterned paper with the Iced Spruce and Bundled Sage Didtress inkk.  The background is a piece of white cardstock that Lawn Fawn Stitched Hillside dies to hide the bunny that pops up.  It's colored with Stormy Sky Distress ink.  I added water splatters to it.  I also added  some splatters of the Stormy Sky ink with a tiny paint brush.  Once everything was dry, I put the card together following the MFT video.
Copic Colors Used:
Tan Bunny - E43, E42, E41, R81
Gray Bunny - W3, W1, W0, R81
Yellow - E41, Y13, Y11
Blue - B95, B91
Green - Y63, Y61
Rose - R83, R81
Lavender - BV11, BV000

Thanks for stopping by and Have a Great Day!


Saturday, September 12, 2020

Happy Halloween from the bat by Sharon Caudle

 Hello AI Fans!!


I'm continuing my spooky posts by showing you another Halloween card using #4784 Old Bat Set and I've also used the brand new Halloween Mini Die Set! I stamped her onto Cryogen paper and colored her with Copic markers which are listed below. Then to add extra spookiness, I die cut three of the bats and a pumpkin from the Halloween Mini Die Set! Super easy and they are the PERFECT size for embellishments! I placed her on a Mini Wobble to make her interactive. I don't know about you, but I LOVE cards you can play with! The moon is an accessory stamp that comes with the set. 


So that's it for me today! Thanks so much for stopping by for a visit and until next time - stay healthy, stay safe, and of course stay crafty!!

hugs


Copics used:

E000, E00, E11, E33

YG13, YG17, YG67

YR04, YR07, YR09

V12, V15, V17

Y02, Y32, Y35, Y38

R20

C4


Sunday, June 16, 2019

Wobbly Bear Birthday by ReneƩ Matarese

Hello Ai fans!

Today I'm sharing a birthday card with you.
except that I thought it would be fun to put him on an action wobble!

You can find the entire Slider series here.  The slider die can also be used with the Stacker series.


My card is pretty dimensional. The plane and several of the clouds are popped up on foam tape and the bear is on an action wobble.


Here you can see him popped up on the action wobble.  Give it a tweak and he wobbles! I tried to take a video but my camera has a stabilizer on it so it slows it down to the point where he barely (bear-ly...ha ha!!  I love puns!) looks like he's wobbling.


Bye all!  See you next week!


Copics used:
YG01, YG07, YG23
YR15, Y35, CO, T3, T5
R46, B02, B24, B66
E31, E33, E35


Tuesday, April 2, 2019

Sweet Easter Cards by Jil Lebel

Hello Ai fans!

I love all the fun bunnies in the Sweet Easter Set.  I had to throw in the cute little chick for a bit of yellow. I decided to make two similar, yet different cards showcasing them. I feel that this stamp set and these cards show the more playful side of Easter.
The images were stamped onto Copic X Press It paper with Gina K Designs Black Amalgam Ink and colored with Copic markers.  The colors used are listed at the end of this post. The bunny in the egg was cut using a double stitched egg die. The other images were fussy cut. A piece of the 6" x 6" Lawn Fawn Perfectly Plaid Spring paper pad was cut to 4" x 5 1/4". An egg shape was cut out of it using one of the double stitched egg dies. A smaller egg shape was cut out of a white A2 card and the plaid layer was attached to it. A greeting was stamped with Versafine ink and cut out with the Circle Double Stitched Dies and attached tot he center of the card along with the flower image.  The bunny in an egg image was attached to the front of the card so it could be seen through to the front.  The chick image was attached over it.  The other bunny was attached over it with a mini action wobble spring.  A few enamel dots were attached to the card front.
Here is a close up view of the inside of that card. 
The second card started out the same way, but ended up quite different!  The images were stamped onto Copic X Press It paper with Gina K Designs Black Amalgam Ink and colored with Copic markers.  The colors used are listed at the end of this post. The bunny in the egg was cut using a double stitched egg die. The other images were fussy cut.
Two layers of patterned paper were cut with the egg die from the 6" x 6" Lawn Fawn Perfectly Plaid Spring paper pad.  Another layer was cut to 4" x 5 1/4" and attached to a peach A2 card. A green plaid strip of the patterned paper was cut to 1 1/4" x 5 1/4" and added to over the larger layer to the left side. The egg dies were used to cut three layers out of peach card stock.  The colored and plaid egg layers were attached to the peach layers and then attached to the card.  The chick and bunny were attached to the center of the card. A few enamel dots were attached to the card front.
Copic Colors Used:
Large Bunny - C00, C0, C1, C3, R00, R20
Egg, YR000,YR00, YR01, YR02,E13
Bunny - E30, E32, E55, E57, R00, R20
Chick, Y11, Y13, Y15, R14, R00, 
Flowers - C00, C1, YG03
Mug - R81, R83, R85
Bow, Y11, Y15, Y17
Background- B000, B00, B01, B02

Thanks for stopping by and Have a Great Day!

Tuesday, June 26, 2018

Little Whoot's by Jil Lebel

Hello Ai fans!

Do you ever find yourself wanting to make a bigger card with a small image?  That's what happened to me with my Little Whoot image. I wanted a few owls on my card front and didn't have one of the larger Whoot images, so I used what I had to stretch my stamps.  As you can see, I was in a colorful mood.


I stamped the image three times onto Spectrum Noir paper with My Favorite Things Extreme Black Ink and colored it with Copic markers.  The colors are listed below.  I stamped an extra owl and colored him in teal like the middle owl and fussy cut it leaving a small border of white paper.  It is attached over the middle owl with a mini action wobble.


 The main layer on the card base is white card stock that was embossed with a We R Memory Keepers embossing folder. I used the Echo Park Happy Birthday Girl 6x6 paper pad on to cut five banners. Everything was edged with Pink Peony Archival Ink. I didn't add a sentiment to the outside of this card.  I figure that I'll add one to the inside when I need to use it.

Copic Colors Used :
Purple - BV02, BV04, BV08
Teal - BG10, BG32, BG13, BG15
Pink - R21, R22, R24
Yellow - Y02, Y17
Grey - Coo, C1, C3


Thanks for stopping by and Have a Great Day!

Saturday, May 19, 2018

Let's get our boogie on by Sharon Caudle

Hello AI Fans!!

I made my card today for a bestie that had a birthday last week. I just love 4730 Birthday Fairy Set from Art Impressions! Her skirt goes on an Action Wobble and she does a little boogie for you!  :)   I paper pieced her dress to match the background papers. 


Isn't she so much fun??!!  Thanks so much for stopping by for a visit today and until next time - stay crafty!!
Copics used:
E000, E00, E11, E21, E23, R20
B000, B00, B02
YG00, YG01, YG13, YG17

Monday, January 8, 2018

Dancer Wiggle Wobble by Diane Zechman

Hello Ai friends and happy Monday!
 
Today I am sharing a card using one of the Ai Wiggle Wobbles.  Here I used 4953- Dancer Wiggle Wobble.
 
I wanted to create a scene with a dance floor and "lights" reflecting off the walls. I found some paper with a bokeh pattern which was perfect for the walls. Then I searched the internet for a free dance floor image to print out for my "floor". I added a few dots of Stickles for some sparkle and paper-pieced her dress.


Don't forget...each Wiggle Wobble stamp set comes with matching dies (they even cut the little holes for brads!), a few mini brads, and an Action Wobble to get you started. Not only do they wiggle, but their legs “jiggle” too!
 
Have a great Monday and… happy stamping!


Monday, October 23, 2017

Skeleton Wiggle Wobble (he glows!) by Diane Zechman

Hello Ai friends and happy Monday!
 
Today I am CASE-ing Renee with a card using the Ai 4952- Skeleton Wiggle Wobble set. (She shared her card last week) The sentiment on the front of my card is from the Michael's exclusive SC0680- Spare Me clear set.
 
Renee had the brilliant idea to create a spider web window on her card and I loved it so much that I wanted to re-create it on a card for my friend who has an October birthday and LOVES Halloween.  After seeing Renee's card, I couldn't even think of making mine any other way! lol.  It's perfect!
 

I changed mine up a bit by making a different shaped window and adding a punched creepy fence to the front. I used the same cute mice punch but brought that to the front as well.
 
On the inside, the wobbly skeleton was assembled with mini brads and he is made EXTRA wobbly by adhering him to the card with a Mini Action Wobble.  I opted to skip his hat & bow tie this time.


Since I used a black card base and a dark patterned paper inside, it is difficult to sign the card.  My solution was to use the leftover pieces I die cut from the front window to adhere on the back for my message and signature.


Now, I didn't give him a hat & bow tie for a reason....he GLOWS IN THE DARK!!!  So I didn't want to cover up part of his head.  After I assembled all his parts with the mini brads, I used an old bottle of Glow-in-the-Dark fabric paint I had in my stash (for many moons!)  Mine was a pale yellow color which I didn't see while searching but I did find the same brand with a Natural color which I've linked below.  I'm guessing the natural color would be better anyway!  Oh, and I didn't forget the eyes in the little bat & spider die cuts....they glow too!


 Here's a quick little video to see the action!


I want to thank Renee for letting me CASE her card! I enjoyed making this for my friend. Have a great Monday and… happy stamping!